How to verify truss spans against your architect’s initial sketch
I’ll never forget the moment I opened up the initial blueprints for my home addition and thought, “Wow, this looks perfect on paper. But what if the actual truss spans don’t match the sketch?” That realization hit me like a brick wall during the early stages of my project. It was a mix of excitement and creeping anxiety. You see, it’s one thing for an architect to draft out a span, and quite another for me to ensure those numbers translate accurately on the actual build site. That misalignment? It can lead to costly delays, structural issues, or worse—having to take everything down and start over.
The Critical Step Most Homeowners Overlook: Verifying Truss Spans
If I could go back, I’d tell myself to double-check those spans before proceeding. Why? Because verifying the truss spans against your architect’s initial sketch ensures that what’s drawn on paper matches the reality on site. When I did my first walkthrough without proper measurements, I discovered discrepancies that could have caused major problems. Therefore, today I’m going to walk you through how to confirm that your truss spans align with your plans—and save yourself a headache later.
Is This Process Worth the Fuss?
Honestly, I used to think it would be an optional step. After all, my architect’s sketch looked detailed enough, right? Well, I made the mistake early on of assuming everything was accurate without verified measurements. That led to a partial rework when the actual spans didn’t match. According to the Structural Engineering Institute, errors in span verification can compromise the entire load-bearing capacity of a roof, leading to safety issues and expensive fixes. So, yes—it’s absolutely worth the effort to verify your spans meticulously.
Have you faced similar problems in your project? If so, don’t worry—you’re not alone. Let me guide you through the practical steps to compare your actual truss spans with your architect’s drawings, ensuring your project stays on track and within budget. Proper verification is your best defense against unforeseen surprises that could jeopardize your construction timeline or safety.
Let’s start with the essentials: understanding exactly what measurements you need and how to take them accurately on site. And trust me, once you get the hang of it, this process becomes second nature—saving you money and peace of mind in the long run.
Gather Your Tools and Prepare the Site
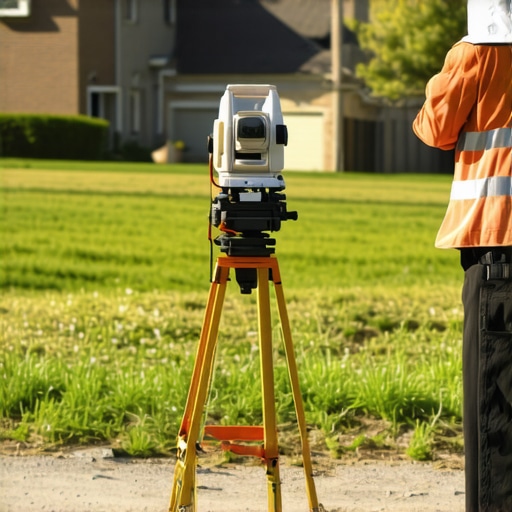
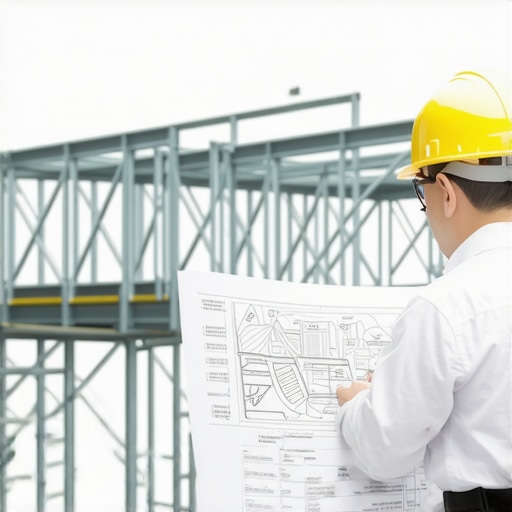
Before diving into measurements, make sure you have the right tools: a reliable tape measure, a pencil for marking, and a ladder if necessary. Also, review your plans carefully, noting the specified span lengths and structural notes. You want to be as precise as possible, as small errors can lead to larger issues down the line. If you’re unsure about reading blueprints or converting measurements, consider consulting a professional or referring to resources like permitting guides for helpful tips.
Measuring Your Existing Trusses
Once you’re set, carefully measure from the key load points: the walls or beams where the trusses sit. Be consistent—measure multiple points along the span to account for any slight bowing or irregularities. Record your measurements and compare them directly with the specifications in your plans. Any discrepancies should be documented and discussed with your architect or structural engineer.
By taking these proactive steps, you minimize surprises during inspection and ensure your build aligns with safety standards. Remember, verifying your spans isn’t just about avoiding fines or delays; it’s about securing the integrity of your home and the safety of everyone inside.
Ready to tackle your project with confidence? Let’s make sure your plans are accurate before the first nail is driven. If you need more guidance on permits or structural verification, check out our cost estimation tips or get in touch via our contact page.
Start by assembling a reliable tape measure, a pencil for marking, and a sturdy ladder if necessary. Review your architectural plans thoroughly, noting the specified span lengths and structural notes. Keep your tools calibrated and in good condition to ensure precise measurements. Think of this step like preparing your cooking ingredients; quality tools and preparation set the stage for a successful outcome. If you’re unfamiliar with blueprint symbols or converting measurements, consult permit guides for additional clarity.
Identify the load-bearing points where the trusses sit—usually wall plates or beams. Using your tape measure, stretch from one load point to the next, taking multiple measurements along the span to catch irregularities. For example, measure at the center and near the edges of the truss to detect any bowing or warping. Record each measurement carefully. Remember, accuracy here can make or break your entire project. It’s like checking your baking dough—small deviations can lead to big problems later. Once done, compare your measurements with your plans, noting any differences.
Address Discrepancies Immediately
If your on-site measurements differ from your blueprints, don’t ignore these mismatches. Contact your architect or structural engineer to discuss potential adjustments or verification processes. It’s better to resolve these issues now than during framing or after. Think of it as catching a typo in an important document—better to fix it early than deal with the fallout later.
Cross-check each measured span against the specifications in your drawings. Use a calculator or digital tools for accuracy. If your measurements are within a small margin of error (say, 1-2 inches), proceeding might be safe, but anything larger warrants further inspection. Consider creating a simple comparison chart: plan measurements versus actual measurements. This visual aid helps keep track of inconsistencies and ensures nothing is overlooked. Remember, even minor variances can affect roof stability and load distribution.
Take clear photos of your measurements, sketch out notes, and keep a detailed log. This documentation will be invaluable when consulting professionals or during inspection. It’s akin to a receipt for your purchases—it provides evidence and clarity about what has been verified. Having this record expedites troubleshooting and re-verification if adjustments become necessary.
Never rely solely on a single measurement; always measure multiple points per span. Avoid measuring from the wrong load points, and be cautious of obstructed views or uneven surfaces. Use a level or a straightedge to check for bowing or warping that could skew your measurements. When in doubt, double-check and have a second person assist to confirm your readings—two sets of eyes catch more errors. Think of it like a safety check in aviation—peer checks save lives, or in this case, save you from costly rework.
For larger projects, consider using digital measuring devices or laser distance meters to enhance accuracy. These tools minimize human error and provide quick, reliable data. Incorporate a smartphone app or software to record and compare measurements, making discrepancies easier to spot. Remember, investing in tech can pay for itself by preventing costly mistakes—think of it as upgrading from a bicycle to a car in your workflow.
Before moving to framing, ensure all measurements are consistent across the board. Review your notes and compare with initial plans. Address any outliers by consulting with a structural expert. Once satisfied, document the verification results thoroughly. This step solidifies your groundwork, reducing surprises and building confidence that your home addition will stand firm. It’s similar to calibrating a scale before weighing ingredients—you want everything to be just right.
Applying these meticulous measurement techniques during your project is like having a GPS on your journey—guiding you around obstacles and ensuring you stay on course. Proper verification not only safeguards structural integrity but also saves you in time and money by avoiding costly corrections later.
Even seasoned homeowners often fall prey to misconceptions about the complexities involved in new builds and additions, especially regarding permitting and estimating costs. One common myth is that permits are merely bureaucratic hurdles to slow down your project. In reality, permits are designed to ensure safety, compliance, and longevity of your build, acting as a safeguard rather than an obstacle.
Many believe that estimating costs is a straightforward process—simply add up material prices and labor hours. However, this oversimplification can lead to significant budget overruns. As highlighted by industry experts, accurate budget estimation requires nuanced understanding of local code requirements, material fluctuations, and contractor variability. For example, neglecting to factor in permit fees, impact fees, or unexpected site conditions can derail your project financially.
What Are the Most Overlooked Factors in Estimating and Permitting?
Advance homeowners understand that unseen factors—like soil conditions or hidden easements—can drastically alter project scope and costs. A study from the National Association of Home Builders underscores this, noting that 30% of construction delays are caused by permit-related issues or unexpected site findings. Overlooking these can silently inflate your timeline and expenses.
Another critical nuance is the misconception around permit acquisition speed. Many think permits are instantly approved, but in reality, the process can be prolonged by incomplete applications, backlogs, or neighborhood reviews. According to experts, proactive engagement with local permitting officials and thorough documentation can streamline approval timelines, but underestimating this step often leads to costly delays.
Beware of the trap that your project’s success hinges solely on construction quality. While craftsmanship is vital, adherence to permit conditions and accurate estimates form the backbone of a sustainable build. Skipping detailed pre-planning or underestimating permit procedures can cause rework, fines, or even forced demolitions—costly errors that many do not anticipate.
Another hidden nuance lies in misjudging the significance of local ordinances and zoning laws. These regulations often contain intricate rules about setbacks, height restrictions, or utility placements that can make or break your design plans. Ignoring these early in the process can result in redesigns or legal disputes, adding unexpected costs and delays. As linked in our guide on permit processes, understanding the legal landscape is essential to aligning your project with regulations.
In sum, the most overlooked aspects often reside in the finer details of permits and estimates. Developing a comprehensive understanding of these
Keeping It Working: Essential Tools and Maintenance Tips
Ensuring your home addition remains solid and functional over the years requires more than initial planning; it demands the right tools and proactive maintenance. Personally, I rely on a combination of high-precision digital tools and routine inspections to keep everything in top shape. For example, a laser distance meter like the Leica DISTO D810 has become indispensable in my toolkit. Its accuracy and speed allow me to verify measurements quickly, ensuring structural elements remain within specified tolerances—crucial for ongoing safety and performance. I also use a smartphone app, such as Measure for quick on-site recordings, which syncs seamlessly with my cloud storage for easy reference later.
Beyond tools, establishing a regular maintenance schedule helps detect issues early. I recommend inspecting your roof, foundation, and external finishes every six months, especially after severe weather. Regular checks minimize the risk of leaks, cracks, or deterioration that could compromise your addition’s longevity. Additionally, adhering to manufacturer-recommended upkeep for HVAC systems, plumbing, and other critical systems prevents costly failures down the line. For detailed maintenance routines tailored to different component systems, consulting resources like our comprehensive management guide can be extremely beneficial.
What’s the Future of Home Maintenance Tech?
Looking ahead, the integration of smart sensors and IoT technology promises to revolutionize home care. Imagine sensors that alert you instantly to leaks, structural shifts, or energy inefficiencies—enabling preventative action before small problems escalate into expensive repairs. Already, companies are developing AI-powered monitoring systems that analyze data trends and provide maintenance recommendations in real time. Adopting these innovations now can save homeowners significant time and money in the long run, making upkeep less of a hassle and more of a proactive safeguard.
If you’re ready to implement a smarter maintenance approach, start by investing in a reliable laser distance meter and integrating basic IoT sensors into your home systems. Not only will this extend the lifespan of your addition, but it’ll also provide peace of mind knowing you’re ahead of potential issues. To learn more about streamlining your project from planning to execution, explore our comprehensive management strategies.
Lessons That Changed My Perspective on Building Success
One of the hardest lessons I learned was the importance of meticulous measurement verification. Relying solely on blueprints without on-site checks almost led me to costly rebuilds. Another insight was how ignoring local zoning nuances could derail an entire project; understanding ordinances early saved me from unexpected delays. Lastly, I realized that transparent communication with professionals, from architects to permit officials, creates smoother progress and fewer surprises, ultimately saving time and stress.
Tools and Resources I Trust for a Seamless Build
My go-to digital measurement tool is the Leica DISTO D810, prized for its precision and ease of use—it’s indispensable for verifying truss spans and structural alignments. I also highly recommend reading “Adding Value with Expert Home Additions”; it offers practical insights that bridge planning and execution. For permit navigation, the permitting guides provide clarity on regulatory steps, making the process feel less daunting. Lastly, staying connected with experienced professionals through consultation services has been a game-changer in avoiding pitfalls.
Your Next Step Toward Confident Home Building
Embarking on a home addition or remodel can seem overwhelming, but with the right approach and tools, it becomes an achievable and rewarding journey. Apply these insider lessons, utilize trusted resources, and don’t hesitate to reach out for expert guidance. Remember, your home is a reflection of your vision—make sure your efforts translate into a safe, compliant, and beautiful space. Now’s the time to turn your plans into reality—start with confidence and stay committed to quality every step of the way.
What’s the most valuable lesson you’ve learned about permits or measuring during your projects? Share your experience below—I’d love to hear your story!
,