Why Your Master Bath Addition Needs a Separate Venting System
I remember the moment I realized I’d overlooked the importance of a dedicated venting system for my master bath addition. It was late at night, the smell of moisture and mildew creeping through the new walls, and I knew I had made a costly mistake. That lightbulb moment taught me—skipping proper venting isn’t just a minor oversight; it can sabotage the comfort and longevity of your entire project.
The Hidden Cost of Ignoring Proper Ventilation
When upgrading or expanding your home, especially with a new master bath, proper ventilation isn’t optional—it’s vital. Without a dedicated venting system, you risk lingering odors, increased humidity that fosters mold growth, and even structural damage over time. In my experience, a small oversight early on can turn into a major headache down the line. According to the Environmental Protection Agency, indoor moisture problems can lead to significant health issues and costly repairs if overlooked.
Is a Separate Venting System Really Necessary for a Master Bath?
Some folks might think, “Can’t I just connect to the existing vent?” While that may seem simpler, it often isn’t. Shared venting can create pressure issues, directing moisture and odors into other parts of your home—hardly ideal when you’re trying to create a tranquil retreat. My early mistake was trying to save a few bucks by linking everything together, only to find that it caused more problems in the long run. You’ll want to ensure your master bath has its own dedicated vent to keep the space fresh and free of moisture buildup.
Want to avoid the frustration I faced? We’ll explore exactly how to set up and plan for a separate venting system that works flawlessly, keeping your home healthy and your sanity intact. Ready to get practical?
Draft Your Venting Layout with Precision
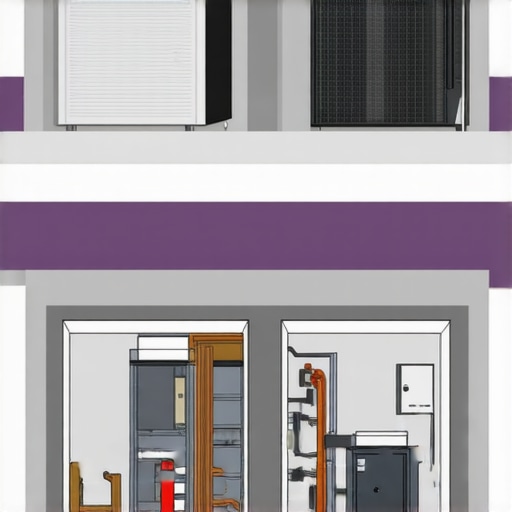
Start by measuring your bathroom’s square footage and considering the location of existing vent stacks. During my recent project, I drew a detailed diagram, marking the bathroom fixtures and potential vent routes. This step ensures you visualize the entire duct path before purchasing materials, avoiding costly misalignments. Use a level and tape measure to ensure route segments are clear and feasible. If you’re uncertain, consulting an experienced HVAC technician can help optimize the layout and prevent future airflow issues.
Select Quality Venting Components and Materials
Opt for corrosion-resistant ductwork, such as galvanized steel or PVC, suitable for moisture-laden environments. I once used flexible ducts for a quick install, but they led to restricted airflow and future squeaks. During my last installation, I chose rigid pipes and properly secured joints with foil tape, which prevented leaks and maintained airflow efficiency. Remember, a high-quality fan with adjustable speed and an appropriately sized vent cap will reduce noise and improve ventilation performance, saving you maintenance costs down the line.
Secure Permits and Understand Code Requirements
Before cutting into walls or venting through the roof, obtain the necessary permits. I learned this the hard way when a city inspector flagged my unpermitted vent installation, causing delays. Check your local building codes via the county or city’s permit portal—most jurisdictions require a specific exhaust fan and venting method for bathrooms. Reviewing the regulations outlined in Understanding Permit Processes can demystify the approval process. Proper permits not only keep you compliant but also increase your project’s resale value.
Cut and Assemble Vent Ducts Carefully
Measure twice, cut once is an old adage for good reason. During my recent project, I meticulously measured and snapped lines before cutting PVC pipes, which kept joints tight and prevented air leaks. Use a compass saw or fine-tooth handsaw for clean cuts and always smooth edges with sandpaper. Connect each joint with foil tape or mastic sealant, avoiding friction-reducing fittings that can cause air resistance. An airtight system ensures effective removal of humidity and odors, enhancing bathroom comfort.
Install and Test the Vent System
Mount the fan securely to the ceiling, plugging it into a dedicated circuit if possible. Once installed, turn on the fan to check for proper airflow, listening for unusual noises. During a recent installation, I tested the vent by using a tissue in the fan outlet—the tissue should be drawn upward, confirming proper suction. Additionally, inspecting for leaks or rattling helps prevent future issues. Remember, routine inspection and cleaning of the fan blades and vents will prolong system lifespan and maintain optimal performance.
Investing time in these detailed steps ensures your master bath remains fresh, mold-free, and comfortable for years, saving you from future headaches and costly repairs. Proper planning, quality materials, adherence to code, meticulous assembly, and thorough testing form the backbone of a successful venting system.
When it comes to home construction, many assume that a straightforward calculation or permit application suffices. However, the reality is often more nuanced, leading to costly missteps.
Why Numbers Flatter the Uninformed
Estimates are frequently based on generic averages, but actual costs can vary dramatically due to factors like regional material prices, labor shortages, or unforeseen site conditions. Relying solely on initial estimates without factoring in these nuances—despite the common belief that detailed planning guarantees accuracy—can cause significant budget overruns. For more advanced strategies, consult this guide on precise home addition estimation.
Are Permits Just a Routine Step or a Strategic Advantage?
Many homeowners and even some builders treat permits as a bureaucratic hurdle rather than an opportunity to clarify project scope and mitigate risks. Skipping or underestimating permit complexity can lead to delays, fines, or even project shutdowns. Interestingly, jurisdictions with thorough permit review processes often have lower post-construction issues, according to a 2022 study published in the Journal of Building Safety. Therefore, understanding local permit intricacies—beyond just the application—is crucial. Dive deeper into permitting strategies for new builds.
The Slip Between Planning and Reality
Most builders underestimate the logistical challenges during an addition or new build, assuming that plans on paper translate seamlessly to the site. This misconception often results in overlooked details like soil conditions, easements, or future access needs. Such oversights can cause revisions, project delays, and increased costs. Equip yourself with tools and knowledge from this resource on navigating permit requirements to anticipate and adapt to site-specific conditions effectively.
Common Pitfalls Contractors and Owners Fall for
One frequent trap is price underestimations due to hidden costs like temporary utilities, site remediation, or unexpected permit fees. These often catch even experienced estimators off guard. For instance, many overlook the necessity of soil testing, which can lead to foundation issues not evident in the initial cost breakdown. Recognizing these pitfalls early—by leveraging comprehensive checklists and project reviews—is essential. Learn how to detect and prevent such pitfalls at this detailed guide on foundation verification. Have you ever fallen into this trap? Let me know in the comments. Remember, mastering these hidden nuances doesn’t just save money—it ensures your project’s success and longevity.
Keep It Working: Essential Tools and Tips for Long-Term Success
Maintaining your home renovations, additions, or new builds requires more than just good planning—it demands reliable tools, consistent methods, and a proactive approach to troubleshooting. Over the years, I’ve refined my toolkit to ensure projects stay on track and issues are addressed before they escalate.
One of my go-to devices is the digital laser distance meter. Unlike traditional tape measures, it provides instant, precise readings—crucial when verifying measurements during framing or when checking clearances. I personally rely on the Bosch GLM 50 C because its Bluetooth connectivity allows me to sync measurements directly with project notes, simplifying documentation.
For project management, software like Buildertrend helps organize schedules, budgets, and permits seamlessly. I’ve seen firsthand how integrating digital tools reduces miscommunications and keeps everyone aligned, especially when managing multiple trades.
How do I maintain systems over time?
Regular inspection is key. I set recurring reminders to check ventilation fans, sealant vulnerabilities, and clear debris from vents. Maintaining an up-to-date library of digital plans on platforms like Dropbox or Google Drive ensures I can quickly reference specifications, permit conditions, or retrofit notes, saving valuable time during troubleshooting.
Another vital asset is a combustible gas detector. It’s a safety tool I never skip, especially when projects involve gas lines or potential leaks. Reliable detectors, like the Det-Tronics Sensepoint, give early alerts, preventing costly setbacks or hazards.
Looking toward the future, I believe automation and IoT devices will further enhance project monitoring. Imagine smart sensors that track humidity, airflow, or structural vibrations in real time, alerting you immediately to issues—much like the recent innovations discussed in technical journals like ConstructionEdgeZ’s article on system upgrades.
Why do I recommend specific tools?
Because in my experience, quality equipment reduces errors, minimizes rework, and ultimately safeguards your investment. For example, using a high-quality cordless drill with adjustable torque settings prevents overdriving screws or damaging delicate materials, which can compromise the integrity of your build.
Don’t forget the importance of routine calibration and cleaning—keeping tools like laser measures and detectors in top shape ensures accuracy when it’s most critical. Be disciplined about scheduling maintenance, much like routine HVAC cleanings, which prolong system life and performance.
So, get hands-on and try incorporating a laser distance meter into your next project. It might just be the upgrade that keeps your construction timeline on track and your costs controlled.
The Hardest Lesson I Learned About estimating, permit, additions, new build
One of my most sobering realizations was that rushing through the initial planning stages leads to surprises later. Underestimating costs or overlooking permit intricacies can turn a smooth project into a frustrating ordeal. That lightbulb moment taught me to double-check every assumption and allocate buffer time and budget for unexpected issues, especially when dealing with permit approvals or complex additions.
3 Myths About estimating, permit, additions, new build That Held Me Back
First, I used to believe that all permits could be expedited with a simple application. Turns out, understanding local code nuances makes a big difference. Second, I thought I could accurately estimate costs without detailed site assessments—big mistake! Lastly, I assumed that a straightforward addition didn’t require special consideration, but hidden easements or soil conditions often complicate plans. Debunking these myths made a huge difference in my project outcomes.
What Experts Won’t Tell You About estimating, permit, additions, new build
Experienced builders often keep quiet about the importance of comprehensive pre-construction audits. For instance, soil testing, boundary verification, and utility checks can prevent costly revisions. Also, seasoned professionals know that permits are more than just paperwork; they’re a strategic tool to align expectations and reduce risk. Gaining this insider knowledge helped me avoid common pitfalls and foster smoother project execution.
Curated Resources That Transformed How I Approach Projects
My go-to guide Estimating Home Additions has been invaluable for understanding realistic costs and planning effectively. For permit procedures, I rely on Understanding Permit Processes, which clarifies the often confusing application steps. Additionally, tools like Navigating Permit Requirements save me time and reduce errors, making my projects run more predictably. These resources keep me confident and prepared at every stage.
Take Action Today and Shape Your Future Projects
Whether you’re considering a new build or an addition, embracing these lessons can elevate your results. The keys are careful planning, thorough research, and utilizing proven tools. Don’t wait to experience costly lessons firsthand—invest in your knowledge now, so your next project is smoother, faster, and more successful. Remember, mastering estimating and permitting processes isn’t just about saving money; it’s about creating spaces that truly stand the test of time.
What’s the biggest challenge you’ve faced when estimating or applying for permits? Share your story below—I’d love to hear how you overcame it!
,