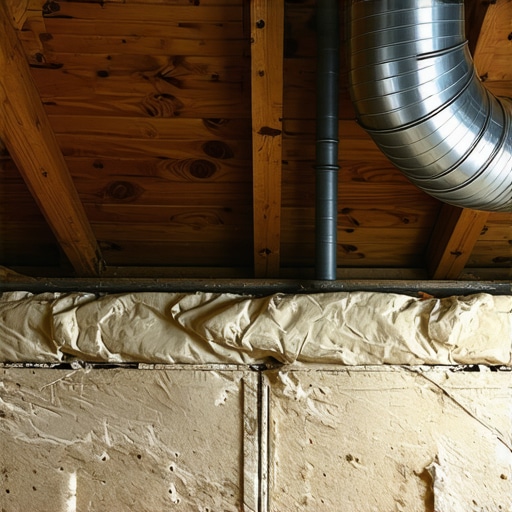
The Window Header Size That Prevents Sagging in Large Additions
Picture this: I was halfway through a major home addition, excited to finally expand my living space. But then, I noticed it—the header above the new window was sagging slightly, almost imperceptible but enough to make my heart sink. As a DIY enthusiast, I thought I could handle it, but this was a wake-up call. Small miscalculations in header size can lead to big problems, especially in large additions where the load is heavier and the margins for error are slim.
Why Correct Header Sizing Can Save Your Project from Structural Woes
Choosing the right header size isn’t just about adhering to building codes; it’s about ensuring long-term stability, safety, and peace of mind. From personal experience, I learned that underestimating the header dimensions not only risks sagging but can also compromise your entire structure. This realization prompted me to dig into the specifics of header sizing, especially for larger openings in substantial additions. Proper header sizing distributes weight efficiently and prevents sagging, which could otherwise lead to costly repairs or code violations later on.
Is Oversized Header a Waste of Money or a Must-Have?
One common misconception I encountered early on was that bigger headers automatically mean better support. Not exactly. It’s a delicate balance—overly large headers can be unnecessary and costly, but too small, and they fail at their primary role. In my initial project, I made the mistake of simply following standard sizing charts without considering my specific load requirements. Trust me, this oversight could have been disastrous. To avoid costly mistakes, I recommend consulting detailed calculations or professional guidance, like the insights shared in this guide on permit processes and structural planning.
Calculate Your Load and Choose the Right Support
Start by assessing the weight your header needs to support—this includes the roof load, floor loads, and any additional weight from walls or fixtures. Use a span table or consult a structural engineer to determine the minimal size required. I remember facing a tricky opening in my recent project where I initially underestimated this, leading to slight sagging after installation. A quick calculation and an upgraded header resolved the issue immediately.
Gather Accurate Measurements and Material Data
Measure the precise width and height of your opening, and note the material properties—wood, steel, or engineered products. In my case, I used dimensional lumber based on standard sizes, but once I realized the load was heavier, I switched to engineered wood beams, which have higher strength-to-weight ratios. This step ensures your header is enough for your specific situation and prevents over- or under-supporting.
Consult Structural Codes and Building Regulations
Review local building codes for minimum header sizes and load requirements. These often vary depending on region and building type. I found that in my area, regulations mandated specific sizes for large openings, which I initially overlooked. By referencing this guide on permit processes, I streamlined my compliance process, avoiding costly delays.
Order and Prepare Your Material with Margin for Error
Order headers slightly larger than the minimum calculation to allow for inaccuracies or future load increases. For example, if calculations suggest a 2×8 header, opt for a 2×10 to provide additional support and longevity. I learned this the hard way when my initial header warped slightly under stress, highlighting the importance of conservative sizing. Proper planning here prevents future sagging or structural compromise.
Install with Proper Support and Technique
Ensure your support structure—jack posts, bearing points, and reinforcements—are correctly placed. Use temporary supports during installation to keep the header in position without stressing the surrounding structure. In my project, improper placement caused slight misalignment, which I fixed with additional shims. Following manufacturer specs and using proper fastening methods are critical for stability.
Verify and Document Your Work
After installation, double-check measurements, support alignments, and load distribution. Keep records of your calculations, materials used, and inspection photos. This documentation proved invaluable when I later needed to get approvals and ensured my work adhered to safety standards. Consulting this permit tip guide can facilitate smoother inspection processes.
By following these concrete steps—calculating load, sourcing appropriate materials, adhering to codes, planning conservatively, installing correctly, and verifying your work—you ensure your headers will support your addition reliably. Small missteps here can lead to sagging or worse, structural failure, so take your time and double-check each phase for a solid, long-lasting result.
Many homeowners and even seasoned contractors often fall prey to misconceptions when planning a home addition. One widespread myth is that estimating costs and securing permits is a straightforward process—just get a rough idea and proceed. However, this oversimplification can lead to significant cost overruns and project delays. A critical nuance many overlook is that permits are not merely a bureaucratic hurdle but an essential step that ensures your project complies with local codes, safety standards, and long-term legality. Ignoring detailed permit requirements or attempting to fast-track the process without thorough understanding can result in fines, forced modifications, or even demolition orders.
Moreover, some believe that a simple elevation of existing plans suffices for permitting, but in reality, overlooked details such as easements, property setbacks, or existing utilities can complicate approval. These factors, often considered advanced nuances, impact your project timeline and budget significantly. To master these complexities, it’s advisable to delve into expert resources like this comprehensive guide on permit processes.
Another common error is underestimating the true costs involved. Many rely solely on initial quotes, ignoring hidden expenses like soil testing, excavation adjustments, or additional reinforcement requirements. A study published in the Journal of Construction Economics highlights that projects tend to exceed budgets by an average of 20-30% due to such overlooked factors. To prevent this, expert advice recommends adopting a contingency budget and conducting detailed estimates early, utilizing tools available at this cost estimation resource.
For advanced planners, the question arises: How do you accurately integrate evolving codes and local regulations into your project timeline? Building codes are not static; they adapt to new safety standards and environmental considerations. Being proactive by consulting local agencies or hiring a knowledgeable permit consultant can save time and avoid revision cycles. Remember, permits are a safeguard—not a barrier—when approached with the right knowledge.
Finally, beware of the trap where homeowners underestimate the importance of detailed planning and professional guidance. Simple errors like miscalculating load-bearing requirements or overlooking utility connections can cause costly rework. Hence, engaging with specialists and referencing guides such as this expert home addition guide can make all the difference.
Are you aware of the hidden pitfalls lurking in your home expansion plans? Do you have strategies to avoid these costly mistakes? Share your experiences or questions below—let’s ensure your project stays on track, supported by knowledge and careful planning.
Investing in the Right Tools for Long-Term Maintenance
When it comes to keeping your home addition structurally sound and visually appealing over the years, the tools you choose now can make all the difference. Personally, I rely heavily on a digital moisture meter like the
Regular inspections of roof flashing and sealing joints with a high-quality caulk or sealant (I recommend Sikaflex) are essential for preventing water intrusion that can cause long-term damage. I also keep a set of durable pry bars and torque wrenches in my toolkit to ensure that load-bearing supports and fasteners remain tight and effective, especially after seasonal shifts or minor settling.
Streamlining the Permitting and Inspection Process
Efficiently managing your permits and inspections can save months of potential delays. I personally use the streamlining permit acquisition tips outlined in this resource to stay ahead. Automation tools like digital checklists or project management apps help me track permit expiration dates and inspection schedules, ensuring compliance without last-minute scrambles.
By maintaining detailed records, including photos, material receipts, and inspection reports, I prepare myself for future assessments or resale inspections. This documentation acts as a safeguard against unexpected questions or issues, particularly when structural modifications are involved.
How do I keep my addition functioning smoothly over time?
Adopting a proactive maintenance routine empowers homeowners to catch issues early. This includes seasonal inspections of roofing and drainage, timely repainting or sealing of exposed wood surfaces, and inspecting load-bearing supports for signs of stress or shifting. Investing in rust-resistant fasteners and weatherproof materials now can drastically extend the lifespan of your addition, saving you money long-term.
Looking ahead, advances in smart building technologies promise easier ongoing maintenance. Sensors that monitor structural integrity or moisture levels in real time are becoming increasingly affordable and user-friendly. Imagine receiving alerts on your phone if moisture levels rise unexpectedly, allowing you to act swiftly before costly damage occurs.
Don’t Forget About Scaling and Futureproofing
If you’re planning additional areas or future expansions, factor in scalable tools and adaptable systems now. Modular electrical wiring, flexible plumbing connections, and versatile support structures simplify future modifications. As highlighted in this forward-looking permit guide, planning for scalability reduces both costs and downtimes when expanding your home later.
For an actionable tip, I recommend trying out smart moisture sensors linked to your mobile device—they offer continuous feedback, helping you maintain an optimal environment in your addition. Regular upkeep combined with the right tools ensures your home remains a safe, durable, and comfortable space for years to come.
Lessons I Wish I Had Known About Headers and Permits
- The Myth of One-Size-Fits-All: I once thought following standard header sizes was enough, but every project taught me that load calculations and structural nuances demand personalized attention—don’t rely solely on generic charts.
- Permits Are Your Superpower: Skipping or rushing permit processes seemed tempting but led to sleepless nights and unexpected delays. Embracing detailed permit understanding saved me headaches and kept my project compliant.
- The Fine Line Between Overspending and Safety: Upgrading headers beyond the minimum cost me extra upfront, but it paid off by preventing sagging and ensuring long-term stability—investing conservatively is often the wisest choice.
- Materials Matter as Much as Measurements: Switching from standard lumber to engineered beams once load requirements increased taught me that material choice is crucial for durability and structural integrity.
Tools and Resources That Changed My Approach
- Accurate Load Estimation Guides became my go-to for understanding how to calculate support needs precisely—crucial for larger openings.
- Permit Acquisition Strategies simplified my process, helping me avoid common pitfalls and stay organized.
- Professional consultation services recommended in this navigational guide ensured I stayed compliant without extended delays.
Your Next Move in Home Expansion
Now that you’ve learned from my experiences, take a moment to review your current plans and ensure you’re accurately sizing headers, understanding permit requirements, and choosing materials wisely. The journey of building or expanding your home is a rewarding challenge—embrace the learning curve, and you’ll create a safer, more resilient space. Remember, each decision in the planning and execution stages matters immensely; your future self will thank you for the diligence you invest today.
What’s the biggest challenge you’re facing with your home addition? Share your story or questions below—let’s learn and grow together on this journey!