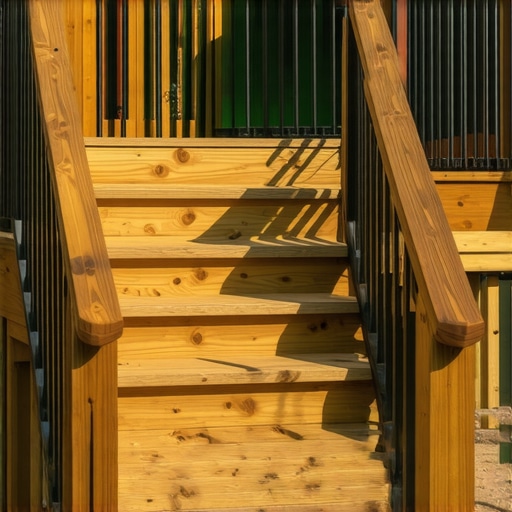
Why Your Deck Stairs Need a Specific Railing Height to Pass Code
I remember the moment vividly—the sun was shining, and I was eager to finish my backyard project. As I stepped onto my newly-built deck stairs, I glanced up at the railing and froze. It was too low. Not enough to meet local safety standards. Suddenly, what I thought was a straightforward addition turned into a permit nightmare. A quick inspection revealed that my railing height was out of compliance, and I had to tear out and rebuild part of the stairs. It was a costly lesson that could have been avoided with a simple understanding of building codes.
How a Small Detail Can Delay Your Entire Project
If you’re like most homeowners or DIY enthusiasts, you might not realize that a specific railing height isn’t just a safety concern—it’s a strict code requirement. Missing this detail can halt your project, cause costly rework, or even lead to fines. Ensuring your deck stairs have the correct railing height is a fundamental step that keeps your project moving smoothly and, more importantly, keeps your family safe.
Are You Wasting Time and Money on Avoidable Mistakes?
Early in my project, I made the mistake of assuming code standards were flexible or only applicable to commercial builds. That misconception almost cost me both time and money. Trust me, understanding the specifics of your local building codes—like those outlined by the U.S. Consumer Product Safety Commission, which recommends a railing height of 36 inches for residential decks—is crucial. Ignoring these details might seem trivial, but they’re vital for passing inspections and avoiding headaches later. If you’ve faced similar frustrations or want to ensure your project stays on track, you’re in the right place. We’ll walk through exactly what you need to know about railing heights to keep your project compliant and safe.
Measure Accurately Before Building
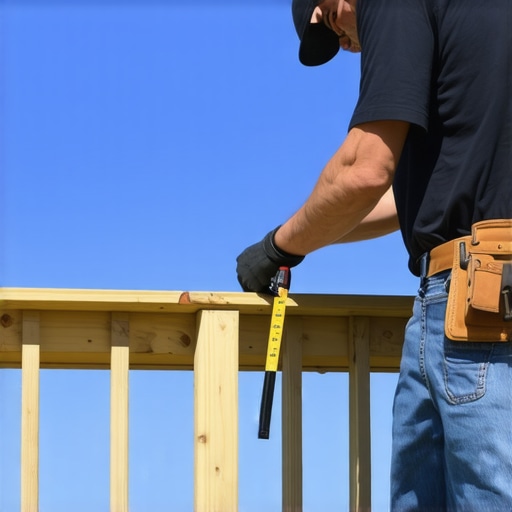
Start by measuring the height from the ground to the top of your deck surface. Use a reliable tape measure and mark the desired railing height, keeping in mind the standard 36 inches for residential decks. During my last project, I initially estimated the height visually, which led to a re-measurement after receiving a warning from a neighbor. Confirm your measurements twice to avoid costly adjustments later.
Consult Local Building Codes Early
Don’t skip this step! Local regulations vary, and understanding them upfront saves time. Visit your city’s building department website or contact them directly at Construction Edgez for guidance. For example, some municipalities require 42 inches on particular decks, especially if the railing serves as a safety barrier against a steep drop. Knowing these details in advance prevents surprises during inspection.
Gather the Right Tools and Materials
Equip yourself with a quality level, post hole digger, and appropriate fasteners. When I built my deck, I used a laser level to ensure the railing was perfectly plumb across the entire perimeter. This precision is critical for code compliance and safety. Prepare all materials before construction; chasing after missing parts causes delays that can jeopardize your permit timeline.
Design for Compliance and Safety
Create detailed plans that include exact measurements, materials, and anchoring methods. Incorporate the required height, spacing, and load requirements indicated by your local code. If you’re unsure, consider consulting a professional or referencing this comprehensive guide to ensure your design is up to standard. Accurate plans mitigate revision requests from inspectors.
Prepare and Submit Your Permit Application
Compile all necessary documents: detailed drawings, measurements, and material specifications. Fill out the permit application form thoroughly. I learned this the hard way when I overlooked including the railing design, resulting in a two-week delay. Using resources like permitting guides helps clarify requirements. Submit your application well before your planned start date to allow processing time.
Schedule Inspections and Make Adjustments
Coordinate inspection appointments after completing each phase. During my last build, I scheduled an initial inspection for the framing, which revealed that my railing height was slightly off. I made quick adjustments—raising the railing an inch—and got approval. Keep communication open with inspectors and be prepared to make modifications promptly. This attention to detail ensures your project remains on schedule and compliant.
Document Everything for Future Reference
Maintain detailed records of measurements, receipts, and inspection approvals. Photographs can also serve as proof of compliance if disputes arise. Last year, I kept photos of my railing installation, which proved helpful when I needed to verify the work for insurance purposes. Proper documentation simplifies future renovations or additions.
Don’t Overlook Ongoing Compliance
Remember, building codes can change. Periodically check for updates at this resource to stay current. Regularly reviewing your plans ensures your structures not only pass inspections but also provide long-term safety and value. Staying proactive prevents costly violations and ensures peace of mind throughout your project lifecycle.
 Many homeowners and even seasoned contractors often hold misconceptions about the complexities involved in home additions, estimating costs, permits, and new construction. One prevalent myth is that obtaining a permit is merely a bureaucratic step—nothing could be farther from the truth. As explained in [this guide](https://constructionedgez.com/understanding-permit-processes-for-successful-home-additions), permits are essential for ensuring your project complies with safety standards and local codes, thus avoiding costly delays or legal issues. A common mistake many make is underestimating the true scope of costs. Relying solely on initial bids without considering hidden expenses such as permit fees, inspection costs, or unforeseen structural adjustments can lead to budget overruns. For expert insights on accurate budgeting, see [this estimation guide](https://constructionedgez.com/estimating-costs-for-new-builds-expert-insights).
Keeping your home project running smoothly requires the right set of tools and systems. Over the years, I’ve refined my toolkit to maximize efficiency, accuracy, and long-term durability. One indispensable gadget in my arsenal is a laser level. Unlike traditional bubble levels, a laser level projects a precise, continuous line across large surfaces, making it invaluable for aligning railings, framing, and even electrical outlets. This ensures your structures are both safe and code-compliant, preventing costly rework down the line.
For managing project schedules and permits, I swear by Buildertrend. This cloud-based project management software keeps every stakeholder—contractors, suppliers, and inspectors—on the same page. It allows you to track permit applications, schedule inspections, and update progress in real-time. From my experience, staying organized through dedicated platforms minimizes overlooked deadlines and last-minute surprises, especially when navigating complex permit processes like those outlined in this guide.
When it comes to estimation, I recommend PlanSwift. This digital takeoff and estimating software helps fine-tune your budget before any dirt is moved. Its features enable precise measurements from digital plans, reducing human error. A tip: always cross-reference your estimates with the latest data from this comprehensive estimation guide. Doing so ensures your project remains financially viable and prevents surprise overruns.
For durable fasteners and hardware, I turn to Milwaukee’s M18 cordless tools. Their reliability and battery longevity have saved me countless times in the middle of a project, especially during unforeseen tasks like reinforcing framing or installing fixtures. Investing in quality tools upfront pays dividends over the long term, both in safety and efficiency. Future trends suggest a rise in cordless power tools equipped with smart sensors—so I recommend keeping an eye on innovations like these to stay ahead in the game.
How do I maintain these tools and systems over time?
Regular maintenance is key. For power tools, clean blades and air vents after each use, and check batteries for charge cycles. Keep software like Buildertrend updated to benefit from the latest features and security patches. Documenting your maintenance routines in a dedicated log helps catch issues early and prolongs your equipment’s lifespan. As technology evolves, integrating IoT-connected tools may become standard, offering automatic diagnostics and proactive maintenance alerts—a trend that’s poised to revolutionize home renovation management.
By selecting the right equipment and staying diligent with upkeep, you can ensure that your home upgrades proceed without unnecessary delays. Don’t hesitate to try out advanced features like laser leveling or project management apps—these small investments yield significant long-term benefits, especially when planning complex projects such as additions or new builds. Remember, informed tool choices and consistent maintenance are your best allies in turning blueprints into reality, smoothly and safely.

Image prompt: Close-up of a laser level projecting a bright line over a construction site, emphasizing precision alignment.
Looking back on my own home projects, I realize one of the most valuable lessons I learned was the importance of thorough preparation and understanding the intricacies of permits and building codes. These details, often overlooked, can make or break your project, turning what should be a smooth process into a stressful ordeal. Investing time in learning from real-life experiences, including missteps, has given me a clearer perspective on what extra measures can save you time, money, and frustration when planning additions or new constructions.
Lessons From the Trenches That Changed My Approach to Building
- Perfection in measurement saves future headaches: Early on, I thought a quick eyeball estimate would suffice. A tiny miscalculation led to rework and permit delays, emphasizing the need for double-checking measurements with professional-grade tools like laser levels. Trusting the process and getting multiple measurements can prevent costly surprises.
- Understanding local codes isn’t optional—it’s integral: I used to believe codes were just bureaucratic hurdles, but my experience taught me that they are safeguards ensuring safety and compliance. Spending time early to review local regulations, perhaps even consulting with experts, can set a solid foundation for your project’s success.
- Documentation is your best friend: Keeping detailed records, from measurements to receipts and inspection notes, has helped me resolve disputes and verify compliance. Think of documentation as building your project’s insurance policy against future issues—be diligent from the start.
Tools and Resources I Trust for Seamless Construction
- ConstructionEdgez’s permit guides: Their comprehensive resources on understanding permits [like this](https://constructionedgez.com/understanding-permit-processes-for-successful-home-additions) have saved me countless hours navigating regulations and avoiding delays. Their insights help demystify the permit process, making it accessible even for first-timers.
- Estimating software like PlanSwift: Accurate budgeting is critical. I rely on digital tools to align cost estimates with real market data, reducing errors and surprises. Combining software with expert advice ([see their guide](https://constructionedgez.com/how-to-accurately-estimate-costs-for-home-improvements)) provides a balanced view for confident financial planning.
- Project management platforms such as Buildertrend: Staying organized with cloud-based tools ensures everyone involved—from contractors to inspectors—is on the same page. This approach streamlines communication, schedule management, and permits, minimizing mishaps and keeping your project moving forward.
Embark on Your Project with Confidence and Passion
Every home addition or new build carries a unique set of challenges, but with thoughtful planning, the right tools, and a willingness to learn from experience, you can transform your vision into reality smoothly and safely. Remember, detailed preparation and a proactive mindset not only help you stay compliant but also empower you to create a space that enhances your home’s value and your quality of life. Don’t let uncertainties hold you back—your perfect project is within reach.
Secrets I Wish I Knew About Addition and New Build Planning
- Permits aren’t just paperwork—they’re a safeguard: My biggest mistake was underestimating their importance. Fully understanding permit requirements [like those explained here](https://constructionedgez.com/navigating-permit-requirements-for-additions-in-2025) can save you from costly delays and legal issues.
- Hidden costs are lurking everywhere: From permit fees to unforeseen structural revisions, budgeting broadly and consulting detailed guides ([see this one](https://constructionedgez.com/estimating-costs-for-new-builds-expert-insights)) helps prevent budget overruns and project derailment.
- Precision tools pay for themselves: Investing in laser levels or quality fasteners ensures safety and code compliance—saving both time and money in the long run. Advanced tools like smart sensors hint at future trends in construction that you should watch for.
Find Your Next Step and Build with Confidence
Now that you’re equipped with deeper insights and trusted resources, it’s time to turn your plan into action. Whether you’re just beginning or in the midst of construction, staying informed and organized is your best strategy. Keep reviewing regulations, recording progress, and embracing new technology—these tweaks make a huge difference. Your perfect addition or new build is waiting; make it happen with conviction.
What’s the biggest challenge you’ve faced in your home addition or new build project? Share your story below—I’d love to hear and help you navigate it.
!