Why Your Master Suite Addition Needs an Upgraded Main Panel
It was a hot summer day when I flipped the switch for the new master bath light, only to be met with flickering bulbs and a frustrating hum that went beyond normal. That light fixture, which seemed harmless at first, turned out to be a glaring warning sign: my home’s electrical system wasn’t prepared for the new load. I had underestimated what a master suite addition really required, and it nearly cost me time and money. That was my lightbulb moment. I learned the hard way that an upgraded main electrical panel isn’t just a luxury—it’s an essential part of making a successful, safe, and code-compliant addition.
The Hidden Risks of Overloading Your Home’s Electrical System
Are you risking expensive updates or dangerous failures?
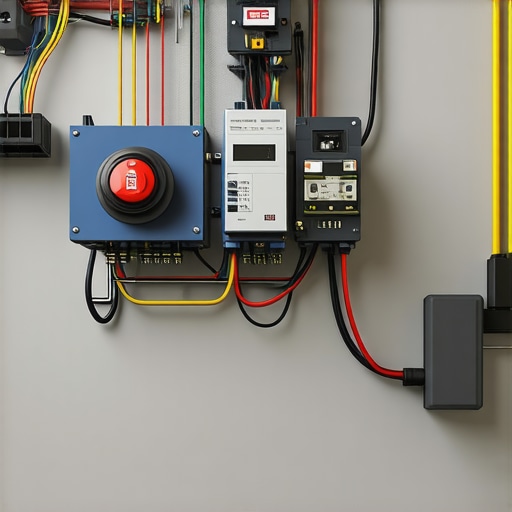
Early in my project, I mistakenly assumed that just adding circuits for the new bathroom and walk-in closet would suffice. I didn’t think about the main panel’s capacity or the overall electrical load. That mistake nearly derailed the entire build, forcing costly panel upgrades halfway through. According to industry experts, a common oversight during home additions is neglecting to analyze and upgrade the main electrical service. This can result in overloads, frequent breaker trips, and even fire hazards. Ensuring your main panel can handle the increased demand is a crucial step that often gets overlooked in the excitement of designing a new space.
If you’re contemplating a master suite addition and haven’t given your electrical system a thorough review, you’re inviting trouble. A well-placed upgrade to your main panel not only prevents these risks but also supports future home improvements without additional rewiring. To learn more about the intricacies involved in planning your project, check out this comprehensive guide on estimating home additions.
As we move forward, I’ll guide you through how to assess your current electrical setup, recognize when an upgrade is necessary, and ensure you’re building a foundation that keeps your home safe and functional for years to come. Have you already faced challenges with your home’s electrical capacity? Share your story—I’d love to hear what worked and what didn’t.
Evaluate Your Current Electrical Load
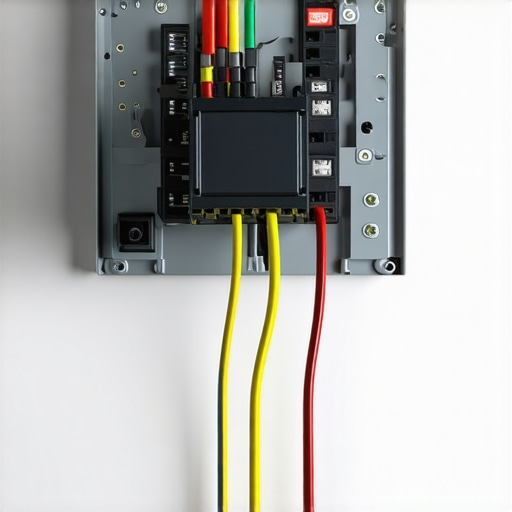
Start by mapping out all existing circuits and appliances. Turn off power and inspect your main panel, noting the amperage capacity—commonly 100A or 200A. Use a clamp meter to measure current draw if possible. This provides a baseline to determine if your panel can handle additional loads without risk.
Calculate the Additional Power Requirements
List every new fixture, appliance, and outlet planned for the addition. Assign wattage estimates—such as 60W for lighting or 1500W for a bathroom heater. Sum these to understand the total new load. Think of it as budgeting: if your current capacity is like a 50-gallon tank, ensure the total upcoming demand doesn’t overflow it.
Compare with Existing Panel Capacity
Match your calculated total load against your panel’s capacity. If the additional load exceeds 80% of your main breaker’s amperage, an upgrade is necessary. For example, if your panel is 100A, and the new load plus existing usage approaches 80A, it’s time to consider an upgrade to prevent overloads and fire hazards.
Plan Your Service Panel Upgrade
Engage a licensed electrician to determine the size of the new panel—typically 200A for most modern homes. They will also advise on compatibility with your service line—sometimes upgrades require calling the utility company. Think of this step as upgrading your electrical ‘fuel tank’ to support your expanded home’s energy needs.
Obtain Necessary Permits and Inspections
Before any work begins, secure permits through your local authority—skipping this step risks code violations and delays. Familiarize yourself with the process via permit process guidelines. Proper permits ensure safety and legal compliance, like a certificate of a job well done.
Implement the Upgrade with Professional Help
Hire a qualified electrician to carry out the panel upgrade. They will ensure all connections meet code, install a new main breaker, and properly ground the system. Think of this as replacing your home’s electrical engine—smooth, reliable, and able to handle the new power demands without breaking down.
Test and Confirm the System’s Capacity
After installation, perform a full test: turn on all new fixtures and appliances and verify no breaker trips occur. Use a multimeter to measure voltage consistency. This step is akin to a test drive—making sure your upgraded system performs safely under real-world conditions.
Document and Keep Records
Save all permits, inspection reports, and contractor receipts. These documents are vital if any future electrical issues arise or for resale purposes. Keeping thorough records is like creating a blueprint of your home’s heart—your electrical system—which supports future upgrades smoothly.
By following these concrete steps, you prevent hazards, avoid costly rewiring, and ensure your addition operates seamlessly within your home’s electrical ecosystem. Proper assessment and planning transform a potential weak point into a robust, future-proof system.
When it comes to estimating, planning additions, or navigating the permit process, many homeowners and even builders fall into common traps that can derail projects or inflate costs. Everyone talks about getting ‘the numbers right,’ but in my experience, there’s a deeper layer of complexity that most overlook. Let’s dig deeper into what most people get wrong, so you can avoid costly mistakes and build with confidence.
One widespread misconception is that a simple square footage calculation suffices for accurate costing. While size is a factor, **the devil is in the details**—material choices, labor rates, permitting intricacies, and site-specific challenges can swing estimates by 20% or more. Relying solely on rough numbers from online calculators often leads to underestimation, which can cause delays or budget overruns. For more precise budgeting, consult detailed guides such as [estimating home additions](https://constructionedgez.com/estimating-home-additions-a-step-by-step-guide-for-2025) and engaging with seasoned professionals.
A significant hidden nuance involves the permit process—particularly understanding the full scope of what a permit entails beyond just the paperwork. Many assume that submitting plans is enough, but the process is cyclical, with multiple reviews and possible revisions. Failing to anticipate this leads to delays and permits expiring before approval. A common trap is assuming that permits are a one-and-done step; in reality, [navigating permits](https://constructionedgez.com/navigating-permit-requirements-for-2025) requires ongoing communication, thorough documentation, and sometimes, unexpected additional inspections.
Now, here’s a question for the advanced builder or homeowner:
How does properly factoring in soil conditions and site accessibility transform your project estimates?
Neglecting soil quality assessments or access limitations can create significant unanticipated costs. For example, unstable soil may demand deeper foundations or soil stabilization, and difficult access can increase equipment rental and labor hours. According to engineering studies, ignoring site-specific conditions can inflate budget estimates by up to 40%. Incorporating detailed site evaluations early in your planning, and consulting experts when necessary, ensures your estimates reflect reality.
Another common pitfall is overconfidence in cost-saving measures, such as choosing cheaper materials or postponing permits until later stages. While these might seem economical initially, they often lead to rework, code violations, or safety issues. Remember, cutting corners on permits or materials can jeopardize your project’s legality and structural integrity. A strategic approach is to work with [expert home additions](https://constructionedgez.com/adding-value-with-expert-home-additions-a-construction-guide) to optimize costs without sacrificing quality.
Lastly, many underestimate the importance of contingency funds—an essential buffer for unforeseen issues. Even the most meticulous estimates can’t predict every challenge that arises during construction or permit review. Industry experts recommend allocating at least 10-15% of your total budget for contingencies. This practice provides peace of mind and keeps your project on track.
Have you ever fallen into this trap? Let me know in the comments how you managed unexpected surprises or what strategies you’ve found effective for accurate planning. Accurate estimation and permit navigation are more art than science—they require attention to nuance, informed choices, and proactive communication. The more you master these hidden aspects, the more seamless your building experience will be.
Investing in Reliable Equipment and Software
When managing home additions, I rely on a combination of robust tools and software that streamline every step of the process. For measurement and site assessments, I prefer using a laser distance meter like the Leica DISTO D810 Touch, which provides precise measurements within millimeters and allows me to document measurements directly to my smartphone. This eliminates miscalculations that could derail timelines or budgets.
For project management, I swear by software such as Buildertrend. It offers real-time collaboration, scheduling, and document sharing, keeping all stakeholders on the same page. I’ve found that integrating this platform with cloud storage services like Dropbox makes document retrieval and sharing seamless, especially when updating permit applications or revision plans.
Keep Tools in Prime Condition
Regular maintenance of your tools ensures longevity and accuracy. I personally schedule weekly checks on my measuring devices, calibrate them as needed, and store them in protective cases to prevent damage. For power tools, I clear dust and debris after each use and oil mechanical parts periodically. This proactive approach minimizes breakdowns during critical phases of the build.
Long-Term Results Come from Routine Checks
Establishing a maintenance routine extends beyond tools. I recommend setting up monthly inspections of your site’s safety equipment like fire extinguishers, ventilation systems, and generators. Keeping a detailed maintenance log helps track when each component was last serviced, ensuring compliance with safety standards and avoiding unexpected failures that could delay your project.
Planning for Scalability and Future Upgrades
As your projects grow, so should your toolkit. Investing in adaptable systems—like a modular scaffolding setup and expandable data management software—makes it easier to scale your operations without major overhauls. Predictive maintenance tools, such as IoT-connected sensors for machinery, are on the horizon, offering real-time alerts for potential issues before they become costly failures.
Where is the Future Headed In Maintenance for Home Builders?
Technological innovations are transforming how professionals maintain efficiency. The integration of AI-driven diagnostics and augmented reality (AR) support for onsite troubleshooting is becoming commonplace. These advancements promise to reduce downtime further and enhance precision, saving both time and money in long-term project execution.
To truly stay ahead, I encourage you to adopt a disciplined approach to your tools and routines. For example, try implementing regular calibration checks on your measuring equipment—this small step can prevent costly errors down the line. Want a concrete starting point? Check out this detailed guide on adding value through expert management.
How do I Maintain Your Home Addition Tools Over Time?
The key is consistency. Create a maintenance schedule, keep records, and don’t shy away from investing in high-quality equipment. Remember, a well-maintained toolkit is foundational to ensuring your project runs smoothly, safely, and efficiently—now and in the future.
Lessons Hidden in Humble Mistakes
One of the deepest insights I gained was how overlooking the main electrical panel capacity can snowball into costly delays. It’s tempting to focus only on the aesthetic and structural elements of an addition, but ignoring the backbone—your electrical system—can threaten the safety and functionality of your entire project. My light flickering incident was a stark reminder that every element requires thorough evaluation, especially the often overlooked electrical load calculations. A second lesson emerged from understanding permit processes: what seems like ‘just submitting plans’ can hide complexities that, if ignored, result in unnecessary setbacks. Embracing detailed planning and early consultations with professionals transforms potential pitfalls into stepping stones towards success. Lastly, I learned that upgrading your tools and routines isn’t luxury but necessity; regular calibration of measuring devices and maintenance routines for equipment hide immense benefits, ensuring precision and safety throughout the build process.