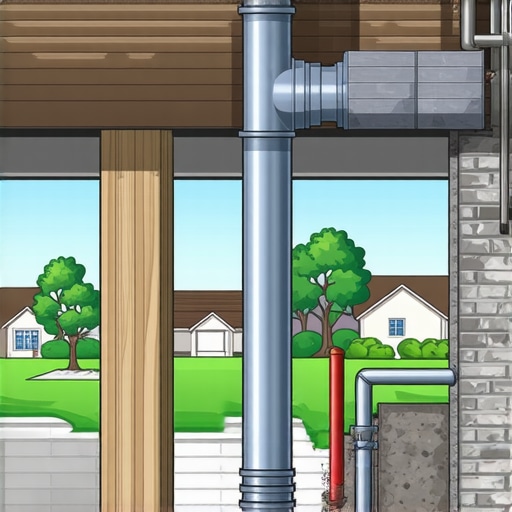
The Insulation R-Value Change That Forces a Wall Thickness Redesign
It was a frustrating morning when I realized that my carefully planned wall insulation wouldn’t fit as expected. The R-value requirements had changed since I first drew up my plans, and suddenly, my existing wall thickness was no longer enough to meet the new standards. That lightbulb moment made me rethink everything about my project’s design and estimation process.
Why the R-Value Changes That’s Throwing Off Your Walls
People often take for granted how insulation standards evolve over time. Just a few years ago, an R-13 batt might have sufficed for a typical exterior wall. But today, many codes now demand R-21 or even R-24 for the same application. This shift isn’t random; it’s driven by climate change concerns and energy efficiency goals. The result? To meet these new requirements, the thickness of your wall assembly might need to increase significantly. I learned this lesson the hard way early in my projects—assuming traditional wall thicknesses would do the job left me scrambling for last-minute redesigns.
The importance of staying ahead in estimating and planning can’t be overstated. According to the Department of Energy, upgrading insulation R-values can reduce heating and cooling costs by up to 15%. That’s a compelling reason to factor in these changes during the design phase, rather than reacting after construction starts. Have you faced the surprise of an insulation R-value change that forced a redesign? If so, you’re not alone.
Is R-Value Talk Just Overhyped Hype? Or Worth the Stress?
I admit, early on, I underestimated how much these standards could impact wall dimensions. My biggest mistake was ignoring the latest update to local code requirements, which caught me off guard during permit submission. This oversight cost me time and money, and made me realize the importance of thorough research.
For a detailed look at how permit processes are changing in 2025, check out this guide on understanding permit processes. It’s crucial to stay informed because these regulatory shifts directly affect your planning, especially when it comes to insulation and wall assembly.
Stay tuned—we’re about to explore how to adapt your estimations and designs to these evolving standards, ensuring your project stays on track and within budget.
Quantify Your Materials Precisely from the Start
When I tackled my last renovation, I realized that relying on generic material estimates was a recipe for cost overruns. To prevent this, I adopted a meticulous approach—measuring each component and cross-referencing with current supplier catalogs. Utilize detailed takeoff sheets and double-check quantities against your material list. This step is akin to a chef measuring every spice before cooking; precision ensures smoother progress and budget control. For guidance on detailed estimation, see this step-by-step guide for 2025 updates.
Stay Ahead with Current Code and Standard Updates
Insulation R-value standards can change unexpectedly, as I learned during my latest project. To adapt effectively, I dedicated time weekly to reviewing local building codes and industry updates. Subscriptions to local code bulletins and participating in online forums kept me informed of upcoming changes. Think of this as tuning your radar; staying alert helps you avoid costly redesigns later. Regularly consult resources like this resource on permit requirements for the latest standards and procedures.
Connect with Permitting Authorities Early
During my last build, I made the mistake of waiting until I had a complete plan before talking to the permit office. This often led to delays and rework. Instead, I scheduled an early consultation, presenting preliminary plans and asking specific questions about required documentation. Imagine this as introducing yourself before the dance—building rapport accelerates approvals. To streamline your permit process, check these tips for permit approvals. It’s worth the effort to anticipate and address questions upfront.
Create Clear, Detailed Documentation
Vague plans invite delays. I found that supplementing drawings with annotated notes and explicit specifications minimized back-and-forths. For instance, clearly stating insulation R-values, material grades, and connection details eliminated ambiguity. This is like providing a well-marked map—you guide reviewers smoothly toward approval. Use digital tools to organize and share these documents easily. Remember, comprehensive documentation doesn’t just speed up approval; it also mitigates errors during construction.
Implement a Stepwise Permitting Checklist
My secret has been developing a tailored checklist that maps each permit milestone against project phases. This checklist includes critical items like site plan submission, structural permits, and utility hook-ups. By ticking off each step and verifying compliance, I avoid last-minute surprises. Think of this as a road trip navigator—keeping you on course and aware of upcoming turns. For a detailed strategy, refer to expert insights on estimating costs that emphasize proactive permitting planning.
Engage with Experienced Professionals
Finally, I learned that collaborating with seasoned architects and permit specialists made a significant difference. They provided insights into local nuances and helped prepare optimized submissions. Their experience is like having a GPS through complex regulatory terrain, saving both time and stress. When in doubt, consult experts via contact options. Their guidance is invaluable for aligning your estimates and permits with current legal and safety standards.Many homeowners and even seasoned contractors assume that estimating for new builds and additions is just about plugging numbers into a spreadsheet. But the truth is, most get caught off guard by overlooked nuances that can blow their budget or delay permits. One common myth is that standard square footage costs apply universally—they rarely do. Variations in site conditions, local regulations, and material prices can dramatically skew these estimates if you’re not careful. For example, a typical $150 per square foot estimate might seem solid, but if your site requires extensive grading or specialty foundation work, costs can escalate quickly, catching the unwary.
Let’s talk about the often-neglected aspect of permit complexity. Many assume that submitting application paperwork is straightforward—but this couldn’t be more wrong. Permitting authorities have intricate, sometimes arcane requirements that can trip up even well-prepared plans. Relying solely on typical permit checklists can lead you to miss critical details—like specific setback requirements, easements, or variance conditions—that could delay or invalidate your project. Running afoul of these rules is an easy trap: I’ve seen projects held up by issues like overlooked utility easements or outdated zoning maps. To avoid this, deep dives into local jurisdictional rules and early communication with permitting officers are essential. For instance, this guide offers valuable insights into navigating permit processes effectively.
Another misconception is the belief that once permits are approved, the work can commence with little oversight. But, in fact, changes during construction—be it scope creep or unforeseen site conditions—necessitate additional permits or plan revisions. Failure to recognize this and plan for potential permit amendments can result in costly rework or legal issues. Having a stepwise permitting checklist, similar to this detailed guide, ensures you’re prepared for these contingencies.
And let’s not forget a critical oversight—many underestimate the importance of accurately assessing and estimating for unforeseen site challenges, like soil stability or existing utility conflicts. These hidden issues often lead to overruns if not properly scoped from the outset. The key is detailed site analysis and incorporating contingency buffers into your cost estimates. An early, thorough soil investigation, like the manual soil test, can reveal surprises that save headaches later.
Finally, most overlook the value of partnering with experienced professionals—be it architects, surveyors, or permit consultants. Their insider knowledge can prevent costly pitfalls and streamline both estimating and permitting processes. As we all know, a well-informed team dramatically improves project outcomes. Check out this contact page to find experts who can guide you through these critical steps.
Have you ever fallen into this trap? Let me know in the comments. Remember, understanding and respecting these hidden nuances makes all the difference between a smooth project and a nightmare.Maintaining a construction project efficiently requires the right toolkit—both digital and physical. One indispensable resource I rely on is sophisticated project management software like **Buildertrend**. It streamlines scheduling, communication, and documentation, allowing me to track progress and address issues swiftly. Unlike generic spreadsheets, Buildertrend provides real-time updates and integrates with my cloud storage, ensuring all team members access the latest plans and permits. To stay ahead, I also use **Bluebeam Revu** for PDF markup and plan revision, which is crucial when addressing permit comments or design adjustments from local authorities. This way, I minimize costly rework caused by miscommunication or outdated drawings.
What I Wish I Knew Before Diving Into My Build
- One of the toughest lessons I learned was that overlooking local code updates can turn your dream project into a costly surprise. Staying informed required weekly check-ins with permits and regulations—something I underestimated at first.
- Estimating costs without detailed, up-to-date material assessments is like gambling. Precise measurements and current supplier quotes are my secret weapons—saving me thousands and frustration.
- Early collaboration with permit authorities might seem tedious, but it’s a game-changer. A quick chat about potential hurdles can prevent weeks of delays later on.
- Partnering with experienced professionals transformed my approach. Their insight into hidden pitfalls—like easements or zoning quirks—kept my project on track and within budget.
Gear Up With Tools That Make a Difference
- Buildertrend has been my command center, streamlining communication, scheduling, and documentation. It keeps all team members aligned and my project moving smoothly.
- Bluebeam Revu allows me to mark up plans effortlessly, ensuring permit comments and design changes are incorporated without mishaps.
- Local code bulletins subscriptions serve as my early warning system for regulations shifts, helping me adapt before problems arise.
- For estimation accuracy, this comprehensive guide offers proven strategies—vital for navigating the evolving standards of 2025.
Light the Path Forward and Take Charge
The journey through modern construction standards and permitting can seem overwhelming, but remember—knowledge is your greatest tool. Take the lessons learned from early missteps, equip yourself with the right tools, and forge ahead with confidence. Your next project isn’t just a build; it’s a testament to your preparedness and resilience. Keep pushing, keep learning, and turn your vision into reality.
Have you faced unexpected changes in permit requirements or estimation challenges? Share your experiences below—your insights could help others avoid the same pitfalls.
,