3 structural fixes for sagging floor joists in old additions
It was a chilly Saturday morning when I stepped into my old addition and felt that unsettling creak under my feet. That familiar sagging dip in the floor had been bothering me for months, but that day, it finally hit me—this wasn’t just a minor annoyance, it was a sign that my home’s structure needed serious attention. If you’ve noticed similar signs in your own space—be it a soft spot underfoot, uneven flooring, or a noticeable slope—you know how nerve-wracking it can be. Old additions often come with hidden structural issues, especially sagging floor joists, which can affect safety, comfort, and even property value.
The good news? I’ve been through the maze of fixing this myself, and I can tell you with confidence—there are effective ways to restore stability without draining your savings or turning your home into a construction zone. Today, I’ll share three proven fixes I’ve successfully implemented for sagging floor joists in older additions. These solutions are grounded in practical experience and trusted construction principles, and they can help you make your home safe, level, and solid.
But before we dive into the solutions, it’s essential to understand why sagging occurs and how to approach the problem correctly. Often, homeowners jump straight into DIY fixes without assessing the root cause, which can lead to costly mistakes. For example, I initially tried to reinforce my joists without checking the existing support structure—resulting in only a temporary fix. Learning from that mistake, I started with a thorough inspection, which proved invaluable.
Are you facing this exact problem? If so, don’t worry. With proper diagnosis and the right techniques, you can strengthen your floor system effectively. For a comprehensive guide on the initial inspection process and understanding permit requirements for structural work, you might find this resource helpful: Adding Value with Expert Home Additions.
Now, let’s explore my top three fixes for sagging floor joists—solutions rooted in tried-and-true methods that I personally applied with great success. Ready to get started on making your home safer and sturdier? Let’s move on to the practical steps.
Assess the Damage Thoroughly
Start by inspecting your floor system to identify which joists are sagging and whether the supports are compromised. Use a level or a laser line to detect unevenness and sagging points. I once noticed a noticeable dip in my living room floor, which prompted me to crawl beneath and check the joists for signs of rot or damage. This initial assessment prevents unnecessary work and helps prioritize repairs.
Check Support Boards and Beams
Examine the support beams and ledger attachments for signs of deterioration or shifting. Reinforce loose or damaged supports before proceeding with more invasive fixes. Remember, addressing support issues first ensures your repairs are effective and long-lasting.
Implement Sistering of Floor Joists
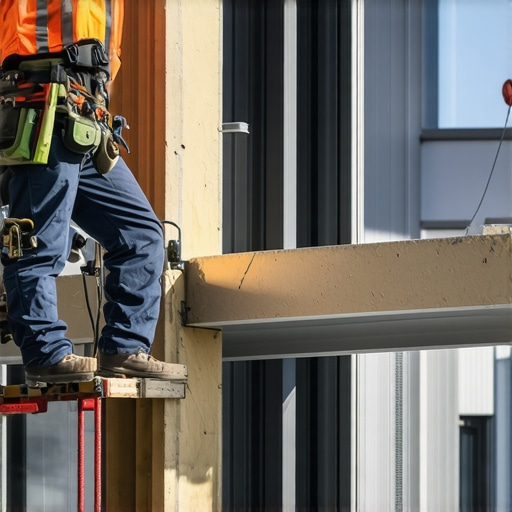
One of the most straightforward fixes is sistering—adding additional lumber alongside existing joists. Cut new 2×8 or 2×10 joists to match the length of the sagging ones, then secure them with high-strength nails or screws. Use construction adhesive to bond the new joist to the existing one for added stability. I used this method in my project, attaching sister joists with corrosive-resistant nails, which immediately improved the floor’s levelness.

Ensure Proper Spacing and Support
Place shims or additional posts beneath the joists if they span unsupported distances. Installing new posts on adjustable jacks allows for precise leveling. When I added adjustable post supports during my repair, I was able to raise and support the sagging joists gradually, avoiding structural stress and ensuring a level floor.
Use Structural Reinforcements like Installing Blocking or Hangers
Adding bridging or blocking between joists distributes loads more evenly. Metal joist hangers can also secure joists directly to beams, preventing future sagging. For my home, I installed metal hangers to secure the joints, which provided immediate reinforcement and peace of mind.
Always verify local building codes and consider consulting a structural engineer if the sagging is severe. Proper reinforcement techniques avoid dangerous failures and uphold your home’s safety standards. For detailed permit and code requirements, refer to this resource.
When it comes to new construction projects, many homeowners and even seasoned contractors fall prey to common misconceptions that can lead to costly mistakes. A widespread myth is that estimates and permits are just formalities, overlooked in the rush to start building. However, in my experience, overlooking the intricacies of accurate estimating and understanding permit nuances often results in surprises that derail projects or blow budgets. For example, many believe that simply multiplying area by a standard cost per square foot suffices for accurate budgeting, but this approach neglects variables like soil conditions, site access, and local permit fees, which can significantly alter costs. To avoid such pitfalls, it’s essential to deepen your grasp of cost estimation, including terrain challenges and regional regulations, which are often underestimated.
One common trap is assuming permits are straightforward and universally quick to acquire. In reality, permit processes are highly localized, with zoning variances, environmental restrictions, and building codes differing vastly across jurisdictions. As I learned from navigating permits in different cities, failing to account for these differences leads to delays and additional expenses. For instance, some areas require detailed soil tests or special foundation designs, which can delay approval if not anticipated upfront. To streamline this, you should review local permit requirements early and consult resources like permit approval tips to anticipate hurdles.
Advanced builders often reserve a significant portion of their budget for unforeseen costs, but many underestimate the risks related to estimating accuracy. Relying solely on simplified spreadsheet models or generic quotes without site-specific adjustments can be your downfall. For comprehensive strategies, refer to how to accurately estimate costs. Incorporating detailed site assessments — including soil stability, access roads, and existing infrastructure — enhances accuracy and builds resilience into your budget.
An often-overlooked nuance involves the permit authorization process, which can be unpredictable. Some permit offices use outdated review procedures or backlogs that extend approval times well beyond expectations. Modern project managers prioritize early communication with local authorities and leverage resources like navigating permits to reduce waiting times. Additionally, understanding that permit approval is a negotiation rather than a simple check-box can save frustration and money.
Let’s address the question: How can savvy builders mitigate these risks? The answer lies in proactive planning—obtaining detailed site analyses, establishing clear communication channels with permitting agencies, and integrating contingency funds tailored to these uncertainties. Recognizing that permits are a dynamic process rather than a static hurdle transforms the project planning paradigm.
Remember, mistakes in estimating and permitting can snowball into project delays, cash flow issues, and legal complications. As an experienced professional, I can attest that mastery over these areas is what separates smooth projects from disaster zones. For further insights, explore estimating for new builds and adding value through expert knowledge.
Have you ever fallen into this trap? Let me know in the comments.
Choose Reliable Equipment to Match Your Goals
Investing in high-quality, durable tools is fundamental for maintaining your home’s systems over time. I personally rely on a cordless drill with adjustable torque settings because it allows precise control when working on delicate fixtures or heavy-duty tasks without the hassle of cords getting in the way. For measuring, I prefer a laser level; it ensures accuracy across large surfaces, saving time and reducing errors. These tools have become indispensable in my routine, especially when performing ongoing maintenance or minor repairs.
Utilize Tech Software for Accurate Estimation and Scheduling
Keeping your home in top shape requires not only manual tools but also software that streamlines planning. I recommend using project management apps like Trello integrated with Estimating tools such as ContractorForeman. This combination allows me to track maintenance tasks, schedule inspections, and manage costs dynamically, preventing small issues from becoming costly emergencies down the line. Investing in good software can save sweat equity and money, particularly when scaling or adding on to your existing structure.
Implement Routine Checks and Preventative Maintenance
Over years, systems like HVAC, plumbing, and electrical wiring naturally degrade. A proactive approach involves regular inspections—checking for leaks, abnormal noises, or corrosion before they escalate. For example, I schedule biannual HVAC filter replacements and seasonal plumbing inspections, which extend the lifespan of these critical systems and improve efficiency. Employing the right tools, such as a moisture meter or thermal camera, can help diagnose issues early and prevent expensive repairs later.
Stay Updated with Regulations and Next-Generation Technologies
Since building codes and best practices evolve, staying informed is key to sustainable home maintenance. I subscribe to industry updates and participate in local builder associations. A recent trend I follow is the integration of smart home tech, like leak detectors and remote monitoring systems, which constantly scan for issues. These innovations can alert you instantly to problems, allowing prompt action—saving both time and money. For example, installing a smart water sensor can prevent extensive water damage by notifying you in real-time of leaks, especially when you’re away.
How do I maintain complex systems over time?
Developing a maintenance schedule based on the manufacturer’s recommendations and your local climate is essential. Keep detailed records of repairs, upgrades, and inspections. Regularly replacing filters, cleaning components, and verifying connections ensures systems operate efficiently. For scaling, consider modular upgrades rather than complete overhauls—this approach reduces costs and minimizes disruption. A good example is upgrading ventilation systems gradually instead of all at once—tailored plan tailored to your home’s needs. Embracing modern tools and informed maintenance routines will prove more cost-effective in the long run.
To deepen your understanding, check out this guide on precise estimation techniques or explore navigating permits effectively to ensure your upgrades stay compliant. Start by testing one smart monitoring device this month—it’s a simple but powerful step toward sustainable home management.
The Hardest Lesson I Learned About New Builds and Permits
One of the most profound lessons I realized is that rushing through estimating or permit approval can silently undermine your entire project. I once underestimated soil variability, which led to costly foundation adjustments later. Patience and thorough assessment upfront save both money and stress.
How I Uncovered My Blind Spots with Structural Fixes
Initially, I believed adding supports was straightforward until I learned that each home has unique load paths. Consulting with experienced engineers helped me avoid future issues and ensured my repairs lasted. The magic lies in understanding your home’s specific needs, not just generic solutions.
A Deep Dive into Permits That Changed My Approach
The biggest eye-opener was realizing permits aren’t just bureaucratic hurdles—they are safeguards. Early engagement with local authorities and understanding nuanced requirements, like soil testing or elevation certificates, prevented delays and fines. Think of permits as your home’s health certificate, not just paperwork.
My Toolkit for Accurate, Cost-Effective Estimating
Over time, I curated tools like detailed checklists and regional cost databases that helped me avoid surprises. Combining reliable software with on-site assessments and regional data made my budget predictions more precise, keeping my projects on track and within scope.
Designing a Sustainable, Future-Ready Home
Investing in modern monitoring and maintenance routines has empowered me to extend my home’s lifespan. For example, installing smart leak detectors and scheduling regular inspections have saved me from costly repairs. Being proactive now makes future upgrades smoother and more affordable.