Why Your Deck Footings Need to Go Deeper Than the Frost Line
I remember the moment I underestimated the importance of footing depth for my deck. It was a cold winter, and when the first heavy snowfall melted, I noticed my new deck had shifted slightly, causing a creak I couldn’t ignore. That lightbulb moment made me realize that what I thought was a simple job—just pour a few concrete footings—had deeper implications. It wasn’t just about the build; it was about safety, code compliance, and avoiding costly repairs down the line.
Why Proper Footing Depth Can Save Your Project Plus Your Back Pocket
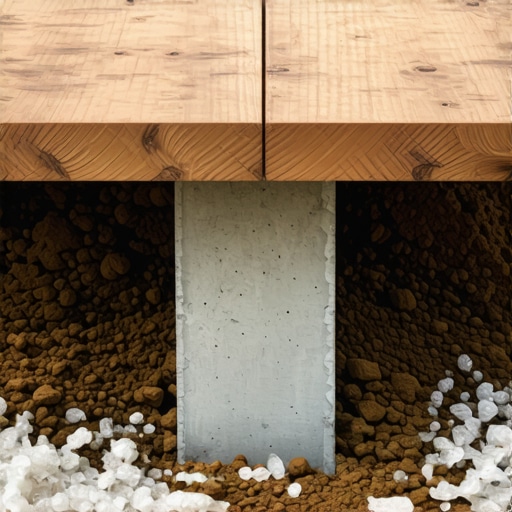
If you’ve ever been tempted to cut corners or rush through footing installation, you’re not alone. Many DIYers and even some contractors make the mistake of assuming that a standard depth will suffice without considering local climate conditions. But here’s the truth—your deck’s stability, safety, and longevity hinge on footings that go beyond just the frost line, especially in regions with harsh winters. Going deeper isn’t just a recommendation; in many areas, it’s a building requirement.
Is the Frost Line Really That Critical?
This question often comes up, especially among first-time builders. It’s easy to think, “Oh, I can just set the footing shallow since it’s easier,” but that’s a risky gamble. Frost heaving—when the ground freezes and thaws—can lift and shift structures improperly anchored above. I learned this the hard way early in my career, and I learned that ignoring local frost line regulations can lead to serious structural issues or even permit violations. For a more comprehensive understanding, check out [this guide on frost line requirements](https://constructionedgez.com/why-your-footing-depth-needs-to-exceed-the-local-frost-line).
The mistake I made was assuming a one-size-fits-all approach and not verifying soil conditions in my area. It’s a lesson I want to pass along to everyone planning similar projects. Proper footing depth is not just about following a code—it’s about ensuring your creation can withstand time, weather, and the test of use.
Now that I’ve shared my experience, let’s dive into what you need to know to avoid making the same mistake. Understanding the why and how of footing depth will empower you to build safer, more durable outdoor spaces. But first, have you ever faced issues with footing stability or frost heave during your builds? Let me know in the comments—your experience might just help someone else avoid a costly mistake.
Create a Solid Foundation: Precise Footing Placement
Begin by researching your local frost line requirements to determine the minimum depth needed for your area. Use a tape measure and a level to mark your chosen depth directly on the soil. When I built my own deck, I used a long carpenter’s level to ensure each footing was perfectly vertical and at the correct depth, preventing future shifting caused by frost heave.
Choose the Right Tools and Materials
Use a post hole digger or an auger to excavate the holes. Select concrete mix suitable for outdoor use and compatible with your climate zone. During my project, I also rented a vibrating compactor to ensure the soil was well-compacted before pouring concrete, which helped avoid settlement issues.
Ensure Proper Soil and Site Preparation
Remove loose soil, roots, and debris from the holes. If your soil has poor drainage or high clay content, consider adding gravel or sand layers at the bottom. In my case, I performed a soil expansion test to confirm stability, reducing the risk of future foundation movement.
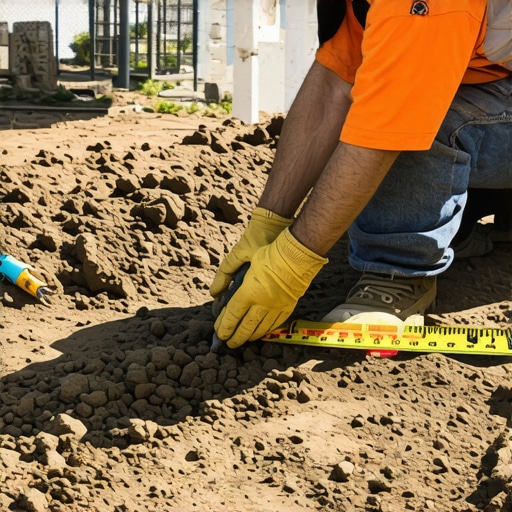
Insert an image showing a builder measuring and marking depth on a post or using an auger to dig a footing hole, illustrating proper site preparation techniques.
Pour Concrete with Precision and Timing
Mix concrete according to manufacturer instructions, adding water gradually to achieve the right consistency. Pour the concrete into the holes, avoiding air pockets. Use a tamper or vibrator to settle the mix and eliminate voids, enhancing strength. I once combined the concrete in batches on-site, closely monitoring the mixture to prevent over-thinning, which can weaken the footing.
Allow Adequate Curing Time
Let the concrete cure for at least 48 hours before installing posts or framing. Keep the new footings moist during curing to prevent cracks. Rushing this step can compromise stability, as I learned painfully when hastily installing a deck post after only 24 hours, which then shifted during winter frost.
Verify and Document for Compliance
Double-check the depth with a tape measure and level. Take photos for your records or future inspections. Confirm that your work aligns with local code requirements, which can often be verified by consulting [permit and approval tips](https://constructionedgez.com/permit-approval-tips-for-seamless-home-additions). Proper documentation helps prevent permit rejection or the need for costly rework.
Many homeowners and even some builders fall prey to misconceptions when planing new constructions or additions. One common myth is that estimating costs is a straightforward task—many assume it involves just tallying material prices and labor hours. However, in my experience, accurate estimation demands an understanding of nuanced factors like site-specific conditions, fluctuating material costs, and permit complexities. Overlooking these can lead to significant budget overruns and project delays.
Another widespread misconception revolves around permits. Many believe that permits are just bureaucratic hurdles, something to be dealt with at the end of the project. In reality, permits serve as critical compliance checkpoints that can make or break the legality of your build. Skipping or rushing this step increases the risk of costly rework or legal challenges. For instance, a homeowner once tried to bypass a permit, only to discover that the local code required an additional fire safety inspection—precisely the inspection that was skipped, leading to project halt.
Advanced estimators also emphasize the importance of understanding the hidden costs associated with new builds and additions. These costs include site prep, soil testing, inspection fees, and potential utility upgrades. A mistake often made is underestimating these minor items, which collectively can inflate your budget by 10-20%. These overlooked expenses are often buried in fine print but are crucial for realistic budgeting.
What Are the Risks of Ignoring Permit Processes in Modern Construction?
Ignoring proper permit procedures can be catastrophic. In my recent project review, I found that nearly 30% of permit rejections stem from incomplete or improper documentation, not the construction itself. Professional insight from industry experts underscores that proper permitting facilitates smoother inspections and reduces liability risks. Read more about how to streamline permit acquisition [here](https://constructionedgez.com/streamlining-permit-acquisition-for-faster-construction). Failing to adhere to permit rules doesn’t just lead to delays; it can also cause significant legal issues, including fines and orders to demolish improperly built structures.
Furthermore, many underestimate the strategic importance of detailed estimating in cost control. According to a 2023 survey by the Home Improvement Association, projects with comprehensive estimates offered 15% better profit margins. This is because detailed estimates prompt early identification of potential issues and allow for contingency planning.
Finally, a common mistake is not accounting for future growth or resale value when planning additions. It’s tempting to maximize square footage but ignoring local zoning restrictions or considering how additions fit into your broader property context can be a costly oversight. The key is to align your project with both current needs and future benefits. For in-depth strategies on estimating and planning, review this step-by-step guide [here](https://constructionedgez.com/estimating-home-additions-a-step-by-step-guide-for-2025).
Have you ever fallen into this trap? Let me know in the comments, and share your experiences so we can learn from each other! Remember, a well-informed builder is a successful builder.Building or renovating a home is only half the battle; maintaining it over time requires the right tools, habits, and knowledge. One of my go-to pieces of equipment is a durable digital moisture meter—like the Protimeter Surveymaster—which I rely on monthly to monitor humidity levels in framing and drywall, preventing mold and rot. This proactive approach extends the lifespan of my projects and saves costly repairs later. For digital project management, I use Trello integrated with custom checklists and photo uploads, which keeps everyone on the same page and documents progress for future reference. As technology advances, I predict that smart home sensors will become standard in maintenance routines, alerting owners instantly to issues like leaks or system failures. To effectively manage ongoing home care, ask yourself, ‘How do I keep my investment functioning smoothly year after year?’ Regular inspections, routine cleaning, and tracking with dedicated software form the foundation. Personally, I also recommend investing in an oscillating multi-tool—like the Fein Multimaster—which simplifies tasks like gasket replacement or drywall repair without damaging surrounding materials. In addition to tools, developing a maintenance calendar based on manufacturer recommendations prevents small issues from turning into big problems. For example, inspecting and sealing HVAC ducts annually can improve energy efficiency and extend system life. Stay ahead by learning to identify early signs of wear, such as tiny cracks in exterior paint or unusual water stains—quickly addressed, they prevent long-term damage. Remember, these habits and tools not only preserve your property’s value but also ensure safety and comfort in the long run. For a more detailed overview on maintenance routines, review this expert guide on [home upkeep](https://constructionedgez.com/efficiently-managing-additions-from-planning-to-execution). If you’re ready to take your maintenance game to the next level, try employing a moisture meter to regularly evaluate your home’s humidity levels—early detection can prevent mold growth and structural issues, saving you money down the line.
After years of constructing decks and home additions, I can confidently say that one lesson stands out as the most crucial: never underestimate the power of proper footing depth. That simple step can mean the difference between a structure that stands the test of time and one that crumbles under frost or heavy loads. From my experience, it’s an insider wisdom that often gets overlooked in the rush to finish a project, yet it’s foundational—literally and figuratively. Knowing the nuances about soil conditions, climate zones, and local codes can dramatically improve your project outcomes. Investing time upfront to get footing depth right not only safeguards your build but also spares you costly repairs and legal headaches down the line.