The Specific Drainage Slope Required for Exterior Patios
I remember the moment so clearly—after pouring my new patio, I stepped outside and noticed a small puddle forming right where I hadn’t expected. At first, I thought it was just a minor oversight, but weeks later, the water pooled even more, threatening to undermine the entire project. That lightbulb moment made me realize something crucial: the importance of getting the drainage slope right from the start.
When I first built my patio, I didn’t pay enough attention to the specific drainage slope requirements. I thought I could wing it, assuming a gentle pitch would suffice. Turns out, improper slope can lead to standing water, damage to the structure, and even costly repairs down the line. If you’re planning an exterior patio, understanding the correct drainage slope isn’t just a technical detail—it’s the foundation of a long-lasting, functional space.
Today, I want to share with you how to determine the right drainage slope for your patio, so you can avoid the pitfalls I experienced. Proper drainage ensures water flows away from your home and patio, protecting your investment and keeping your outdoor space usable and safe.
The Critical Role of Proper Drainage Slope in Exterior Patios
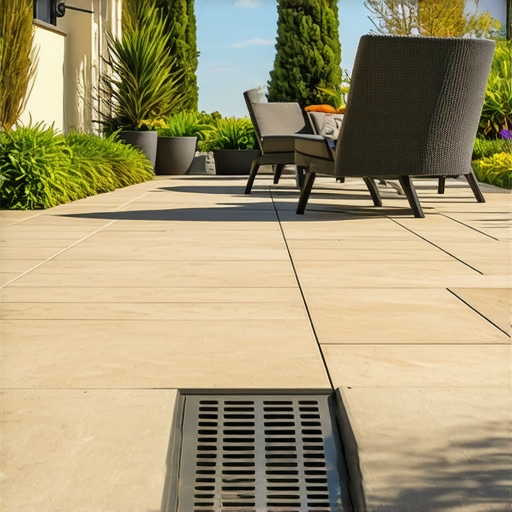
Getting your drainage slope right begins with knowing the standard practices and rules. Typically, a slope of 1/4 inch per foot (about 2%) is recommended for patios, but this can vary depending on your soil type, climate, and the design specifics. An insufficient slope might lead to water pooling, which accelerates erosion and promotes mold or moss growth. Conversely, too steep a slope can cause water to run too quickly, leading to erosion or damage to adjacent structures.
**Have you ever built something and later regretted not paying attention to how water would flow?** If so, you’re not alone. Many homeowners and even some builders overlook the importance of drainage, which turns into expensive problems down the road. To get it right the first time, understanding the precise drainage slope requirements and how to measure them is essential.
Early in my project, I made a mistake I want to help you avoid: I assumed that a gentle tilt was enough without verifying the exact slope. This led to water pooling at the base of my steps, trying to seep into my foundation—an experience I wouldn’t wish on anyone. The mistake taught me that thorough planning and adhering to proven standards are crucial. You can read more about the importance of proper site preparation, including drainage, [here](https://constructionedgez.com/streamlining-permit-acquisition-for-faster-construction).
Next, we’ll look into how to determine the right slope for your patio, including some simple tools and techniques. Ensuring your project has the correct drainage slope now will save you headaches and money later. Ready to tackle this essential step with confidence?
Measure Your Site Before You Begin
Start by assessing your patio area with a simple level and a tape measure. Imagine you’re a surveyor mapping out a landscape; your goal is to identify the low and high points accurately. Mark these with stakes or chalk lines. This initial step is crucial, as it sets the foundation for your slope calculations. I once skipped this step and ended up with uneven water runoff, leading me to redo the entire layout. Proper measurement ensures your drainage slope directs water away effectively.
Determine Your Desired Slope
The standard drainage slope is 1/4 inch per foot—think of it as a gentle hill guiding water downhill. To visualize, if your patio is 12 feet wide, the height difference from one end to the other should be 3 inches (12 feet x 0.25 inches). Use a straight board or a string line to visualize this grade across your site. Precise calculations prevent pooling and erosion. I recommend double-checking these measurements with a level to avoid costly mistakes later.
Calculate the Total Height Difference
Multiply the length of your patio by the slope rate. For example, if your patio is 20 feet long, multiply 20 by 0.25 inches to get a 5-inch slope. This calculation ensures water flows properly. Remember, small inaccuracies can lead to standing water; therefore, use a measuring tape and a level to verify your calculations. I once miscalculated and had to redo part of my patio because water was not draining properly, which was an expensive lesson.
Mark the Slope on Your Surface
Use stakes and string to lay out the slope line across your site. Imagine drawing a gentle ramp from the high point to the low point—this visual guide helps ensure consistent grading. Adjust as needed, confirming with a level and tape measure. Proper marking is vital; if you skip this, you risk creating uneven drainage. Once marked, you can transfer these lines to the surface to guide your site preparation.
Excavate and Prepare the Base
Remove soil and debris down to your marked grade, ensuring the surface is smooth and compacted. Think of it as sculpting a shallow trough for water to flow properly. Compact the base material thoroughly to prevent future settling that could alter your slope. During my project, I used a tamper to ensure stability, which helped maintain the slope over time. Good preparation prevents future drainage problems and protects your investment.
Install Your Pavers or Surface Material Carefully
Lay your surface material, making sure it follows the graded slope. Use a level on each section as you go, constantly checking that the pitch remains consistent. Small adjustments during installation can make a big difference. I recommend periodically stepping back to view the overall slope, preventing subtle deviations that could cause water to collect. Proper installation is key to maintaining the drainage slope long-term.
Test Your Drainage System
After completing the surface, test your work by pouring water along the slope. Watch how it flows—if it pools or runs improperly, re-evaluate your grading. Think of it as a trial run for your drainage; adjustments may be needed. In my case, a quick water test revealed a minor dip, which I corrected with additional gravel fill. This step ensures your patio effectively redirects water away from your foundation and landscape.
Consult Local Regulations and Experts
Always verify your plan aligns with local building codes and drainage standards. For complex projects, consider contacting professionals via [Construction Edgez’s contact page](https://constructionedgez.com/contact-us). Ensuring adherence to regulations prevents future legal issues and guarantees longevity for your structure. I’ve found that a quick consultation can save time and money, especially for larger or slope-sensitive sites.
Many homeowners and even some builders believe that estimating and permitting processes are straightforward tasks—simply get the permit, buy the materials, and execute. However, in my experience, this oversimplification often leads to costly mistakes. One critical nuance many overlook is the underestimation of hidden costs and the complexity of permit requirements, which can vary significantly by locality. For example, a study by the National Association of Home Builders highlights that permit delays can extend project timelines by up to 30%, dramatically increasing costs and frustration.
What Advanced Estimators Know About Permitting Risks
Let’s dig deeper: seasoned project managers don’t just count material prices and labor hours—they build contingencies for permit-related surprises, like additional inspections or overlooked code updates. An often ignored aspect is the evolving nature of local regulations. Many assume that permit requirements remain static, but jurisdictions regularly update codes, impacting project scope and costs. To stay ahead, proactive consultation with local authorities and experts is vital. For guidance on navigating these changes, consider reaching out via our contact page or diving into dedicated resources such as Navigating Permits and Streamlining Permit Acquisition. Another common misconception is that the initial estimate should include all future costs, but in reality, a dynamic, flexible approach is needed. Incorporating a reserve fund for unforeseen permit issues ensures the project can adapt without financial strain, especially when latest code amendments are not yet reflected in initial plans. Consider that many underestimated expenses originate from permit delays or additional testing, which might not be apparent at the project’s outset. As emphasized in Mastering New Build Estimating, detailed risk assessment enhances accuracy and reduces surprises. Ultimately, understanding that permitting is not just a bureaucratic hurdle but an integral part of project design and execution is key. It’s worth engaging experts early, not just to avoid fines or delays but to ensure your build aligns perfectly with all regulations. Use these insights to refine your approach—because your project’s success depends on it. Have you ever fallen into this trap? Let me know in the comments.
Keep Your Drainage Systems in Prime Condition
Once you’ve established a proper drainage slope and installed your surface materials, the next step is ensuring your system remains effective over time. Regular maintenance is key to preventing water pooling, erosion, and potential structural issues. Start by inspecting your drainage channels, grates, and outlets at least twice a year, especially after heavy storms. Clear out leaves, debris, and any blockages that can impede water flow. I personally recommend investing in a high-quality debris removal tool like the RIDGID Soil Pipe Cleaning Brush, which makes cleaning out clogged pipes and outlets efficient and straightforward. This proactive approach minimizes repair costs and maintains the integrity of your landscape.
In addition, consider installing a perforated drain pipe beneath your surface layer. This pipe effectively directs excess water away from your foundation and patio. It’s vital to ensure that the pipe’s perforations are free of silt and debris, which can be checked using a garden hose and a small inspection camera—a tool I wouldn’t go without. Making minor repairs, such as re-fixing loose grates or sealing minor cracks, prolongs the lifespan of your drainage system. Trends suggest that incorporating smart sensors and monitoring devices into your drainage network could be the next step in maintenance, allowing real-time alerts for blockages or failures, significantly reducing long-term risks.
How do I maintain my drainage system over time?
Developing a routine inspection schedule and using specialized tools for cleaning and monitoring will keep your drainage system functioning effectively for years. As maintenance technology advances, adopting smart monitoring solutions will provide early detection of issues, saving you from costly repairs. For complex systems or if you’re unsure about your current setup, consulting with a professional can be invaluable. Reach out to experts via our contact page to discuss tailored maintenance strategies or upgrades. Remember, a well-maintained drainage setup protects your investment and keeps your outdoor space safe and usable for the long haul. Don’t wait for problems to arise—start your maintenance plan today and stay ahead of potential issues.
The Hidden Truths That Changed My Approach to Build Planning
One of the toughest lessons I learned was that overlooking the nuances of slope measurement can dramatically affect a project’s success, leading to unexpected costs and repairs. I once thought a slight tilt was enough, but detailed experience showed that precision in drainage slopes prevents future headaches. This insight transformed my entire planning process, emphasizing thorough site assessment and accurate calculations before breaking ground.
Another revelation was that even small miscalculations in slope calculations can cause significant pooling of water, which accelerates deterioration and erosion. Investing time in proper tools and double-checking measurements saved me days of repairs later. It’s a reminder that meticulous attention to detail at the beginning preserves long-term peace of mind and structural integrity.
Finally, collaboration with local experts and adherence to regulations proved invaluable. Staying informed about current codes and seeking advice early ensures compliance and avoids costly permit delays. This proactive approach, combined with continuous learning, not only smooths the construction process but also builds confidence that your outdoor space will withstand years of weathering.
My Essential Toolkit for Drainage Success
Over the years, I’ve found that certain tools and resources are indispensable for mastering drainage slopes. The first and most trusted one is the cost-effective estimating techniques, which help me plan accurately from the outset. A high-quality laser level, like those from Leica or Bosch, ensures precision over long distances, making slope measurement straightforward and reliable.
For learning and reference, I turn to reputable guides such as The Complete Guide to Permitting for New Builds and Additions. It keeps me updated on code changes and best practices, preventing costly oversights. Lastly, engaging with local expertise through Navigating Permit Requirements ensures compliance and smooth approvals—saving time and money. Combining these resources has been instrumental in elevating my build quality and confidence, especially when tackling complex site conditions.