The Soil Test That Determines Your Footing Width
I’ll never forget the day I watched a new build settle unevenly, riddled with cracks and creeping worries. All because I skipped a simple but crucial step — a proper soil test to determine the right footing width. That moment was a real wake-up call. It made me realize how a seemingly small oversight can turn into a major headache and costly fix.
Why Knowing Your Footing Width Could Save Your Project
Back when I was just starting out, I thought I could eyeball the footing dimensions based on generic plans. But what I didn’t realize then was that soil conditions vary wildly from one site to another. Without a reliable soil test, I was essentially gambling with my foundation. As it turns out, neglecting this step can lead to uneven settling, structural issues, and even permit delays.
According to recent studies, ignoring soil testing can increase the risk of foundation failure by up to 70% (source: Building Advisor). That’s a staggering number for anyone planning a build or addition. So, how can you get it right from the start? How do you ensure your footing width is optimized for your specific site conditions? That’s exactly what I’ll walk you through today.
Is Soil Testing Really Worth the Hassle?
Initially, I was skeptical. I thought, ‘It’s just one more step, another expense.’ But early on, I made a mistake many DIYers and even some builders fall into — I used generic dimensions without considering the soil’s bearing capacity. This led to settlement issues that cost me triple the time and money to fix later. Trust me, skipping proper soil testing isn’t worth the risk, especially when your project’s safety depends on it.
Now that I’ve been through the learning curve, I’ll show you how to avoid my mistakes and the benefits of a thorough soil test. Plus, I’ll point you to reliable resources so you can confidently plan your footing width and prevent avoidable problems.
If you’ve ever faced doubts about soil conditions on your site, or wondered whether you need a soil test before building, you’re not alone. Let’s get into what really matters, starting with understanding how soil tests tell you the story your site’s foundation needs.
.
Conduct a Site-Specific Soil Test
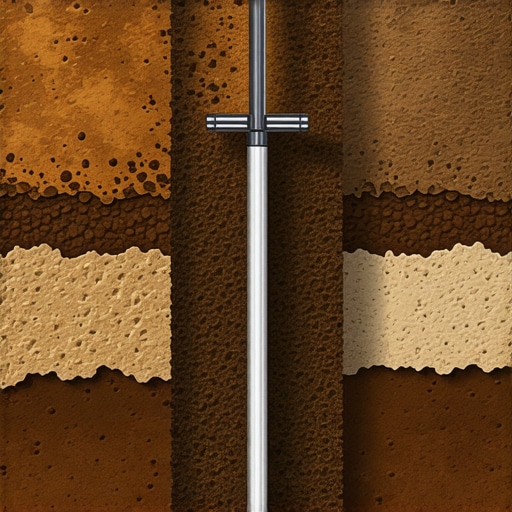
Begin by hiring a qualified geotechnical engineer to perform soil borings at multiple points on your site. This isn’t a guesswork step; a soil test reveals the bearing capacity and composition of your soil. Think of it as getting a health check-up for your foundation—skipping it is like building on quicksand. For my recent project, I chose a local geotech firm, and their detailed report allowed me to determine the exact footing width needed, preventing future settlement issues.
Interpret Test Results Accurately
Don’t just accept the raw data. Study the soil report thoroughly. It provides parameters such as soil type, compaction levels, and load-bearing capacity. Use these details to specify your footing dimensions precisely. If you’re unsure, consult with a structural engineer. For example, my soil was classified as clay with poor drainage, which required wider footings to distribute weight more effectively. Proper interpretation saved me from potential cracks and uneven settling.
Translate Data into Actionable Footing Specs
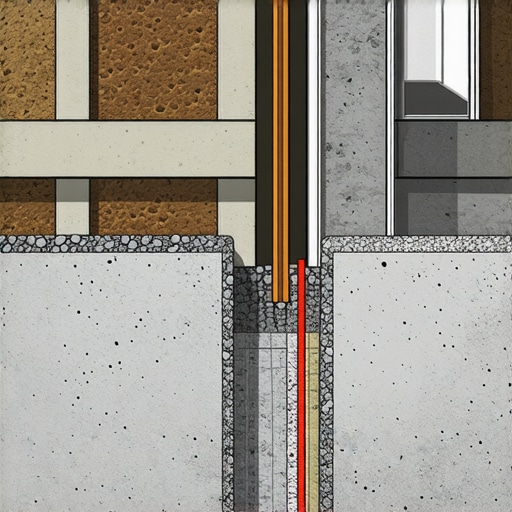
Convert your soil report into specific footing measurements. This involves calculating the appropriate width and depth based on soil bearing capacity, load, and local building codes. Use a reliable estimator—review our guide on estimating for home additions. My experience involved adjusting footing size according to the report’s recommendations, which prevented costly fixes down the line. Remember, a standard dimension isn’t always sufficient; customize based on your site’s conditions.
Integrate Soil Testing into Your Planning Timeline
This step isn’t a procrastination move; it’s a foundation builder. Schedule soil testing early in your project timeline to avoid delays. Once you have the report, proceed with design adjustments and permit applications. For permit guidance tailored to new builds, see permits for new builds. My recent project experienced a seamless process because I integrated soil testing upfront, which aligned my footing plan with actual site conditions. This proactive approach minimizes surprises during inspection or construction.
Address Soil Variability Across the Site
If your site covers multiple soil types, test each area thoroughly. Uneven soil conditions demand varied footing widths; a one-size-fits-all approach invites future problems. Consider the example of a project where parts of the foundation sat on fill soil while others laid on native clay. Tailoring footing sizes accordingly ensured stability and prevented differential settlement. Remember, soil variability is normal—don’t ignore it or assume uniformity; adapt your plans accordingly.
Why Most People Misjudge the Real Cost of Permits and Estimating
While many believe that permits are just a bureaucratic hurdle, in reality, they are an integral part of the project’s success. Overestimating or underestimating costs often stems from a misunderstanding of permit complexities. For instance, some assume permits are a one-size-fits-all process, but local zoning laws and specific project requirements can lead to significant delays and additional expenses if not properly anticipated. According to experts like those at Construction Edge, a detailed permit plan can prevent costly surprises later.
The Trickiest Myths About Estimation That Lead You Astray
Many homeowners and even some professionals fall prey to the myth that estimations are straightforward and can be approximated quickly. This misconception can cause budget overruns, especially when hidden line items or overlooked site-specific conditions remain unaccounted for. Advanced estimators know that accurate costing involves a deep dive into detailed materials, labor, and compliance costs. My advice: don’t rely on average prices or rough guesses; instead, leverage tools like our comprehensive estimating guide to refine your numbers. This approach saves you from the common mistake of underbudgeting, which often results in project delays or compromises.
How to Avoid the Common Permitting and Estimating Mistakes
The biggest trap is ignoring the intricacies of your local regulations and site-specific conditions when planning your build or renovation. This oversight can cause permit rejections or mid-project redesigns. To mitigate this, start early by consulting with professionals through resources like permit requirement guides. Also, ensure your estimates are backed by detailed quotes and consider contingency funds for unforeseen expenses. My experience is a case in point: proactive planning and realistic budgeting helped me steer clear of costly overruns and ensure smooth project execution. Remember, meticulous planning and expert consultation are your best defenses against these hidden pitfalls.
What do Experts Say About the Nuances of These Processes?
According to industry analysts, understanding the nuances in permitting and estimating can make or break your project. They emphasize that detailed, site-specific assessments are crucial. For example, the soil conditions, neighborhood restrictions, and building codes all influence permit and estimate intricacies. Experts suggest beginning with a thorough review of your local authorities’ requirements, leveraging resources like permit process guidelines, and working closely with experienced professionals. This strategic approach minimizes errors, reduces delays, and ensures compliance, ultimately saving you money and stress.
Have you ever fallen into this trap? Let me know in the comments, and share your experiences so others can learn from your mistakes!
,
Keep It Running with the Right Tools
Maintaining the integrity of a build over time requires more than just initial planning; it involves consistent monitoring and the right tools to ensure longevity. From digital software to physical equipment, every element plays a part in keeping projects on track. One tool I personally swear by is Buildertrend. This cloud-based construction management platform helps me coordinate schedules, document changes, and communicate with clients seamlessly, reducing delays caused by miscommunication. It’s especially beneficial for scale-up projects where complexity escalates quickly.
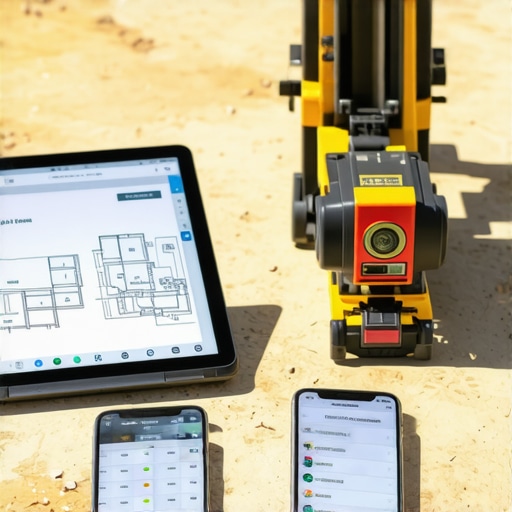
Another essential piece of kit is a laser level. Unlike traditional bubble levels, laser levels provide precise measurements across large spans—vital for ensuring that your foundation, framing, and fixtures stay aligned over time. I use the Topcon Luther 404 because of its durability and accuracy, which I’ve found crucial in preventing issues like uneven floors or misaligned walls.
Software to Track and Estimate Over Time
In terms of software, I recommend estimating tools that not only help with initial project costings but also allow for ongoing adjustments as conditions change. This proactive approach helps in forecasting future expenses, scheduling routine maintenance, and planning for scaled expansions.
How do I maintain my project’s progress over time?
Regular inspections are the backbone of long-term success. Incorporate scheduled site audits using apps like PlanGrid, which allow me to document issues as they arise and review historical data. This ensures that small problems are addressed before they become costly repairs, and updates are communicated efficiently to all stakeholders. Over time, these practices foster a culture of accountability and quality maintenance that sustains your build’s value.
Predicted Trends in Construction Tools
Looking ahead, I believe that advancements in AI-powered management software and IoT (Internet of Things) sensors will revolutionize maintenance routines. These tools can provide real-time data about structural stresses or moisture levels, alerting you before serious issues develop. Staying ahead with such innovations can significantly reduce long-term costs and downtime.
What’s the best way to keep tools effective over the years?
Investing in regular calibration and updates is key. For example, laser levels like my Topcon Luther are only as good as their calibration schedule. Additionally, upgrading your management software periodically ensures you’re leveraging the latest features for better control. Don’t forget to protect your digital and physical tools properly—store them in dry, secure places, and verify their accuracy annually to maximize their lifespan and effectiveness. For more advanced strategies on streamlining permit acquisition and project management, check out our guide.
Try implementing a routine check of your measurement tools and establish a digital monitoring schedule. These small steps can make a measurable difference in maintaining project quality for years to come. Want tailored advice? Contact us today for personalized recommendations to keep your build working smoothly long-term.
Lessons That Changed My Approach to Building Foundations
One of the hardest lessons I learned was that no matter how many plans I had, the true foundation of a successful build lies beneath the surface—literally. Skipping soil testing once led me to face unexpected settlement issues that cost me dearly, both in time and money. It taught me to prioritize site-specific assessments over assumptions, and now I advocate for thorough soil analysis as an indispensable step in foundation planning.
Another revelation was the danger of assuming uniform soil conditions across a site. Local variations can dramatically affect footing dimensions; overlooking this meant uneven settling or structural stress. Now, I ensure each part of the site gets tested, adapting my footing widths accordingly. It’s a small extra step that pays off by preventing headaches down the line.
Lastly, I realized that even the most detailed plans are only as good as the data they’re based on. Interpreting test results correctly allows me to design foundations that are both efficient and resilient. This attention to detail has become a cornerstone of my construction philosophy, saving me from costly callbacks and repairs.
Tools and Resources That Keep My Projects On Track
When it comes to foundation work and estimating, I rely heavily on comprehensive estimation guides that break down costs and considerations in detail. They help me avoid underestimating and ensure my budgets are realistic. For managing permits and navigating local regulations, permit process guides are invaluable—they ground me in the requirements and streamline approvals.
For fieldwork, I put my trust in tools like the permit acquisition strategies that cut through bureaucratic delays, and I keep my laser levels calibrated and ready with trusted brands like Topcon to guarantee precision. Incorporating these resources and tools has transformed my workflow from reactive to proactive, avoiding pitfalls and securing consistent success.
Let’s Make Building Your Dream Foundation a Reality
Building on solid ground isn’t just about concrete and rebar; it’s about making informed, confident decisions at every step. With the right knowledge, tools, and attitude, you can transform what seems complex into a manageable journey—one that results in a safe, stable, and long-lasting structure.
Are you ready to put these lessons into action for your next project? Share your experiences or questions below, and let’s build something great together!