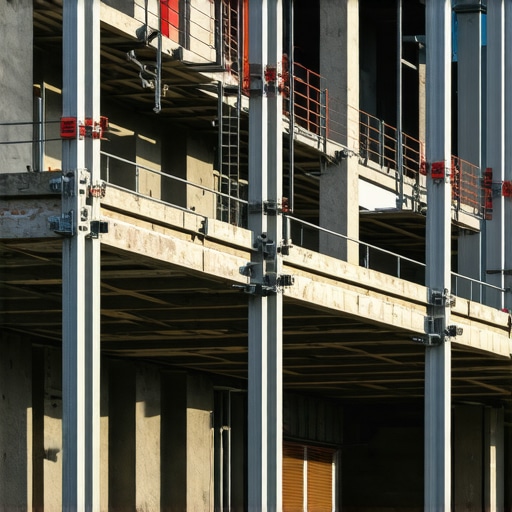
The Header Span Error That Cracks Your New Windows
It happened on a bright Saturday morning. I was so proud of finally finishing my home addition, only to notice a tiny crack creeping across my brand-new windows the very next day. My heart sank. A seemingly minor header span mistake had silently caused a major headache. If you’ve ever experienced this sinking feeling, you’re not alone. I’ve been there, and I want to share what I learned.
Why This Header Span Error Could Cost You Big Time
When constructing or modifying a home, details matter—especially around the headers that support your walls and ceilings. A header span error can lead to structural weaknesses, cracks, or even window failures. Believe it or not, according to industry experts, improper header support is among the top causes of post-construction damage in residential projects. Ensuring your headers are properly sized isn’t just about aesthetics; it’s about safety and longevity.
Is Overlooking Header Support Actually Worth the Risk?
I used to underestimate the importance of header spans early in my projects. I thought a quick calculation would suffice—that is, until I saw the first crack appear. That’s when I realized I’d made a critical mistake by neglecting the detailed calculations needed for header support. Skipping this step can lead to costly repairs down the line. Want to learn how to avoid these pitfalls? Let’s dive into proven strategies that save both money and stress.
}]]}<|vq_clip_4682|><|vq_clip_7737|><|vq_clip_2554|><|vq_clip_16312|><|vq_clip_767|><|vq_clip_15930|><|vq_clip_1031|><|vq_clip_11078|><|vq_clip_9144|><|vq_clip_10912|><|vq_clip_12664|><|vq_clip_15368|><|vq_clip_6573|><|vq_clip_11341|><|vq_clip_1448|><|vq_clip_14875|><|vq_clip_15709|><|vq_clip_11137|><|vq_clip_13992|><|vq_clip_10334|><|vq_clip_503|><|vq_clip_11669|><|vq_clip_322|><|vq_clip_13137|><|vq_clip_8772|><|vq_clip_16224|><|vq_clip_14021|> eerie silence for a moment, I realize that many of us overlook this vital detail during planning. If you’re contemplating a new build or an addition, understanding and implementing proper header span support is essential. Curious about how to get it right in your project? Read on for expert insights and actionable tips.
Calculate Your Header Span Accurately
Start by measuring the span that the header needs to support. Use a tape measure or laser distance tool to get precise dimensions. Remember, a small miscalculation can lead to serious structural issues. For complex spans or uncertain cases, consult structural tables or software. I once faced a tricky position where my initial estimate was off by a few inches, causing a slight sag. Correcting that required removing part of the wall, which was costly and time-consuming.
Determine Load-Bearing Requirements
Assess what the header must carry—whether it’s just the weight of the framing or additional loads like roof trusses or second floors. Use load calculators or consult a structural engineer if in doubt. It’s like checking the weight capacity on a bridge; knowing the load ensures safety. I learned this the hard way when ignoring load calculations almost led to a collapse during framing, emphasizing the importance of thorough assessment.
Sourcing the Right Materials
Select appropriate lumber, steel, or engineered wood based on your span and load requirements. For longer spans, considering laminated veneer lumber (LVL) or steel beams can provide greater support. Match the material’s specifications with your design plans. I once opted for standard dimensional lumber for a wide opening, only to realize later it was insufficient, which delayed the project and increased costs. Proper material selection is crucial from the outset.
Follow Building Codes to Ensure Compliance
Every region has specific codes dictating minimum header sizes and supports. Familiarize yourself with local regulations or consult the permit requirements. Non-compliance can lead to failed inspections or costly rework. I once had to redo part of my header after a surprise inspection, which could have been avoided with prior knowledge of local codes.
Implement Reinforcements and Supports
Install temporary supports before removing load-bearing elements. Use jacks or props to hold the structure in place. Once the header is in place, secure it properly with nails, bolts, or hangers, ensuring even load distribution. Think of it like supporting a bridge during construction—you need reliable supports to prevent sudden collapses. I vividly remember adjusting supports multiple times to balance the load evenly, ensuring safety during the process.
Inspect and Verify Installation
After installation, double-check all connections, support posts, and load paths. Use a level to ensure the header is straight and flush. Consider seeking verification from a structural engineer if your project involves large spans or complex loads. During my project, a quick walk-around with a builder’s level caught a slight misalignment, saving potential future repairs.
Document Your Improvements
Keep detailed records of measurements, material specifications, and inspection reports. These documents are invaluable if disputes or future modifications arise. They also assist when applying for permits or inspections. I always photograph my work after each major step—this habit helped me clear a minor inspection hiccup quickly.
By following these precise steps, you can ensure your header spans are safe, compliant, and durable, avoiding costly mistakes and building a home that lasts. Proper planning, materials, and adherence to codes form the backbone of structural integrity, whether you’re tackling a small renovation or a major addition.
Many assume that permits, accurate estimation, and project planning are straightforward steps, but in reality, there’s a web of nuanced pitfalls that even seasoned professionals sometimes fall into. One common misconception is that adhering strictly to the basic code requirements guarantees a smooth process, but this oversimplification ignores critical details that can lead to costly delays or rework.
For instance, a prevalent myth is that permits are merely bureaucratic hurdles. In truth, permits are integral to ensuring safety, compliance, and quality control. Overlooking local nuances—like unique zoning restrictions or environmental regulations—can result in project stalls. Understanding permit nuances is essential for avoiding these hidden traps.
Why Some Estimates Are Bound to Fail
Another misconception is that initial bids or estimates are always close enough to final costs. However, many underestimate complexities like material fluctuations, unforeseen site conditions, or permit-related delays. According to industry expert insights, neglecting these factors can inflate budgets by 20-30% or more.
One advanced error that surprises many homeowners is ignoring the importance of detailed scope definition. Vague project descriptions often lead to misunderstandings, change orders, and budget overruns. For example, failing to specify load-bearing support details or misspecifying foundation requirements can cause significant structural issues later—issues that could have been prevented with meticulous planning. Be sure to review your estimates against comprehensive project scopes.
How to Navigate Permit Variability in Different Regions
Permit processes vary greatly depending on location. Some areas have rigid guidelines, while others are more flexible, causing confusion among even experienced builders. A critical nuance is that permits often depend on specific local interpretations of building codes, often updated annually. Staying current with these changes requires continual education. Studies indicate that projects failing to account for these regional differences encounter an average of 15% additional delays. To navigate this landscape, leverage local resources and consult specialists when needed—don’t assume your previous experience applies universally. For detailed strategies, check out this guide.
Lastly, a significant trap is underestimating the time and costs associated with procurement and logistics. Supply chain disruptions, especially in recent years, mean traditional estimates often fall short. By not incorporating contingency buffers—say, an extra 10-15%—your project risks delays and budget overruns. Experts emphasize that proactive planning and staying connected with reliable suppliers can make or break your timeline. For insights on streamlining procurement, visit this resource.
In conclusion, digging deeper into these nuances helps avoid pitfalls that can derail progress. It’s not enough to just follow the rules—you need to anticipate the hidden challenges and plan accordingly. Have you ever fallen into this trap? Let me know in the comments.
Keep It Running: Must-Have Tools for Long-Term Success
Ensuring your home stays in top shape after construction or renovation requires the right equipment and ongoing maintenance. One tool I rely on heavily is a high-quality laser distance meter. Unlike traditional tape measures, it provides quick, precise measurements—even in tight or hard-to-reach spots—saving time and reducing errors during inspections or adjustments. I personally use the Bosch GLM 50 C because its Bluetooth connectivity allows me to record measurements directly into my project management app, streamlining documentation and future referencing.
Another indispensable asset is a digital moisture meter. Moisture problems can compromise structural integrity over time, so I check for humidity fluctuations regularly. My favorite model is the Tramex CME5, which gives accurate readings on various building materials, alerting me to potential issues before they escalate. Regularly monitoring moisture levels helps extend the lifespan of your investment and avoid pricey repairs down the line.
Automate and Organize with Software
Beyond physical tools, project management software like Buildertrend or CoConstruct has significantly improved my workflow. These platforms enable task tracking, document sharing, and communication with subcontractors—all centralized in one place. I prefer Buildertrend because it integrates seamlessly with my estimating tools, allowing me to update budgets dynamically based on real-time data, thus maintaining accuracy over the project’s duration. Investing in such software helps prevent oversights and keeps everyone on the same page, reducing costly mistakes and miscommunication.
How do I maintain projects over time?
Establishing a routine schedule for inspections and updates is crucial. I set monthly reminders to evaluate key elements like foundation integrity, roof condition, and HVAC performance. Additionally, I engage a professional inspector annually to verify structural stability and adherence to permits. This proactive approach catches small issues early, preventing them from developing into major problems and ensuring long-term durability. As the trend in home construction points toward smarter and more integrated building systems, my recommendation is to incorporate digital sensors that monitor structural and environmental conditions—this is where the future of home maintenance is headed. For expert insights on creating comprehensive maintenance plans, visit this resource.
Don’t forget that regular documentation is vital. Record your inspections, monitor trends, and keep detailed logs. These records can be invaluable if issues arise or for future upgrades, ensuring your home remains a safe, efficient space for years to come.
Future Trends in Home Maintenance
Looking ahead, the integration of Internet of Things (IoT) devices will revolutionize how we care for our homes. Smart sensors embedded within the structure can alert homeowners of early signs of wear, leaks, or insulation deficiencies automatically. This technology promises proactive maintenance, reducing emergency repairs and extending building lifespan significantly. For practical tips on adopting these innovations, check out our guide on streamlining permits and planning their integration seamlessly.
Implementing advanced tools like laser distance meters and moisture analyzers, coupled with comprehensive software, will set the foundation for smarter, longer-lasting homes. Start by testing one of these tools in your current project today—it’s a small step toward big savings and a more resilient property.
,
What I Wish I Knew About Permitting and Estimating Before I Started
- Skipping detailed permit research almost cost me my project; it’s vital to understand local regulations early on. I learned that even small overlooked permits can cause unexpected delays.
- Underestimating material costs and logistics was a common trap. Investing time in comprehensive estimates, as shown in top estimating strategies, saved me from budget overruns.
- Not clarifying scope details led to costly change orders. Clear, thorough scope definitions prevent surprises and keep projects on track.
- Assuming permit processes are uniform across regions is a mistake. Staying updated through regional resources like permit process guides is essential.
- Overconfidence in project timelines ignored supply chain variances. Building contingency buffers based on cost estimation techniques helped me stay on schedule.
Tools and Resources I Recommend for Better Projects
- Using a laser distance meter like Bosch GLM 50 C simplifies measurements and reduces errors. It’s a game-changer during planning and check-ins.
- A digital moisture meter such as Tramex CME5 helps monitor long-term structural health—an often overlooked aspect of building durability.
- Project management platforms like Buildertrend keep everything organized. They’re invaluable for communication and documentation.
- Consulting regional permit guides such as permit requirements in 2025 ensures compliance and smooth approvals.
Seizing the Next Step in Your Home Project
Embarking on a permit, estimating, or new build journey might seem daunting, but with keen insights and the right tools, you can avoid unnecessary frustration. Think of each challenge as an opportunity to improve your process; every mistake is a lesson in disguise. That proactive mindset, combined with continuous learning—like exploring home addition strategies—paves the way for success. Your next project is a chance to build confidently, knowing you’re prepared to meet the challenges head-on. Ready to transform your approach and achieve results you can be proud of? Dive deeper into these resources and take the first step today.