The Depth Requirement for Electrical Conduits Under Driveways
I still remember the moment I realized I had overlooked something crucial when wiring a new driveway installation. It was late in the job, and I was staring at a trench that I had just dug, contemplating whether I’d done enough to meet code—only to discover that I hadn’t considered the required conduit depth. That realization hit me like a cold splash of water. The last thing I wanted was an expensive rework after permits were in place and inspections scheduled.
Why Proper Depth for Electrical Conduits Matters More Than You Think
If you’re like me, you might assume that installing conduits beneath a driveway is straightforward—just dig, lay the pipe, and cover it back up. But the reality is, local building codes specify a minimum depth to ensure safety, durability, and long-term reliability. Failing to adhere to these standards can result in failed inspections, costly delays, or worse—electrical failures down the line that could compromise safety.
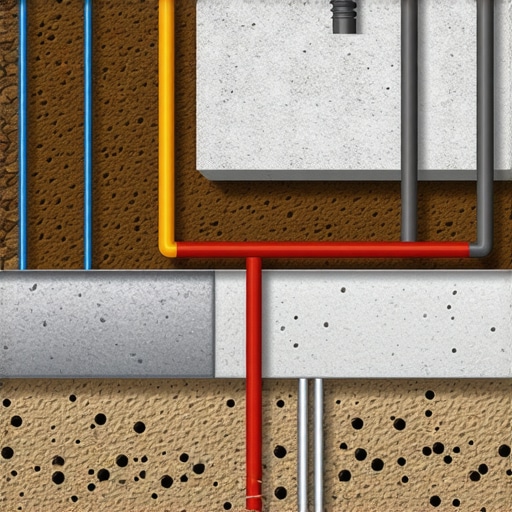
Based on my experience, and after doing some research, I learned that the depth requirements aren’t arbitrary. Proper conduit depth prevents accidental damage during future excavation, minimizes exposure to surface loads, and maintains the integrity of the electrical system. For example, certain codes require conduits to be buried at least 18 inches deep in residential areas, but this can vary depending on local regulations and soil conditions. Ignoring this can be a costly mistake, especially if you’re planning multiple projects that require driveway renovations or maintenance.
If you’re gearing up for a new build or driveway addition, I highly recommend you get familiar with your project’s specific requirements early on. Trust me, checking out [permitting and code guidelines](https://constructionedgez.com/permits-for-new-builds-essential-tips-for-your-project) can save you from headaches later. It’s always better to build right from the start than to correct mistakes that could have been prevented.
Is Your Driveway Conduit Installation at Risk of Failing Inspection?
Early on, I made the mistake of assuming that following general practices was enough. It wasn’t. Each jurisdiction has its nuances. My failure to double-check local codes nearly caused my project to stall, just as the inspector came knocking. Turns out, oversight in this step can lead to rework or even citations—something you definitely want to avoid. To build confidence, I suggest you review [navigating permit requirements](https://constructionedgez.com/understanding-permit-processes-for-new-building-projects) and make sure your planned conduit depth aligns with local standards.
Now that I’ve shared my experience, let’s dive into what it takes to ensure your electrical conduit installation under driveways meets all the necessary depth requirements, avoiding the pitfalls I encountered. Ready to get started?
,
Measure and Plan Before You Dig
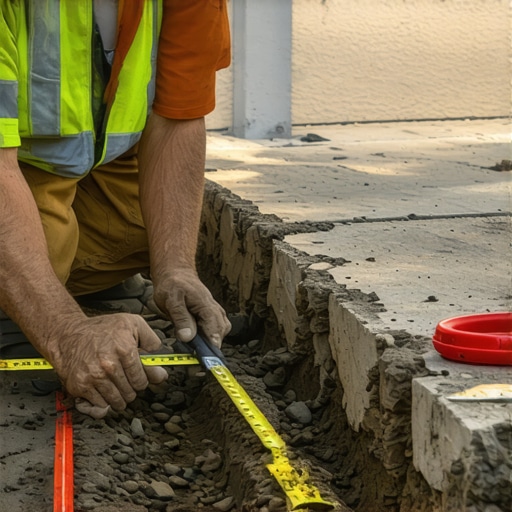
Start by referencing your local code requirements, which typically specify a minimum burial depth—often around 18 inches for residential driveways. Use a measuring tape and marking paint to outline the trench path accurately. I once used a laser distance meter to double-check my marks, preventing a costly mistake later. Precise planning ensures you’ll stay compliant and avoid rework.
Mark the Trench Line Clearly
Use spray paint or chalk to outline the trench. Visual markers help during excavation and prevent accidental deviation. During my project, I drew the trench line on the surface and double-checked dimensions against the blueprint, which saved me from having to redo sections where I had misaligned the conduit route.
Excavate with Precision
Use a mechanical trencher or mini excavator for accuracy, especially if the trench length is substantial. Keep the bottom as level and smooth as possible to prevent conduit damage. Remember, consistent depth is critical; a shallow spot could cause code violations, while excessive depth might weaken the ground. During my installation, I used a leveling guide to maintain a 20-inch depth, which kept me within code and avoided inspection issues.
Set a Reliable Depth Marker
Insert a rebar or stake at key points along the trench, indicating the required depth. This acts as a quick visual reference during the conduit laying process. Once, I used a chalk line stretched between stakes to ensure consistent depth throughout, which made the subsequent piping installation smooth and compliant.
Lay the Conduit Carefully
Place the conduit on a bed of fine gravel or sand to cushion it from sharp stones or soil. Use a level to check the depth periodically—your measurement from the surface to the top of the conduit should match your initial plan. When I did my project, double-checking the depth after laying each segment prevented surprises during inspection.
Backfill Methodically
Start by lightly covering the conduit with gravel or sand, then slowly fill the trench with soil, tamping it down to prevent settlement. Avoid dropping large rocks or uncompactable soil directly onto the pipe. My experience showed that proper backfilling avoids future settling issues that might expose the conduit over time. Stick to the required depth markings during this phase for consistency.
Final Inspection and Adjustments
Once backfilled, verify the depth with a tape measure at multiple points. If any sections are too shallow, remove soil and add gravel or other bedding material to restore proper depth. During one project, I realized a small section was shallow, so I carefully excavated and added more material, ensuring it passed inspection without issues.
Remember, adherence to these concrete steps helps prevent future problems, makes permit approval easier, and reduces the risk of costly rework. Always verify local code specifics, as they can vary between jurisdictions, and consulting your local permitting authority or [permit guidelines](https://constructionedgez.com/permits-for-new-builds-essential-tips-for-your-project) is a safe default. By following these precise procedures, you secure a reliable foundation for your electrical system, saving time and money in the long run.
While many homeowners and even some builders believe they have a solid grasp on new construction and additions, there are several overlooked nuances that can lead to costly mistakes. One prevalent myth is that estimating costs early and roughly is sufficient for project planning. In reality, detailed and accurate estimates—drawing from expert strategies like those discussed in top estimating techniques—are vital to avoid budget overruns.
Another misconception is that permit acquisition is merely a formality. In fact, navigating the permitting process requires a thorough understanding of local regulations, which can vary significantly, as explained in understanding permit processes. Failing to secure the correct permits or misunderstanding requirements often results in delays or fines, a trap many overlook until it’s too late.
How Can Overestimating or Underestimating Affect Your Project?
Meticulous estimation and permit compliance are intertwined—an underestimate can lead to unexpected expenses, while overestimating might tie up unnecessary capital. Interestingly, a study by Construction Economics Journal reveals that projects with detailed early estimates experience 25% fewer costly change orders (Construction Economics Journal, 2022). Proper estimation also involves considering hidden costs like utility adjustments, site accessibility, and future maintenance, which are sometimes neglected in casual planning.
Moreover, many assume that a straightforward addition or new build will proceed smoothly once plans are approved. But the truth is, overlooked factors like soil conditions, drainage, or structural reinforcements often trigger revisits and redesigns. These nuances are critical and can be mitigated by consulting specialists early and reviewing expert home additions resources.
For experienced builders or homeowners aiming for precision, it’s vital to look beyond the basics. Proper planning, accurate estimating, and understanding permit intricacies—covered extensively in estimating costs for new builds—are not just procedural steps; they are the backbone of a successful project. Remember, mistakes here can cascade into delays, increased costs, and compliance issues, which are seldom recoverable without significant rework.
Have you ever fallen into this trap? Let me know in the comments. The more we share our experiences, the more we can avoid common pitfalls and build smarter from the start.

Invest in Precision Measurement Tools for Long-Term Success
When it comes to ensuring your build stays on track, precise measurement is non-negotiable. I personally swear by the Bosch DLR165 Laser Distance Measure for its accuracy and ease of use. It reliably measures distances up to 165 feet, which drastically reduces the risk of errors that can cause costly rework down the line. Using a laser tool ensures that trench depths, framing dimensions, and layout lines stay consistent, saving time and money.
Leverage Construction Management Software for Better Coordination
In my experience, adopting software like Buildertrend or CoConstruct has transformed project organization. These tools help track permits, schedule inspections, and communicate with subcontractors seamlessly. The real value comes from their ability to generate detailed reports, keep everyone aligned, and catch potential issues before they become costly delays. As technology advances, expect these platforms to incorporate AI-driven scheduling, further enhancing efficiency.
Stay Updated on Permitting Changes to Avoid Surprises
Permitting rules aren’t static; they evolve, and staying current can save you from missteps. I recommend regularly checking your local building authority’s updates—many jurisdictions now provide online portals with real-time info. A solid example is this guide which emphasizes proactive permit management. Keeping track of permits and inspections ensures your project remains compliant over its lifespan, preventing costly hold-ups.
Implement Routine Maintenance Checks During Construction
Don’t forget that maintenance extends beyond completed projects. Routine inspections of equipment, like excavators and power tools, can prevent unexpected breakdowns. I routinely perform quick service checks using manufacturer manuals and maintenance scheduling apps, which prolong equipment lifespan and avoid project delays. Planning for maintenance also sets a blueprint for future troubleshooting and scaling efforts.
Plan for Scaling and Future Expansion Early
A smart builder considers long-term growth from the outset. Installing conduit with extra capacity or placing additional electrical circuits during initial build phase can save substantial retrofit costs later. Learning from my early projects, I often consult with electrical engineers early on to determine future expansion needs—an approach endorsed by industry experts, such as in this detailed resource.
How do I maintain the quality of my build over time?
Maintaining quality hinges on regular inspection, documentation, and establishing clear standards. Using durable tools and software enhances consistency, while proactive planning anticipates future demands. Building this into your workflow ensures long-term performance and client satisfaction. I highly recommend trying out advanced measurement techniques and integrating management apps into your routine to keep projects running smoothly and on budget.
The Hardest Lesson I Learned About Driveway Wiring and Permits
One of my most eye-opening experiences was realizing how overlooking minor details like conduit depth could threaten the entire project. It made me understand that every measurement and code compliance step carries significant weight in building safety and longevity. Paying attention to these details prevents costly rework and keeps inspections smooth.
3 Myths About Permitting and Estimating That Held Me Back
For years, I believed permits were just bureaucratic hurdles and that rough estimates sufficed. Turning these myths around, I saw that detailed permit understanding and precise estimating—like those outlined in top estimating techniques—are essential for avoiding delays and budget overruns. Knowledge in these areas is a game-changer.
What Experts Won’t Tell You About Building Driveways Safely
Many seasoned builders know that beneath a driveway’s surface lies a network of overlooked codes and best practices. I’ve learned that proactive planning, like verifying local regulations via understanding permit processes, and meticulous measurement can save you from future headaches. Think of it as laying a foundation for trust and quality.
Curated Resources for Building Success
- ConstructionEdgez Guides: A treasure trove of actionable tips and updates on permits, estimating, and construction best practices. I trust their insights because they combine expert knowledge with real-world applications.
- BuildIt Right Software: Tools like Buildertrend or CoConstruct streamline project management, helping me coordinate permits, inspections, and schedules seamlessly. They make complex tasks manageable.
- Local Building Departments: Your best source for up-to-date regulations and permit requirements. Engaging with them prevents surprises and fosters community trust.
- Trade Journals and Blogs: Industry-specific publications that reveal emerging standards and safety tips, keeping my projects compliant and innovative.
Your Next Step in Driveway Safety and Building Confidence
Building or renovating is a journey filled with lessons and opportunities. Embrace meticulous planning, continuous learning, and leveraging trusted resources to turn your vision into a safe, compliant reality. Remember, the true reward lies in knowing your project stands the test of time and safety—so start today with confidence and purpose. What was the most surprising thing you’ve discovered about building codes or permits? Share your experience below, and let’s learn together!
,