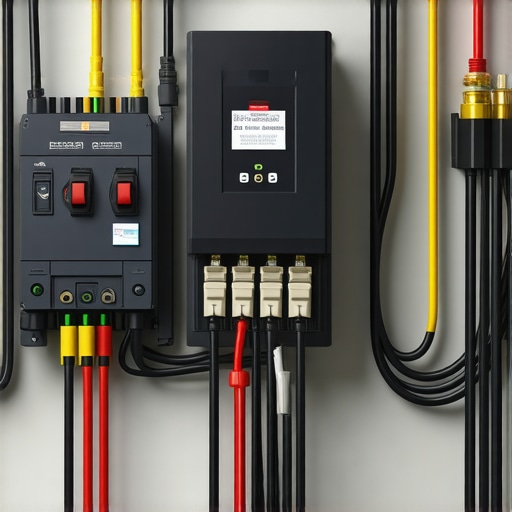
The Electrical Load Requirement for Adding an EV Charger
Ever found yourself in the middle of a home upgrade—perhaps installing an EV charger or planning a new build—and suddenly hit a wall because of an unforeseen electrical load limit? I remember the exact moment I realized my mistake. I was ready to plug in my new EV charger, eager to reduce my carbon footprint, only to discover that my existing electrical system couldn’t handle the extra load. It was a frustrating, eye-opening experience that taught me a vital lesson about planning ahead.
Why Understanding Your Electrical Load Is Critical Before Adding an EV Charger
When I first thought about installing an electric vehicle (EV) charger at my home, I assumed the process was straightforward—hire an electrician, run some wires, plug in, and go. But reality quickly set in when my electrician examined my home’s electrical system and advised me that my current service panel might not support the additional load without upgrades. This was a classic case of not fully understanding what was involved, leading to unexpected costs and delays. So, today, I want to share what I learned about estimating your electrical needs accurately before committing to any upgrades.
Adding an EV charger isn’t just about plugging in a new outlet; it involves calculating the total electrical load your home can handle. This ensures safety, avoids code violations, and prevents future surprises. A common mistake I see homeowners make early on is overlooking the capacity of their existing electrical system, which can be a costly oversight. To get it right, you need to understand your main panel’s capacity and how much headroom is available for new load additions.
What if Your Existing System Isn’t Enough? A Reality Check
One thing I learned the hard way: assuming your current system can handle the growth can lead to dangerous overloads. The National Fire Protection Association reports that electrical fires are often caused by overloaded circuits or outdated wiring. So, it’s essential to evaluate the load capacity thoroughly, considering other major appliances, HVAC systems, and future expansion plans. Many homeowners underestimate their current load, only to discover that an upgrade—like a new breaker or panel—is necessary. I highly recommend consulting detailed resources such as this comprehensive guide on estimating project needs to ensure you’re prepared.
So, how do you get started with this critical assessment without feeling overwhelmed? That’s what I’ll walk you through next. But first, ask yourself: Have you ever faced a last-minute surprise because your electrical system couldn’t handle a new load? If so, you’re not alone—and understanding your current capacity is the first step to avoiding that stress in your plans.
Now, with that foundation laid, let’s move into practical steps to evaluate your electrical load and plan for a smooth upgrade process.
Assess Your Main Electrical Panel Capacity
Start by locating your main service panel and checking the amperage rating, typically marked on the panel door or inside the door cover. Use a flashlight if needed. For example, I found mine labeled as 200 amps, which is standard for many homes. This number represents the maximum load your entire home can draw simultaneously.
Imagine your electrical system as a highway; the amps are the number of lanes available. More lanes mean higher capacity, but if your load exceeds this, cars (electrical demands) will get bottlenecked or cause overloads.
Calculate Your Existing Electrical Load
Next, list all major appliances and systems currently running—HVAC, water heaters, laundry, kitchen appliances, and lighting. Use their wattage ratings from labels or manuals, then convert to amps by dividing watts by voltage (usually 120V or 240V). For instance, a dryer at 3000W at 240V draws 12.5 amps.
Sum these loads to understand your current usage. If your total approaches or exceeds 80% of your panel’s capacity, any additional load like an EV charger could be risky.
Factor in Future Load Additions
Plan for upcoming appliances or expansions. For example, if you anticipate installing a hot tub or a new workshop, include their estimated loads now. This proactive approach prevents surprises and helps avoid costly upgrades later.
I once overlooked this step and had to upgrade my panel after realizing my planned hot tub exceeded capacity, delaying my project by weeks.
Determine the Available Capacity for New Loads
Subtract your existing load from the main panel’s total capacity. The remainder indicates how much additional load you can safely add. If it’s insufficient, consider a service panel upgrade.
Now, think of your electrical system as a fuel tank — the total amps are your tank size, and the current load is how much fuel is already used. Upgrading to handle additional ‘fuel’ (load) ensures safety and efficiency.
Coordinate with a Licensed Electrician
Finally, verify your calculations with a qualified electrician. They can perform a detailed load analysis and recommend necessary upgrades. Sharing your findings helps streamline this process, avoiding unnecessary delays and ensuring compliance with local codes.
From my experience, involving a professional early saves time and money, especially when preparing for permit applications and upgrading panels.
Remember, precise calculation now can save you from future outages, expensive rewires, or safety hazards. Proper estimation is the foundation of a safe, reliable home’s electrical system, especially when adding powerful loads like EV chargers.

Many homeowners and even seasoned contractors believe that obtaining permits and making accurate estimates are straightforward steps in construction. However, beneath the surface lies a complex web of nuances and common misconceptions that can derail even well-planned projects. For example, a prevalent myth is that permits are simply a formality — but in reality, they involve detailed approvals that can significantly influence your project’s timeline and cost. Rushing this process or neglecting the intricacies can result in costly delays or legal complications.
One critical nuance often overlooked is the difference between permit fees and the actual scope of approval. Many assume that paying for a permit grants unrestricted project progress, but regulators frequently impose specific conditions and inspections that can influence your work’s sequence and quality. According to experts, understanding the permit and impact fee distinctions ensures better budget management and compliance.
Estimating costs for new builds or additions isn’t just about compiling material prices and labor hours. A common trap is underestimating hidden expenses such as permit-related upgrades, site preparation, or unforeseen regulatory requirements. Many project overruns stem from failing to account for these variables early. For instance, an underestimated soil condition or underground utility conflict can inflate costs unexpectedly. This is why utilizing comprehensive estimation strategies, discussed in detail here, is vital for accurate budgeting.
How can you avoid underestimating complexities in permitting and estimating?
One advanced mistake is assuming your local building codes are static. In fact, codes evolve, and what was compliant last year might be outdated now. Staying updated requires reviewing local amendments, which can be intricate. For example, some jurisdictions have recently updated setback or easement requirements, affecting your design and permits. Regular consultation with local authorities or specialists can prevent costly rework. A study published in the Journal of Construction Engineering emphasizes the importance of proactive code compliance checks, highlighting that early engagement reduces project risks.
Furthermore, the misconception that permits are a mere formality can encourage shortcuts that jeopardize safety and legality. Ignoring detailed permit requirements—for example, failing to get approvals for structural alterations or electrical upgrades—can lead to fines, project shutdowns, or even rebuilding. It’s essential to understand the permit process thoroughly and work closely with professionals during each step.
To sum up, the real challenge isn’t just about acquiring permits or estimating costs but appreciating the intricate details and potential pitfalls that lurk beneath surface assumptions. Embracing this mindset can save time, money, and stress down the line. Have you ever fallen into this trap? Let me know in the comments, and if you want to ensure your next project dodges these pitfalls, check out our comprehensive guides on permit acquisition and cost estimation.
Remember, mastery over these nuances is what separates amateur effort from professional success in construction projects.
 Maintaining momentum in a construction project demands more than just good intentions; it requires reliable tools, systematic methods, and a proactive mindset. Over the years, I’ve discovered that leveraging specialized equipment and software not only streamlines the workflow but also minimizes costly setbacks. For example, a laser distance meter like the Leica Disto makes quick, precise measurements, reducing errors that could derail the entire schedule. I personally rely on it because it saves time and enhances accuracy, especially when checking elevations or verifying dimensions before installation.
Beyond hardware, software solutions have become indispensable. I recommend using project management tools like Buildertrend or CoConstruct, which allow real-time collaboration, document sharing, and task tracking. My choice is Buildertrend, as it integrates scheduling, budgeting, and communication into one platform—keeping everyone accountable and informed. For estimating, I utilize construction-specific apps that incorporate local codes and material costs, akin to what I read in this guide. This approach ensures my estimates remain competitive yet realistic, preventing surprises later.
Regular site audits are another cornerstone of ongoing maintenance. I perform weekly reviews using a checklist I developed, focusing on safety violations, material stock levels, and work quality. This habit not only preserves standards but also catches issues early. In terms of long-term results, maintaining documentation—photos, inspection reports, and change orders—has proven invaluable when navigating permits or resolving disputes.
Looking ahead, I predict that the integration of drone technology for site surveys and progress monitoring will become a game-changer. Drones can quickly provide aerial views and detailed images, saving time and reducing human error. In fact, I plan to experiment with models like DJI Phantom 4 RTK to enhance my site assessments.
Any project manager or contractor wondering how to keep their work consistently on course should consider adopting a digital maintenance regime. How do I maintain project momentum over time? My answer is to combine precise measurement tools, robust management software, and ongoing site reviews. Notably, understanding permit processes thoroughly—such as the procedures outlined here—can prevent delays and costly rework. I also encourage you to try implementing a weekly site audit with your team; this small step can yield significant long-term benefits. Mastering these strategies will respectively help you keep projects running smoothly and build a reputation for reliability and professionalism.
3 Surprising Lessons That Changed My Approach to Permits and Estimating
One of the most eye-opening realizations I had was that permits aren’t just bureaucratic hurdles but vital safeguards that can save you from costly mistakes. For example, rushing through permit applications without understanding local nuances often leads to delays or rework. Another lightbulb moment was learning that accurate cost estimation is less about adding up material prices and more about anticipating hidden variables like code updates and site conditions. Finally, I discovered that real mastery comes from ongoing education—staying updated with changing regulations and best practices keeps your projects on track and in line with safety standards.
Tools and Resources That Elevated My Construction Game
To improve my estimating accuracy, I rely heavily on comprehensive estimation tools that factor in local codes and unseen costs. For managing permits seamlessly, I trust step-by-step permit guides that clarify complex requirements. My go-to reference is the book Mastering New Build Estimating, which offers practical tips that translate directly into smoother project execution. Using these resources has transformed my approach from reactive to proactive, saving both time and money.
Your Next Step: Embrace the Knowledge Shift
Taking ownership of your building and permitting process isn’t just about avoiding fines or delays—it’s about empowering yourself to craft better projects with confidence. The journey begins with a willingness to learn, ask questions, and stay informed about evolving regulations. Remember, each challenge you encounter is a chance to grow your expertise and build more resilient, efficient homes. So, are you ready to take the next step toward smarter construction practices? Your future self will thank you for it.
What’s your biggest takeaway from managing permits and estimates? Share your experiences below and let’s learn together!