The Beam Span Error That Leads to Sagging Floors
I remember the exact moment I realized I had seriously underestimated a critical detail in a home addition project. It was late afternoon, samples of wood and blueprints sprawled across my workbench. My client was eager to move in, but I had this sinking feeling—something wasn’t right. The floors felt uneven, not just slightly; it was that irritating, unmistakable sag that whispers, “Something’s off here.” That’s when it hit me. I had overlooked a seemingly small detail, but it’s known among builders and engineers as the beam span error—a silent culprit behind sagging floors in countless homes.
The Weight of a Miscalculation: Why Beam Span Errors Matter
Imagine you’re standing in a new house, stepping onto the floor, expecting a solid, level surface. Instead, you feel a slight dip underfoot—a tiny, persistent wiggle. That’s usually a sign of an underestimated beam span, where the joists or beams are stretched beyond their capacity. When I first started in this line of work, I made a mistake early on: trusting generic calculations without considering the specific load and span requirements. It’s an easy trap, especially if you’re new or rushing through the planning stage. But the repercussions? Well, they can be expensive—think repairs, rebidding, or worse, unsafe structures. Studies show that improper beam span calculations are among the top causes of structural failures in residential construction (source: National Building Code). So, what do we do to prevent this from happening? That’s what I’ll show you next.
Is Double-Checking Your Calculations Really Worth It?
Honestly, I used to think a quick estimate was enough. I’d glance at the blueprints, make a few assumptions, and move on. But that’s how errors slip in—errors I paid dearly for later. One of the biggest lessons I learned—early but painfully—is that every home is unique. Factors like material quality, load distribution, and even local codes influence beam spans dramatically. If you’re like me, wondering whether your span calculations are spot-on, I’ve got good news: it’s easier than you think to double-check and ensure your floors won’t sag or, worse, fail inspections. Want to learn how? Stay tuned. We’ll delve into the details and common pitfalls, along with practical steps you can take today. To save yourself stress and money, understanding exactly how to tackle this issue is essential, and it’s something I wish I had mastered from the start. Remember, accurate estimation isn’t just a technical necessity; it’s your safeguard against future headaches. Ready to dive deeper? Let’s go!
,
Start with Precise Material Selection and Load Calculation
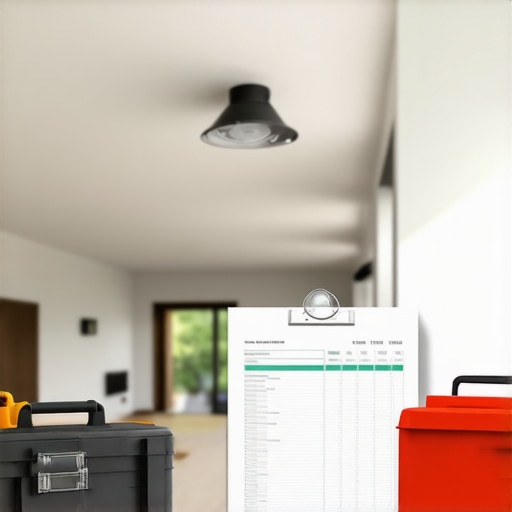
Begin by choosing the right materials for your beams—consider wood type, grade, and structural strength. Double-check your load estimations, including live and dead loads, by consulting local building codes or using online calculators. I once miscalculated the load of an upper floor, leading to a sagging ceiling—a costly mistake that underscored the importance of accurate input. Use detailed spreadsheets or software to keep track of these variables, ensuring every beam is rated for actual use.
Use Span Tables and Calculation Formulas
Rely on established span tables specific to your material and load class. These tables, found in engineering handbooks or reputable construction resources, provide maximum allowable spans for various beam sizes. For customized projects, apply the formula:
Span = (Beam Strength) / (Load per foot). This calculation helps verify whether your chosen beam size can span the required distance without reinforcement. Remember, oversimplifying can lead to catastrophic failure. I once skipped deep calculations, only to discover midway that my joists were inadequate, causing a major redesign.
Perform Actual Measurements and Adjustments On-site
Take precise measurements of your space before ordering materials. Use laser distance meters for accuracy, especially over long spans. Allocate extra length for adjustments and unforeseen obstacles. During my last project, measuring twice and ordering slightly oversized beams prevented delays when minor discrepancies appeared after framing.
Coordinate with Structural Engineers and Permitting Authorities
Engage a licensed engineer to review your estimations—especially vital for large spans or unusual loads. Their calculations validate your work and help navigate complex permit requirements. I found that early consultation saved me time and avoided resubmission hassles, which you can learn more about in the [permitting process](https://constructionedgez.com/navigating-permits-a-step-by-step-approach-for-builders). Consulting experts also ensures compliance with local codes and enhances safety.
Document and Review Every Step Rigorously
Maintain detailed records of your calculations, measurements, and decisions. Use digital tools to store and review data regularly. Revisiting your estimates during construction helps catch errors early. I kept a dedicated journal, which proved invaluable when adjustments became necessary, ensuring the project stayed on track.
Many builders and homeowners operate under misconceptions when it comes to estimating costs, navigating permits, or executing new builds and additions. One widespread myth is that simple square footage calculations suffice for accurate budget planning. In reality, this oversimplification ignores critical factors such as material variability, site-specific challenges, and permit complexities, leading to significant overruns. Another trap is the belief that permits are merely a bureaucratic hurdle; however, skipping or rushing this step can result in costly legal issues or project delays. A nuanced understanding reveals that permits are integral to safety compliance and can save you money in the long run.
A common advanced mistake involves underestimating the intricacies of regulatory compliance, especially in complex projects like additions or hillside builds. Local regulations may have specific requirements on setbacks, soil testing, or energy codes that, if overlooked, can result in project halts or mandatory redesigns. For example, failing to account for soil vapor barriers or seismic codes might not only delay your project but also compromise safety.
From my experience, many underestimate the importance of detailed planning documents, including structural calculations and site surveys. Overlooking these can lead to costly modifications during construction and even legal setbacks. For instance, neglecting to verify utility access or easements early on can cause major redesigns or permit reapplications, adding time and expenses.
A particularly insidious issue is the misconception that once permits are obtained, inspections will automatically pass—leading to complacency. In practice, inspectors look for a strict adherence to code, which can be highly specific and sometimes counterintuitive. According to a study in the Journal of Construction Engineering, misinterpreting permit requirements accounts for over 30% of project delays in residential builds, emphasizing the need for detailed understanding.
So, how can you avoid falling into these traps? Firstly, invest in comprehensive pre-planning, including professional consultations when necessary, especially for complex or large-scale projects. Secondly, always review local regulations thoroughly—many resources are available online, such as detailed guides on navigating permit requirements. Lastly, treat permits not as an obstacle but as a roadmap to ensure safety, compliance, and long-term savings.
Building success depends on recognizing that estimations and permits are nuanced, often-hidden facets of construction that require attention beyond initial assumptions. Mastering this layer of complexity can make the difference between a smooth project and a costly setback. Have you ever fallen into this trap? Let me know in the comments.
Essential Tools for Long-Term Success in Building and Permitting
Maintaining smooth progress in construction requires more than just initial planning—it’s about using the right tools consistently. One tool I rely on heavily is Bluebeam Revu. Its advanced PDF editing capabilities allow me to markup, review, and coordinate with teams seamlessly, ensuring everyone stays aligned. For project management, I prefer Procore because it centralizes communication, documentation, and scheduling, reducing miscommunications that can delay permits or additions.
Staying organized with Microsoft Excel or Google Sheets isn’t just about lists; I create detailed tracking sheets for permits, inspection deadlines, and material orders. These spreadsheets act as my project backbone, providing at-a-glance status updates and helping me spot potential delays early.
Routine Maintenance to Keep Projects Moving Forward
Regularly reviewing your documentation and permit statuses prevents last-minute surprises. I schedule weekly check-ins using Asana to track upcoming inspections or permit renewals. This habit ensures everything remains current, preventing penalties and rework. Also, performing site inspections with a digital camera allows me to document progress visually, which can be invaluable when resolving disputes or clarifying permit requirements with authorities.
Planning for Scaling and Long-Term Results
As your projects grow, think beyond immediate needs. I recommend establishing a digital archive of all permits, blueprints, and inspection reports. This archive, kept in cloud storage, supports future additions or modifications by providing quick access to essential data. Tools like Dropbox or Google Drive make this effortless and scalable.
Investing in predictive scheduling tools, such as Buildertrend, can help forecast potential delays based on historical data, enabling proactive adjustments and avoiding costly setbacks. As the industry trends toward integrated construction tech, adopting these tools now positions you well for future scalability.
How do I keep construction maintenance manageable over years of projects?
Establishing a systematic maintenance routine is crucial. Regularly update your software tools, perform site audits, and keep tabs on permit expirations. For long-term health of your build environment, consider implementing a digital maintenance calendar integrated with your project management platform. This proactive approach ensures that updates, repairs, or permit renewals happen seamlessly, reducing risk and supporting ongoing projects without disruptions.
One tip I highly recommend is setting up automated notifications for permit renewals and inspection deadlines within your management tools. This small step can make a huge difference, preventing overlooked renewals that might cause penalties or project halts. Try integrating calendar alerts today to keep your projects flowing smoothly. For more detailed insights on this, check out navigating permit requirements and stay ahead of the curve.
Throughout my career, I’ve seen how overlooked details and personal misconceptions can turn smooth projects into costly lessons. One revelation that transformed my approach was realizing that no aspect of estimating or permitting should be taken lightly—every detail counts in ensuring a safe, compliant, and budget-friendly build. Building a home addition isn’t just about measurements and materials; it’s about understanding the complexities behind each step and proactively addressing potential pitfalls before they become issues. The key is to adopt a mindset of meticulous planning combined with continuous learning, which ultimately saves time, money, and stress.
Avoid Common Blind Spots That Hinder Your Projects
Many builders and homeowners fall into the trap of underestimating the importance of detailed permit research or miscalculating load capacities, leading to structural failures or permit denials. I learned early that assuming standard procedures work everywhere is a mistake—local codes and unique site conditions often demand tailored solutions. For example, overlooking soil tests or special setback requirements can delay approvals or compromise safety. Embracing a proactive approach—such as consulting with experts early and thoroughly reviewing jurisdictional guidelines—has been invaluable in preventing these costly surprises.
Essential Resources That Elevate Your Building Game
One tool I rely on is comprehensive permit guides. These provide clarity on local regulations and streamline the approval process, saving time and avoiding errors. For estimating, cost calculators and spreadsheets have become my go-to, ensuring every project has a realistic budget. Additionally, step-by-step estimation guides reinforce my understanding of material variability and labor nuances. These resources collectively help me maintain accuracy and confidence from planning through execution.
Your Next Move Starts Now — Build Confidently
Taking charge of each estimating, permitting, and building step transforms uncertainty into opportunity. Remember, mastering these details doesn’t require perfection—just a willingness to learn and adapt. By implementing thorough checks, leveraging trusted tools, and continuously educating yourself on local regulations, you’ll be better equipped to manage any project, big or small. Your journey toward building smarter begins today—so why not start with one small adjustment to your process? Have you ever encountered a hidden mistake that derailed your plans? Share your story below and let’s learn together.