Pass the Stairwell Width Check for Legal Basement Suites
I remember the moment vividly—that sinking feeling when I realized my basement renovation was hitting a snag because of a simple but crucial measurement: the width of the stairwell. It was my first attempt to navigate the complex world of permits and codes, and I had underestimated the importance of adhering to specific stairwell dimensions. That lightbulb moment made me realize how a seemingly minor detail could turn into a major project hurdle. If you’re planning a basement suite or any home addition, understanding the pass/fail criteria for stairwell width isn’t just a bureaucratic formality—it’s essential to keep your project moving smoothly.
Why Your Stairwell Might Cause Permit Headaches—and How to Avoid Them
In my early days of renovating, I made a mistake that many first-timers do: I assumed that measuring the width of the staircase was a straightforward task. Turns out, building codes are pretty specific, and ignoring them can lead to costly delays or even having your permit denied. According to the National Fire Protection Association, proper exit routes, including stairwells, are vital for safety and are strictly regulated in building codes (NFPA, 2023). This is why passing the stairwell width check is such a big deal—and why I want to help you get it right the first time.
Is this really a big deal, or just red tape? Honestly, it’s worth paying attention to. I once skipped verifying the stairwell dimensions early in my project, thinking I could tweak it later. That mistake cost me weeks of rework and a gnawing feeling that I might have jeopardized the entire permit approval. Trust me, doing your homework upfront can save you from these headaches. If you want to learn the ins and outs of measuring correctly and understanding the specific requirements your local authorities enforce, I’ll guide you through every step in this post. And if you’re unsure about the process, check out resources on [managing permits efficiently](https://constructionedgez.com/efficiently-managing-additions-from-planning-to-execution). Now, let’s dive into what makes the stairwell width check so pivotal and how to pass it without breaking a sweat.Measure Precisely to Avoid Red Flags
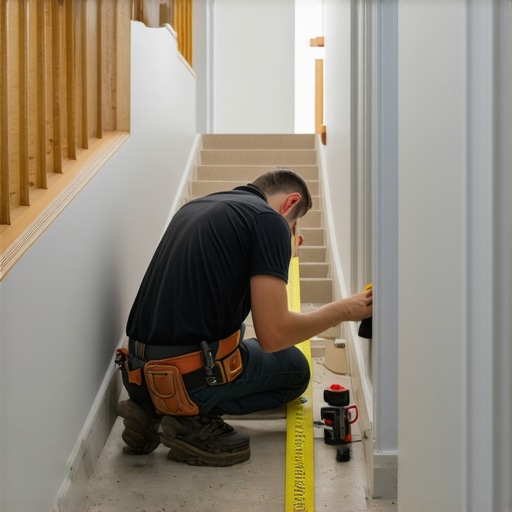
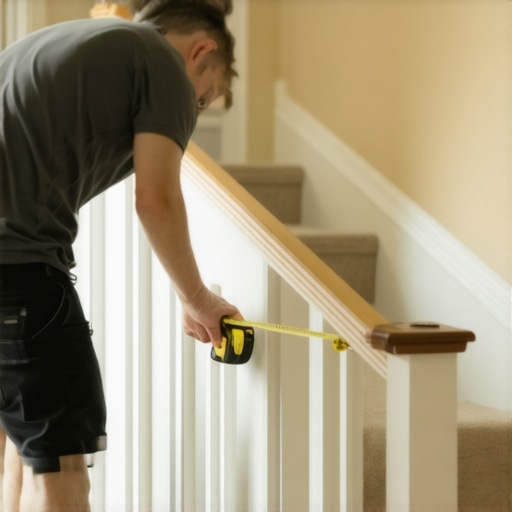
Start by gathering your tools: a reliable tape measure, a level, and a pencil. Physically measure the width of the stairwell at multiple points—top, middle, and bottom—to account for any irregularities. In my own experience, I once measured only the top width, assuming it was uniform, only to find out later that the bottom was narrower, leading to permit rejection. Therefore, always measure at intersecting points and record the smallest width as your reference.
Confirm Local Code Requirements
Next, consult your local building code or permit authority’s specifications regarding minimum stairwell widths. Usually, they mandate at least 36 inches of clear width for residential emergency escape routes. To clarify these standards, review resources like navigating permit requirements and ensure your measurements align. Remember, non-compliance can cause costly delays; don’t guess—verify.
Adjust for Building Features and Obstructions
Identify any obstructions—handrails, existing ductwork, or other fixtures—that could affect your clear width. If these are present, measure from the edge of the obstruction to the opposite side of the stairwell and subtract their widths to get an accurate clearance. For example, I once had a handrail that encroached 2 inches into my measurement, which would have failed permit inspection. Always include these in your calculations.
Document Every Measurement Thoroughly
Create a detailed table or diagram showing measurements at different points, noting the date, time, and conditions. This documentation proved invaluable when I needed to clarify my measurements with inspectors or when reapplying after adjustments. Clear records prevent misunderstandings and streamline the permit approval process.
Prepare for Necessary Modifications
If your measurements fall short of code, plan the adjustments early. This could involve widening the stairwell opening by framing out additional space. I once added a 2-inch shim to my framing to meet the required width, which was straightforward once I documented the existing state. Be prepared to communicate these modifications clearly and update your plans accordingly.
 While many homeowners and even seasoned contractors focus on the obvious aspects of remodeling—like permits, costs, and design details—there’s a hidden layer of nuances that can trip up even experienced professionals. One of the most overlooked mistakes involves assuming that all permit requirements are straightforward or universally applicable. In reality, local codes often have subtle differences, especially when it comes to structural elements like load-bearing walls or fire safety measures. Failing to recognize these specific nuances can lead to costly rework and delayed approvals. For example, I once encountered a project where the permit office required a different steel reinforcement detail than what the general blueprint specified, simply because of a regional seismic code update. This underscores the importance of keeping abreast of regional building code amendments—trust me, a deep dive into local
Equip Yourself with Trusted Tools for Long-Term Success
Over the years, I’ve refined my toolkit to ensure every home addition or renovation maintains its quality and safety. A high-quality laser distance meter, like the Leica DISTO series, provides quick, precise measurements—crucial when verifying permit-required dimensions. I personally rely on this device to eliminate errors caused by manual tape measures, especially when dealing with irregular walls or complex layouts. Pair it with a digital level, such as the Johnson Level & Tool 48-0220, to confirm that structures are perfectly aligned, minimizing future issues related to settling or structural integrity.
Software tools like ProEst or Buildertrend streamline estimating and project management, keeping costs within scope and schedules on track. I prefer these platforms because they integrate material lists, labor costs, and scheduling in one interface, reducing the risk of overlooked expenses or delays. Investing in a reliable 3D modeling software, like SketchUp, also assists in visualizing the scope before breaking ground, helping to avoid costly rework later.
Prioritize Regular Maintenance to Protect Your Investment
Maintenance isn’t glamorous, but it’s essential for preserving the quality of your additions. Establish a routine inspection schedule—quarterly checkups of load-bearing walls, sealing windows and doors to prevent water intrusion, and clearing gutters to avoid foundation damage. I recommend setting reminders using apps like Todoist or Trello to stay disciplined with these upkeep tasks. This proactive approach prevents small issues from escalating into costly repairs, prolonging the lifespan of your investment.
How do I keep my additions functioning smoothly over time? The secret is consistent vigilance combined with smart tools. Regularly use thermal imaging cameras, such as FLIR’s series, to detect hidden leaks or insulation gaps before they become significant problems. Also, periodically update your project documentation and measurements, especially if you’re planning future expansions or modifications. Proper documentation ensures future work is compatible and complies with evolving codes, such as those outlined in the latest edition of the [International Building Code](https://constructionedgez.com/understanding-permit-processes-for-successful-home-additions). This foresight can save you thousands and make future renovations more straightforward.
Looking ahead, the trend leans toward automation—integrating IoT sensors for structural health monitoring or moisture detection. Embracing these advancements now can give you a head start on maintaining your home and scaling efficiently. For instance, installing smart sensors in foundational areas can alert you at the earliest signs of shifts or moisture issues, enabling preemptive repairs rather than reactive fixes. As these technologies evolve, staying informed will be key; I recommend subscribing to industry newsletters or participating in professional workshops. To get started, try implementing a maintenance checklist that incorporates digital tools and scheduled inspections—I guarantee it will streamline your workflow and protect your investment long-term.
What I Wish I Knew Before Measuring for Permits
One of the toughest lessons I learned was that precision in measuring stairwell widths is non-negotiable—something that can make or break your permit approval. I once believed a quick tape measure check was enough, only to find out later that regional codes have nuanced requirements that can easily be overlooked, leading to delays. The realization hit hard that every inch counts—literally—and being thorough from the start saves time and money down the line.
Don’t Just Guess: Verify and Document for Smooth Sailing
Having a reliable set of tools—like a laser distance meter and a digital level—and knowing how to use them can elevate your project. I recommend checking multiple points in the stairwell, especially at the narrowest spots, and recording those measurements meticulously. Accurate documentation not only streamlines inspections but also helps you make informed modifications if needed, preventing last-minute surprises.
My Secret Weapon: Community and Local Codes
Never underestimate the power of local resources. I found that consulting regional building codes online or directly speaking with permit officials clarified many gray areas, especially regarding specific width requirements and exceptions. Building codes often evolve, and staying updated—through sites like navigating permit requirements—ensures you’re always in compliance, avoiding costly rework.
Sharpen Your Toolbox: The Essentials for Accurate Measurements
Investing in quality tools made a real difference. I personally rely on a high-precision laser distance meter for quick, reliable measurements, particularly for irregular or hard-to-reach areas. Pairing this with a digital level helps confirm that structural elements meet safety standards, which is crucial for permit approval and long-term safety. Plus, digital tools enable you to document measurements instantly, keeping your records clear and trustworthy.
Moving Beyond Basics: Embrace Smart Planning and Flexibility
When plans reveal measurement shortfalls, don’t panic—think of it as an opportunity. Sometimes, adjusting framing, widening openings, or re-routing handrails can bring you into compliance without significant overhaul. Early planning and consulting with structural engineers can make these modifications straightforward, saving time and ensuring your project adheres to all safety standards. Remember, flexibility and proactive steps are your best allies in navigating permit requirements effectively.
Insider Wisdom: Lessons That Can Save You from Costly Delays
- Never assume uniformity—measure at multiple points, especially at transitions or corners, to catch irregularities early.
- Stay informed about regional code differences and recent updates—these often contain subtle but critical requirements.
- Documentation is your best friend—record measurements, modifications, and communications to avoid misunderstandings.
- Invest in quality measurement tools—precision now saves headaches later in inspections and adjustments.
- Be open to modifications—sometimes small adjustments can ensure full compliance and keep your project on schedule.
A Path Forward with Confidence
Combining accurate measurement, thorough verification, and staying informed transforms a potentially stressful process into a manageable one. Remember, every successful addition or renovation starts with understanding the rules and preparing meticulously. With the right mindset and tools, you’re not just passing permit checks—you’re building a safer, more resilient home that reflects your dedication and professionalism. For more insights on permit processes, consider reviewing these essential tips, and progress with confidence.