How to Pass Your Final Framing Inspection Without Stress
It was a hot summer afternoon when I realized I had overlooked a crucial detail—my framing wasn’t up to code, and the final inspection was just around the corner. My heart sank. The stress of last-minute fixes and the looming threat of delays hit me hard. Have you ever been there? That sudden sinking feeling when you’re not sure if you’ll pass the inspection or face costly rework? If you’re in the middle of a build or renovation, that fear can feel all too real.
Why Final Framing Inspections Can Make or Break Your Project
A final framing inspection might seem like just another box to tick, but in reality, it’s the gatekeeper that can delay your entire project if not handled properly. Missing a detail or rushing through the process can lead to costly re-inspections, project delays, or worse—failure to secure the certificate of occupancy.
My own early mistake was trusting my contractor’s word that “it looks fine” without double-checking the framing details. That small oversight cost me precious days and extra expenses. It’s a common trap—assuming that once the walls go up, the hardest part is done. But, in truth, this is when attention to detail becomes most critical.
According to recent studies, nearly 30% of construction delays are caused by inspection failures or rework related to framing issues. Knowing what inspectors look for—things like proper header support, wall bracing, and compliance with local codes—can save you from these pitfalls.
So, what’s the secret to passing your final framing inspection smoothly? Rest assured, it’s not about last-minute panic, but about proactive planning and thorough checks. Ready to dive into the essentials that can keep your project on track and stress-free? Let’s get into it.
Are You Wasting Time & Money on Common Framing Mistakes?”
Early on, I made the mistake of not familiarizing myself with local framing codes and standards, assuming my contractor had it all covered. Big mistake. This oversight led to red flags during inspection and added costs. If you want to avoid similar setbacks, consider reviewing the key inspection points and ensuring your contractor is aligned with current codes. For expert tips, check out [mastering new build estimating](https://constructionedgez.com/mastering-new-build-estimating-essential-tips-for-success) and [permitting tips](https://constructionedgez.com/permit-approval-tips-for-seamless-home-additions). Staying informed and involved can make all the difference in passing your final framing inspection without stress.
Develop a Detailed Inspection Checklist
Start by creating a comprehensive list of all local code requirements relevant to framing. Review the specific standards for header support, wall bracing, and shear walls in your area. Use this checklist during your final walk-through, checking each item off as you verify compliance. I once used a printed checklist during my renovation and caught a missing brace support that would have otherwise led to a retest, saving me days of rework.
Thoroughly Inspect Structural Components
Get familiar with inspection points by reviewing resources like new build estimation strategies. Assess your framing for proper alignment, secure fastenings, and correct placement of beams and headers. Use a level, tape measure, and perhaps even a thermal scanner to identify hidden issues. During my last project, I personally re-verified all the wall studs and doubled-checked the beam supports, which prevented any surprises during inspection.
Consult with a Structural Engineer or Experienced Inspector
If uncertain about specific details, hire a structural engineer or experienced framing inspector for a pre-inspection review. Their expert eyes can spot issues that might be overlooked by laypeople. Think of this as getting a AI-powered diagnostics test before a critical health check—prevention saves time and money. I scheduled a quick review with a local inspector and addressed a minor compliance gap, resulting in a smooth final approval process.
Document Your Work Meticulously
Keep detailed records of all inspections, material certifications, and changes made during framing. Photos with timestamps, signed approval forms, and material receipts build a solid case demonstrating your compliance. During my project, I maintained a photo log and kept correspondence with inspectors, which proved invaluable when clarifying questions arose during the final review.
Prepare for the Inspection Day
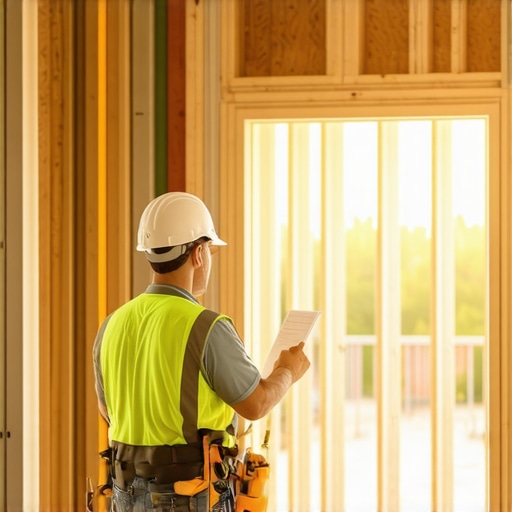
Conduct a final walkthrough a day before with your team and double-check every item on your checklist. Clear the area of debris, ensure all access paths are unobstructed, and have your documentation ready. Think of it as preparing your car for a road test—you want everything visibly in order. I once staged my site like a professional, which impressed the inspector and expedited the approval process.
Stay Educated on Code Updates and Common Pitfalls
Codes evolve; stay updated to avoid missing new requirements. Regularly review resources like construction guides and attend local seminars. Remember, proactive knowledge reduces last-minute surprises. When I updated my knowledge on recent code changes, I was able to anticipate inspector queries and address issues beforehand, leading to fewer re-inspections.
Many professionals believe that accurate estimates and smooth permit processes are straightforward, but in reality, there’s a complex web of nuances they often overlook. A common myth is that adding a contingency or padding to your budget suffices to account for unforeseen issues. However, this approach can lead to inflated estimates that scare off clients or mislead project planning. The true art lies in understanding where these contingencies are genuinely necessary versus where they are simply padding to hide uncertainty. According to recent industry research, nearly 40% of project delays stem from misestimations rooted in overlooked variables or hidden costs, emphasizing the importance of precision over assumption.
Why do seemingly minor estimation errors cause major delays?
It turns out that small miscalculations in areas like natural soil conditions or permit processing times expand exponentially once they cascade through the project timeline. For example, underestimating site prep costs due to unnoticed soil contamination can double your initial budget, while inaccurate permit timelines often lead to costly project standstills. An essential step is to leverage advanced estimating techniques, such as integrating detailed site assessments and up-to-date permit processing data. You can find practical strategies and tools in [cost-effective estimating techniques for new builds and additions](https://constructionedgez.com/cost-effective-estimating-techniques-for-new-builds-and-additions), which can help you identify and incorporate these hidden costs early on.
Beware of the permit trap: Are you factoring in all the delays?
Permit acquisition isn’t merely about submitting forms; it’s an intricate process influenced by jurisdictional policies, seasonal workloads, and even political changes. Overlooking these variables can cause significant project delays, sometimes extending timelines by months. For instance, some urban jurisdictions have complex zoning requirements that change annually, impacting approval times. To avoid this, it’s vital to stay informed about the latest permit regulations—resources like [navigating permit requirements for new building projects](https://constructionedgez.com/understanding-permit-processes-for-new-building-projects) provide essential insights. Additionally, establishing relationships with local authorities and employing experienced permit expeditors can streamline the approval process and prevent surprises. Remember, proactive planning in estimating and permitting is your best shield against unforeseen costs and delays. Have you ever fallen into this trap? Let me know in the comments.
Staying Ahead with Reliable Equipment and Software
Maintaining a construction project requires the right tools not only for accuracy but also to ensure efficiency and safety. Personally, I depend heavily on laser distance meters like the Bosch GLM 50 C because it offers precise measurements up to 165 feet with Bluetooth connectivity, enabling quick data transfer to my planning apps. This eliminates guesswork, ensures dimensional accuracy, and saves time during framing and layout stages. Additionally, at the core of my project management is advanced estimating software that integrates real-time cost updates, allowing me to adjust budgets dynamically and stay within scope.
Regular calibration of tools is vital. For example, I calibrate my laser device every six months to maintain measurement accuracy, preventing costly mistakes that can cascade into delays or structural issues. Incorporating durable, high-quality safety gear such as harnesses, helmets, and gloves, also keeps workers safe over the long term and helps avoid downtime due to accidents.
On the software side, I leverage building information modeling (BIM) platforms, which give a 3D visual overview of the entire project. BIM helps identify conflicts early, such as plumbing intersecting with electrical conduits, before any physical work begins. This proactive approach reduces rework, which is often responsible for significant project delays.
Looking ahead, the trend is moving toward integrated management systems that combine BIM, project scheduling, and cost tracking into a seamless platform. This integration will further improve maintenance routines, monitor progress remotely, and enable predictive analytics for potential issues.
How do I maintain tools and software over time?
Consistent maintenance is key. For physical tools, schedule regular calibrations, store equipment properly, and replace worn parts preemptively. For software, keep licenses up to date and back up project files weekly to prevent data loss. Also, investing in training ensures that everyone on your team stays proficient with new features—minimizing user error and maximizing efficiency. Regular review of your tools’ performance and software updates helps sustain long-term productivity and project quality. Want to deepen your understanding? Check out top estimating strategies that can complement your maintenance routine, ensuring your projects stay on budget and schedule. And don’t forget to try implementing a bi-annual calibration calendar; it’s a small step that can prevent big headaches down the line.
Lessons from the Trenches: Hard-Won Insights on Framing Inspections
One of the most valuable lessons I learned was the importance of never assuming anything during the framing process. Even small details, like the placement of a single stud or the support for a header, can make or break your inspection success. I once overlooked a minor bracing detail, which led to a re-inspection and delayed my project by days. Trust your instincts and double-check every element—sometimes, your eye isn’t enough, and a second opinion from a seasoned inspector can make all the difference.
Another lightbulb moment was realizing that familiarizing myself with local building codes beforehand could save significant stress later on. Different jurisdictions have unique requirements, and knowing these early ensures your work aligns perfectly with standards. It’s tempting to rely on your contractor’s assurances, but taking ownership of the inspection checklist proved to be a game-changer. Knowledge is power when it comes to passing your final framing inspection smoothly.
Lastly, I discovered that meticulous documentation not only provides peace of mind but can also expedite approvals. Photographing key structural points during construction and keeping copies of permits and material certificates created a solid trail to demonstrate compliance. When questions arose during the review, I had everything ready to go, which impressed inspectors and minimized delays. Learning to record and organize this information can truly elevate your planning and execution stages.