Why Shadenet Carport Installations Fail When You Skip the Turnbuckle Tension Test
Why Shadenet Carport Installations Fail When You Skip the Turnbuckle Tension Test
In the world of structural engineering and outdoor fabric design, there is a very fine line between a structure that lasts for 15 years and one that collapses or shreds within three. As the Director at Outrigger Awnings, I have spent decades certifying designs, sizing steel frames, and overseeing the assembly of complex shade systems. One of the most common – and most avoidable – points of failure I encounter in the field involves a fundamental misunderstanding of tension. Specifically, the failure to perform a rigorous turnbuckle tension test during Shadenet Carport Installations.
The turnbuckle is not merely a piece of hardware used to take up the slack in a net; it is the final verification of structural readiness. Without the correct tension, your carport is not a protective structure – it is a ticking time bomb of mechanical fatigue. In this guide, I will explain why skipping this critical step leads to catastrophic failure and how you can ensure your installation meets professional engineering standards.
The Physics of Tension: Why It’s Not Just About Looks
A common misconception among homeowners is that a shadenet only needs to be “tight enough” to look flat. From an engineering perspective, this is dangerously incorrect. A loose sail does not just look unprofessional; it acts as a parachute. When wind hits a fabric surface that lacks sufficient tension, the fabric undergoes what we call “wind flutter.” This is a rapid, high-frequency vibration that creates a self-destructive cycle.
Professional Shadenet Carport Installations require specific tension to ensure that wind resistance is managed through deflection rather than absorption. When a sail is taut, it creates a stable aerodynamic surface. Wind gusts are deflected over the edges of the structure. However, a loose sail captures the wind, increasing the wind uplift requirements exponentially. This extra force is transferred directly to the mounting points and the steel poles. Over time, this constant “snapping” of the fabric against the frame causes accelerated fabric wear and stresses the corners unevenly, eventually leading to the fabric tearing or the hardware failing.
Furthermore, without proper tension, you lose the ability to manage environmental loads like heavy rain. While shadenet is porous, high-intensity storms can still lead to water pooling if the fabric is sagging. This weight creates a “belly” in the net, which further stretches the HDPE (High-Density Polyethylene) fibers beyond their elastic limit, ensuring the fabric never returns to its original shape.
Anatomy of a Turnbuckle: The Unsung Hero of Shadeport Carport Installations
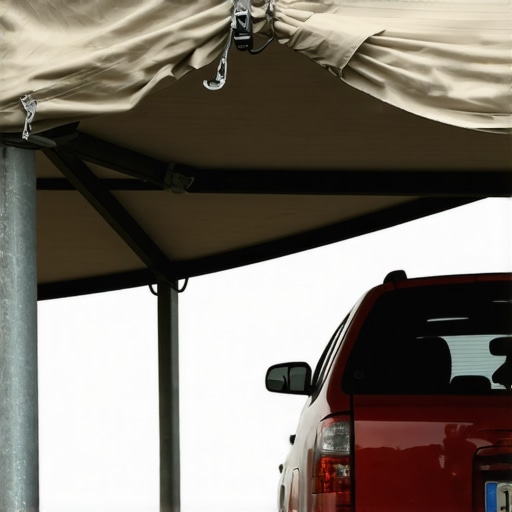
When we discuss Shadeport Carport Installations, the hardware is just as important as the fabric itself. The turnbuckle is the primary mechanism for introducing and maintaining the necessary tension. Typically, we use 316-grade stainless steel eye-to-eye or hook-to-eye turnbuckles, depending on the specific mounting requirements. These components connect the corners of the shade cloth – often reinforced with a perimeter wire rope – to the structural poles or wall plates.
The perimeter wire rope is the backbone of the system. It distributes the tension from the turnbuckle along the entire edge of the fabric. Without this wire, the tension would be concentrated solely at the eyelets, causing the fabric to “neck” and eventually rip. [Understanding Permit Processes for New Building Projects] is often the first step in ensuring your hardware meets local safety codes, as many municipalities have specific requirements for the gauge of wire and the rating of the turnbuckles used in public or residential spaces.
A technical warning for the DIY enthusiast or the inexperienced contractor: over-tightening is just as dangerous as under-tightening. Stripping the threads of a turnbuckle or using under-rated eye bolts that can open under load are common mistakes. A turnbuckle must be sized to handle the maximum predicted wind load of the region, not just the static weight of the net.
Step-by-Step: How to Perform the Turnbuckle Tension Test
To ensure structural integrity, we follow a strict protocol. If your contractor is not performing these steps, your installation is at risk.
- Initial Attachment: The fabric is lifted into place and secured using bow shackles to the turnbuckles. At this stage, the turnbuckles should be fully extended to allow for maximum adjustment.
- The “Drum Tight” Auditory Check: As we tighten the turnbuckles in a cross-pattern (similar to tightening lug nuts on a car wheel), we perform an auditory check. When struck with the palm of the hand, the net should produce a low-frequency “thump,” similar to a drum. If it sounds “flappy” or soft, the tension is insufficient.
- Visual Check for Hyperbolic Paraboloid Geometry (Hypar): In Shadesail Installations, we look for the “Hypar” shape – where two opposite corners are high and two are low. This three-dimensional curve is essential for stability. The turnbuckles must be adjusted until the fabric shows no wrinkles along the diagonal lines.
- The 7-Day Re-tensioning Rule: All HDPE fabric has an initial “creep” or stretch period. A professional installer will return after seven days of exposure to the elements to perform the final turnbuckle adjustment.
Below is a reference for professional installation standards in the Gauteng region, where wind loads can be particularly challenging:
Ignoring these steps is often [Why Shadenet Carport Quotes in Pretoria Often Ignore Foundation Depth Requirements]. Without the proper foundation to hold the tension, the poles will simply lean inward as you tighten the turnbuckles, rendering the test impossible to pass.
Comparing Structural Designs: From Cantilever to Wall Mount
The requirements for tensioning change significantly based on the architecture of the carport. For example, Cantilever Carport Installations are particularly sensitive. Because these structures rely on a single side of support, the tension of the shadenet places a massive moment load on the vertical poles. If the tension is not perfectly balanced via the turnbuckles, the poles can twist, leading to structural misalignment. This is [The Wind Load Requirement for Cantilever Carports in Pretoria That Most Quotes Ignore].
In contrast, Wall Mount Carport Installations present a different risk. Here, the turnbuckles are often anchored directly into the brickwork or a concrete lintel. If the tension is too high, or if the turnbuckle test reveals a lack of structural substrate, you risk pulling the hardware straight out of the wall. We always use chemical anchors in these scenarios to ensure the wall can withstand the lateral pull of a tensioned sail.
When looking at Steel Carport Installations, the contrast is stark. While steel roofs are rigid and rely on fastener shear strength, shadenet relies on “live” tension. A steel frame must be rigid enough to support the fabric’s tension without bowing. If the steel frame flexes too much, the turnbuckles will never reach the required torque, and the fabric will eventually fail due to the aforementioned wind flutter.
The Financial Cost of Skipping the Test
From a budgetary perspective, skipping the tension test is a classic case of being “penny wise and pound foolish.” [How to Accurately Estimate Costs for Home Improvements] must include the long-term maintenance and durability of the structure. A properly tensioned shadenet will last 15 years or more. A poorly tensioned one will likely need the fabric replaced within 3 to 5 years.
Consider the scaling of these costs:
- Single Carport Installations: The cost of replacing a single sail is manageable, but the inconvenience of vehicle damage from a collapsed structure is not.
- Double Carport Installations: With a larger surface area, the wind loads are doubled. The failure of one turnbuckle can cause the entire sheet to whip, potentially damaging the second vehicle.
- Multi Carport Installations: In commercial settings, such as office parks or car dealerships, the failure of a multi-bay system is a massive liability. If a contractor skips the tension test on a 20-bay system, the cumulative stress on the shared poles can lead to a domino-effect failure.
Always [How to Verify Your Contractor’s Liability Insurance for New Builds] before work begins. If they cannot explain their tensioning protocol or provide engineering certifications for their pole sizes, they are likely cutting corners that will cost you thousands in the future.
Conclusion: Engineering Peace of Mind
The turnbuckle is the smallest component of a carport, but it carries the heaviest burden. It is the bridge between a static piece of fabric and a dynamic, wind-resistant structural system. Skipping the turnbuckle tension test is the primary reason Shadenet Carport Installations fail prematurely. It leads to fabric fatigue, hardware failure, and potentially dangerous structural collapses.
As an engineer, my advice is simple: demand a tension test. Watch your contractor perform the drum-tight check. Ensure they return for the 7-day re-tensioning. By prioritizing the physics of tension over the speed of installation, you ensure that your vehicle remains protected for decades to come. Don’t settle for a “loose” installation – insist on engineering excellence.