Why Your Solar Panel Installation Needs a Roof Loading Study
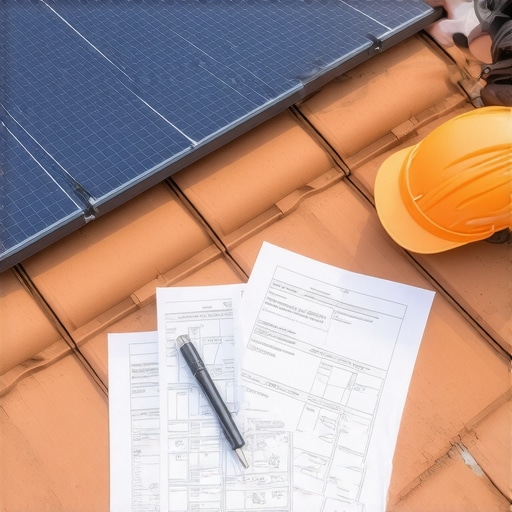
It was a chilly Saturday morning when I first realized I’d overlooked something crucial for my solar project. As I climbed onto my roof to inspect the installation, a sudden wobble sent a jolt through me. That unexpected movement made me wonder: had I properly assessed whether my roof could handle the added weight? Looking back, that moment was my lightbulb — realizing that risking a solar upgrade without understanding my roof’s load capacity could have led to costly repairs or even a dangerous collapse.
The Hidden Weight of Solar Panels and Why It Matters
When I started my journey toward renewable energy, I was excited about reducing my carbon footprint. However, I soon learned that installing solar panels isn’t just about sticking the panels on the roof; it’s about ensuring your roof can support them safely and effectively. Many homeowners jump straight into the installation without considering the structural integrity of their roof. This oversight can lead to severe problems down the line, such as roof damage or even failure, which underscores the importance of a roof loading study before proceeding.
According to recent industry insights, a significant percentage of solar installations experience complications related to inadequate roof support, often leading to costly repairs. This is why a roof loading study isn’t just a formal step; it’s a safeguard for your investment and safety. If you’ve faced doubts or fears about whether your roof can handle solar panels, know that you’re not alone. Many homeowners, just like you, have had that moment of uncertainty—yet choosing to overlook this crucial step can turn that doubt into a major problem.
Is Skipping the Roof Loading Study Really Worth the Risk?
My early mistake was assuming my roof had enough support based on initial visual inspections alone. That was a rookie move. In fact, I learned that a thorough roof load calculation can reveal hidden weaknesses, especially if your roof isn’t recently evaluated or if it’s an older structure. Trust me, not doing this check was a gamble that I’d advise others to avoid. Studies show that proper estimation of load capacity can help you avoid surprises later on—making your solar upgrade as smooth and safe as possible.
So, if you’ve ever wondered whether your roof can support solar panels or if you’ve noticed your roof’s age or condition, it might be time to dig deeper. The good news? You don’t have to navigate this alone. There are proven methods and expert guidance to ensure your roof is ‘solar-ready,’ keeping your home safe and your energy goals on track. Ready to learn what steps to take next? Let’s dive into the practical side of making your solar dream both realistic and secure.
Start with a Detailed Roof Inspection
Before diving into technical calculations, perform a thorough visual inspection of your roof. Check for signs of wear, sagging, or damage. If your roof is over 20 years old or shows visible issues, it’s wise to consult a structural engineer. During my own inspection, I noticed some soft spots and creaks, which prompted me to seek professional advice rather than assume my roof could support solar panels.
Gather Structural Data and Existing Documentation
Locate your roof’s structural plans or previous inspection reports. If these aren’t available, consider hiring a licensed engineer to assess your roof’s current state. Use load verification techniques to get an accurate baseline. In my case, I obtained recent blueprints and cross-checked with on-site measurements, which revealed that my rafters were made of standard lumber, but some joints had weakened over time.
Calculate the Dead and Live Loads
Distinctly, dead loads are the weight of the panels, mounting systems, and other permanent fixtures, while live loads include snow or maintenance activities. Use online calculators or consult estimating techniques for home additions to approximate these loads. For example, I calculated that each panel would weigh around 40 lbs, and my mounting system adds another 10 lbs per panel. Knowing this helped determine if my roof could handle the additional weight without risking damage.
Perform a Structural Load Analysis
This is the critical step. Use the gathered data to analyze whether your roof’s framing can bear the combined load of the existing structure plus the new panels. You can do this either through simplified online tools or by hiring a structural engineer for a comprehensive assessment. I opted for a professional evaluation, which included a load calculation based on building codes. The engineer’s report confirmed my roof’s capacity and highlighted minor reinforcements needed for safety margin.
Identify Reinforcement Needs
If analysis shows your roof is near its limit, consider reinforcements. This could mean additional joists, bracing, or supporting beams. Think of it like strengthening a boat before heading into rough waters—better safe than sorry. During my project, I installed supplementary joists and braces, which cost extra but ensured the added weight was well-supported, preventing future issues.
Plan for Permits and Compliance
Ensure your assessment and reinforcement plans align with local building codes. Secure necessary permits before installation, avoiding delays or violations. Refer to resources like permit navigation guides to streamline approval. In my case, I submitted a load assessment report along with reinforcement plans, which expedited the permit process.
Document Everything for Future Reference
Keep detailed records of assessments, calculations, and contractor reports. This documentation can be invaluable for future inspections, resale, or if modifications are needed down the line. I organized all my reports digitally and physically, ensuring a smooth process if future work is required.
Many homeowners believe that obtaining permits and estimating costs for additions or new builds is a straightforward task, but the reality is far more nuanced. A widespread misconception is that permits are merely a bureaucratic hurdle; in truth, they are essential safeguards that prevent costly mistakes. For example, some assume that if their neighbors built without permits, they can do the same—but this overlooks the legal and safety risks involved. Skipping permit acquisition can lead to fines, delays, or even order to demolish unapproved work, which can far exceed the cost of proper planning.
When it comes to additions, many think that a rough estimate based on square footage suffices. However, this oversimplification ignores critical factors like structural load capacity, foundation integrity, and local codes. An inaccurate estimate can cause budget overruns or compromise safety. According to expert insights, detailed estimation techniques that account for material quality, labor costs, and site-specific challenges lead to more reliable budgets. Don’t fall into the trap of assuming that all projects are identical; each site and design requires careful analysis.
Advanced homeowners often overlook the importance of understanding permit nuances—such as specific code requirements for wind-rated materials or drainage considerations—that can vary significantly by location. For instance, a project that complies with general codes may still face rejection if it ignores local amendments or special zone restrictions. Navigating these complex rules calls for a thorough review of permit requirements and regulations early in planning. Failing to do so may lead to costly revisions, project delays, or legal issues down the line.
What about estimating for multiple projects simultaneously? How do you keep your numbers accurate?
This is a common challenge for seasoned builders. Coordinating estimates for several projects demands sophisticated techniques like unit-cost analysis, contingency planning, and detailed scope definitions. Expert sources highlight the importance of cross-referencing data from reliable sources, such as comprehensive estimation guides, and leveraging project management software to track variables. These methods help prevent the all-too-common mistake of underestimating costs or overlooking hidden expenses like permit fees, inspection costs, or unforeseen site conditions. Remember, meticulous planning and accurate estimation are the backbone of successful projects, whether you’re expanding a home or constructing anew.
Finally, recognize that the permitting and estimating process is inherently dynamic—it’s not a one-and-done task. Regular updates, clear communication with authorities, and thorough documentation are vital. Doing so ensures your project remains compliant, within budget, and completed on schedule. As you gain experience, you’ll notice that understanding these nuances can save you time, money, and stress. Are you currently considering a project? Make sure to double-check your permit plans and estimation strategies—your future self will thank you! Have you ever fallen into this trap? Let me know in the comments.
Mastering Maintenance for Long-Term Success
Maintaining the integrity of your construction projects over time requires a combination of reliable tools, systematic processes, and proactive management. I personally rely on a few key software solutions that have transformed how I keep projects on track. For instance, Procore has become my go-to for project management, allowing real-time collaboration, documentation, and scheduling. Its intuitive interface helps me flag potential issues before they escalate, saving time and money.
For estimating, I use Bridgit Bench, a resource planning tool that provides accurate labor projections. This software is invaluable because it aligns resource availability with project timelines, reducing delays caused by workforce shortages or overbooking. The precision of these tools ensures that my long-term planning is rooted in data rather than guesswork.
Routine inspections are vital to keep everything functioning post-setup. I prefer using digital inspection apps like PlanGrid, which allow me to upload photos, notes, and checklists directly related to specific project areas. It streamlines communication with my team and makes follow-up straightforward, especially when dealing with complex additions or renovation segments.
Predicting Future Needs and Scaling Up
As projects grow, so do maintenance demands. I anticipate scaling my toolkit by integrating IoT sensors that monitor structural health and environmental conditions in real-time. Technologies such as smart moisture meters and load sensors can alert me to issues like increased stress on beams or moisture build-up, allowing for preventative measures rather than reactive fixes.
Furthermore, automation via AI-driven analytics promises to revolutionize project oversight. For example, AI can analyze inspection data to identify patterns indicating structural weaknesses, enabling proactive repairs. Staying ahead with these innovations not only extends the lifespan of the work but also boosts safety and compliance.
How do I keep maintenance manageable over time?
Establishing a systematic schedule is key. I recommend setting regular, documented check-ins using maintenance logs stored digitally. This approach ensures nothing gets overlooked and provides a clear record for future reference or inspections. When I started doing this, I found issues like minor framing shifts are caught early, preventing costly repairs later. Incorporating predictive maintenance tools enhances this process, helping me forecast potential failures before they occur. For more advanced strategies, explore how to manage additions efficiently from start to finish. Try implementing IoT sensors or digital inspection checklists on your next project—you’ll be surprised how much smoother your workload becomes when you’re proactive rather than reactive.
What I Learned the Hard Way About Building Codes and Permits
The most overlooked lesson in construction is how little most of us really understand about local regulations until facing a costly mistake. My own projects showed me that permits are more than paperwork—they’re a safeguard that prevents future headaches. Missing a permit or misunderstanding the requirements can mean delays, fines, or even the need to dismantle work already done. That lightbulb moment reminded me that deep familiarity with permit processes unlocks smoother project execution and peace of mind.
Why Skipping Structural Checks Can Haunt Your Dreams
Initially, I believed visual inspections sufficed for load capacity assessments. But as my projects grew, I realized that detailed load calculations and structural evaluations are essential. Ignoring this step can lead to unforeseen failures—a costly lesson I won’t forget. This experience underscored that investing in professional assessments early pays off by safeguarding your home and wallet in the long run.
Getting Real About Cost Estimates and Hidden Expenses
One of my biggest setbacks was underestimating the true scope of costs involved in additions or new builds. Relying on rough square footage estimates without considering factors like permit fees, rebuilding, and reinforcement costs is a recipe for budget overruns. I found that detailed, cost estimation techniques bridged the gap between expectations and reality, ultimately making my projects more predictable and less stressful.
The Value of Thorough Documentation and Planning
Early on, I learned that keeping comprehensive records—from permits, inspections, to contractor communications—makes a world of difference. This documentation streamlines approvals and provides a safety net if disputes or issues arise later. Embracing organized planning created smoother workflows and quicker responses, turning potential chaos into controlled progress.
Would You Risk It or Double-Check? The Choice Is Clear
Every project has its surprises—it’s part of the process. But doing your homework on permits, structural integrity, and estimating is like installing safety rails along the way. Your home and peace of mind depend on it. I challenge you: Have you ever skipped a step that later cost you dearly? Share your experience below and let’s learn from each other’s journeys.