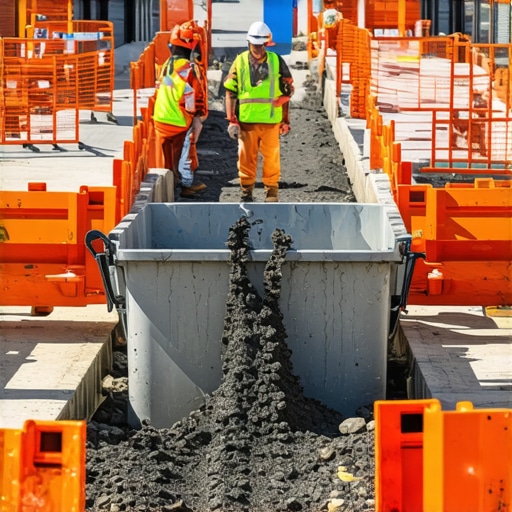
Why Your New Build Site Needs a Designated Concrete Washout
I remember the first time I overlooked setting up a proper concrete washout area on a new build site. Concrete was pouring, trucks were lined up, and I thought, “No big deal—I’ll clear it up later.” Fast forward a few weeks, and I was faced with a muddy mess that’s now a permanent stain on my project timeline. That moment of realization hit me hard: skipping a designated washout area isn’t just messy—it’s a costly oversight that can lead to environmental violations and project delays.
Guard Your Site and Save Money By Setting Up a Concrete Washout
Today, I want to share why dedicating a specific area for concrete washout isn’t just good practice—it’s essential. If you’ve ever dealt with the shock of cleanup costs or the embarrassment of environmental violations, you’re not alone. A proper washout area helps keep your construction site organized, protects local waterways from harmful runoff, and even keeps your project within legal boundaries. But, the most common mistake I see early on is underestimating the importance of this simple step. Trust me, one poorly planned washout can escalate into a major headache that drains valuable resources and jeopardizes your project’s compliance.
Is A Concrete Washout Worth the Extra Effort?
Initially, I believed I could manage concrete residues without dedicated space, thinking it was a minor detail. However, that mistake led to unexpected fines and task rework. Implementing a designated washout area from the start might seem like an extra chore, but the long-term benefits far outweigh the effort. It’s a safeguard against environmental issues, and it can even streamline your concrete pouring process, saving you time and money. For more insights on managing projects effectively, check out new build estimation strategies.
Now, let’s explore how to set up an effective concrete washout that keeps your site clean and compliant—it’s simpler than you think, and the benefits are well worth it.
,
Start with a Clear Site Assessment
Begin by evaluating your construction site to identify a low-traffic, well-drained spot away from water sources and disturbed areas. Choose an area with natural runoff away from storm drains. In my recent project, I spotted an unused corner that was barely on the path of heavy machinery—perfect for a washout zone without disrupting the workflow.
Mark Your Boundaries Effectively
Use bright flagging tape or spray paint to delineate your washout area. Make it visibly distinct to workers and waste haulers, reducing accidental spills or misplacement. This step is crucial to avoid contamination and streamline cleanup, similar to how a painter blocks out sections before starting—precision prevents messy overlaps.
Construct a Durable, Containment Structure
Build a simple barrier using construction-grade plywood or portable sandbags to contain rinsed concrete residue. The barrier prevents runoff from escaping during washouts. For my project, I used lightweight plywood panels anchored with stakes—they were quick to set up and stood firm during rain and wind, saving me from costly cleanups later.
Prepare for Waste Collection and Disposal
Place thick plastic liners or tarps inside the containment area to collect wastewater and slurry. Coordinate with local disposal services beforehand—think of it as arranging a dedicated drop zone so you’re not scrambling when cleanup time arrives. I contacted my waste hauler early, which avoided delays and ensured compliance with environmental regulations.
Ensure Proper Signage and Training
Post clear signs indicating the purpose and boundaries of the washout area. Train your crew to use it correctly—demonstrate how to rinse tools and trucks without spilling outside the zone. Clear communication here is like a traffic cop guiding flow—saves time and prevents costly mistakes.
Implement Routine Inspection and Maintenance
Regularly check the containment for leaks or overflow, especially after heavy rain. Empty or replace liners as needed to maintain effectiveness. This proactive approach mimics a health check—catch issues early before they escalate into environmental violations or project delays. In practice, I scheduled inspections at shift changes, catching minor issues before they became major cleanup jobs.
By following these concrete steps, you create an efficient, compliant washout zone that keeps your site clean, reduces environmental impact, and prevents costly penalties. Remember, the key is planning, proper setup, and ongoing management—small investments now save big later.
 Many contractors and homeowners assume that estimating construction costs is straightforward—add up a few numbers, include some markup, and you’re set. However, this oversimplification often leads to costly mistakes that can derail a project before it even begins. One widespread misconception is relying solely on generic per-square-foot costs without considering project-specific nuances. In my experience, failing to account for these details results in underbidding or overbidding, which affects profitability and client satisfaction. For example, ignoring the complexity of permit requirements or site conditions can cause delays and unexpected expenses. To truly master accurate estimates, it’s essential to understand the hidden nuances, such as adjusting for regional material costs and local code variations. According to industry expert Bruce McDougall, a detailed and flexible approach to estimating—incorporating contingencies and variable factors—is key to success. Rushing into a quote based on rough calculations without digging into these specifics often traps even seasoned professionals. Another common mistake is overlooking the impact of permit complexity; some projects look simple on paper but involve refined zoning adjustments or special inspections, which can double or triple initial estimates. These subtleties often trip up inexperienced estimators and lead to disputes or project slowdowns.
How do you adapt your estimates when project variables change midstream?
Think about all the factors that influence costs besides raw materials and labor. Site access, slope, existing structures, and even neighborhood restrictions can drastically alter your initial calculations. To navigate these challenges, many builders now turn to digital estimation tools that allow dynamic adjustment for variables—but even these rely on accurate data inputs. It’s well worth reviewing expert resources on estimating strategies, like those found at this guide. Remember, a meticulous approach—checking every assumption and factoring in potential delays—saves money and reduces surprises. Are you falling prey to common estimation pitfalls? Let me know in the comments! For in-depth insights into estimating with confidence, consider exploring cost-effective techniques or consulting professionals through contacting experts. Smart estimating isn’t just about numbers; it’s about understanding the project’s full scope and variables—let’s dig deeper to prevent costly mistakes.
Establishing Reliable Systems for Long-Term Success
Keeping your construction projects on track demands more than just great planning; it requires consistent use of proven tools and methods that ensure efficiency over time. Personally, I rely on advanced project management software like Procore for real-time collaboration and documentation. This platform allows me to track progress, manage RFIs, and view updated schedules, which minimizes miscommunication and delays. By integrating such tools early into your workflow, you create a resilient system that adapts to changes and maintains momentum, especially when scaling operations or handling complex additions.
Additionally, leveraging digital estimating tools like cost estimation software helps refine budgets as the project progresses. These tools account for fluctuations in material prices and labor, providing dynamic estimates that keep you aligned with real-world costs. Adapting to market conditions and updating estimates regularly is crucial for long-term profitability and client satisfaction.
Tools That Simplify Maintenance and Scale
Routine updates on your equipment are vital, whether it’s machinery or software systems. For example, I use remote diagnostics for my heavy equipment, which not only alerts me of maintenance needs but also predicts potential failures before they happen. This proactive approach prevents costly downtime and prolongs the service life of expensive machinery. Similarly, regularly updating your project management software ensures you have the latest features and security, reducing vulnerabilities that could compromise your operations.
In terms of scaling, cloud-based storage solutions like Dropbox or Google Drive are indispensable, allowing seamless access to plans, permits, and documents from any location. This flexibility is indispensable when managing multiple sites, as it enhances communication and reduces delays caused by lost or misfiled paperwork. Looking ahead, I predict that integrating AI-driven analytics into project management—such as predictive scheduling—will become a game-changer for maintaining efficiency and anticipating project bottlenecks before they occur.
Keep Your Projects Moving with Consistent Checks
How do I maintain ongoing efficiency? The answer is routine checks combined with the right tools. Regularly auditing your processes and leveraging maintenance logs for equipment ensures that everything functions smoothly. Moreover, maintaining open lines of communication with your team via instant messaging platforms like Slack fosters quick problem-solving and keeps everyone aligned. Incorporating these practices helps to sustain momentum, even as projects grow in complexity or size.
If you haven’t already, try implementing remote diagnostics for your key machinery. This small step can drastically reduce unexpected downtime and extend equipment lifespan, giving you a tangible edge in project management. Remember, the goal is to create a system that not only works today but continues to support you as your project scales or evolves. For detailed guidance on integrating these strategies into your workflow, visit this resource to streamline your transition from planning to execution.
< >
>
Lessons from the Trenches: Surprising Mistakes That Cost Me
One of the biggest lessons I learned is the importance of detailed project assessment before estimating. Underestimating site-specific variables like soil conditions or accessibility can lead to significant budget overruns. For example, overlooking the need for specialized foundation work in a hilly area doubled my costs unexpectedly.
Another insight is the necessity of building contingency allowances into your estimates. I used to rely on rough numbers, but surprise permit fees or material fluctuations caught me off guard. Including a 10-15% contingency helps cushion these unforeseen expenses, saving me from sleepless nights and client disputes.
Finally, I realized that early communication with permit authorities and understanding local code nuances can accelerate project approval. Ignoring this step led to costly delays that could have been prevented with proactive planning.