How to Calculate Concrete Yardage for Curvy Garden Paths
Ever spent hours pouring over plans for a garden path, only to realize you underestimated the amount of concrete needed? I remember the lightbulb moment when my first curved walkway cracked halfway through pour because I didn’t account for its complexity. That mistake cost me not just money, but valuable time and frustration. Trust me, you’re not alone—many DIYers and pros alike grapple with this puzzle. But here’s the good news: with a little know-how, you can confidently determine exactly how much concrete your unique, winding path needs without any guesswork.
Why Estimating Curves Can Be Tricky—and Why It Matters
Accurately calculating concrete for curvy paths isn’t as simple as measuring a straight line. Because curves add extra volume, just using length and width won’t cut it. Misjudging this leads to wastage or, worse, running short mid-slab. Early on, I made the mistake of just calculating a basic rectangle for my curving sidewalk, only to find I needed significantly more concrete to fill the undulating edges. That taught me a vital lesson: understanding the true volume of irregular shapes is essential—not just for saving money but also for avoiding project delays and potential code violations. According to industry sources, improper volume estimations can inflate costs by up to 30%, which isn’t small change for any project. So, how do we get it right? Well, it all comes down to understanding the shape of your curves and how to break them down into manageable parts. Along the way, I discovered some clever tricks that make the math straightforward, even for curvy designs. If you’ve ever faced the anxiety of ordering too little or too much concrete, you’re in the right place. Ready to take the guesswork out of your project? Let’s dive into the details to get your calculations spot on—saving you money, time, and unnecessary headaches. Want to see how professionals do it? Check out this guide on estimating techniques for accurate project budgets to learn more about reliable measuring strategies. Now, let’s look at what makes calculating concrete for curves different—and how to simplify the process for your next project.
Break Down the Curves Into Manageable Segments
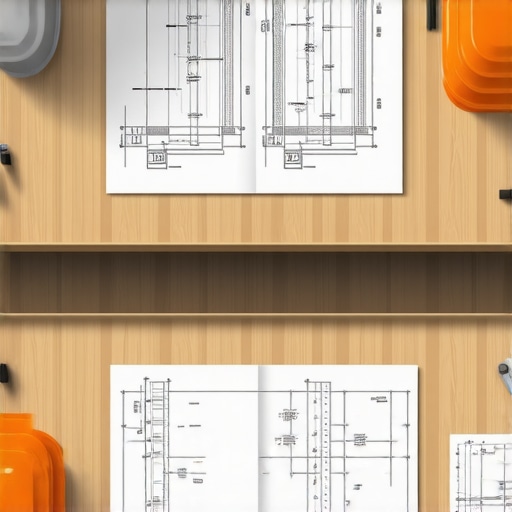
Start by sketching your path and dividing it into small sections—like slicing a pie. During my last project, I drew my winding walkway on graph paper, dividing it into segments no longer than 2 feet each. This approach made calculating volume much easier because I could treat each segment as a small rectangular prism, simplifying the math. Using a flexible measuring tape, I recorded the length of each segment along the curve, noting the widest and narrowest points to estimate the average width. This method helped me avoid under- or overestimating the concrete needed, saving money and reducing waste.
Calculate the Volume of Each Segment Accurately
Once divided, measure the depth of your concrete pour—typically 4 inches for walkways. Convert all measurements to feet to keep units consistent. For each segment, multiply the length by the width and the depth to find its volume in cubic feet. For example, a segment 2 feet long, 3 feet wide, and 0.33 feet deep (4 inches) yields about 2 cubic feet of concrete. Repeat this for all segments, then sum the totals for the entire path. This granular approach prevented the common mistake I made before—assuming a simple rectangle and ending up short on material.
Consider Variations in Curvature and Thickness
Remember, curves aren’t perfect circles; they often have varying radii. Adjust your measurements for tighter curves by slightly increasing the estimated width on convex sections, or decreasing for concave areas. Also, if your design includes slopes or thickness variations, account for these in your calculations. When I worked on my curved patio, I added an extra 10% to my total to cover minor irregularities and unforeseen bumps, ensuring my mix supply was sufficient.
Convert Cubic Feet to Concrete Bags or Cubic Yards
Next, convert the total cubic feet to your preferred measurement. For bags, divide by the yield per bag—usually 0.5 cubic feet for a standard 60-pound bag. For example, 50 cubic feet means 100 bags. For larger projects, converting to cubic yards (27 cubic feet per yard) simplifies ordering—about 1.85 cubic yards for 50 cubic feet. I learned this step the hard way when I ordered too many bags, only to realize I had excess. Precise conversions save money and storage hassles.
Order a Little Extra to Cover Waste
Always add a contingency—10% is common—to account for spillage, over-excavation, or adjustments. During my first pour, I underestimated waste, resulting in two trips to buy more concrete, stalling my project. Now, I order slightly more than my calculations suggest. This small buffer ensures continuous work flow and prevents delays caused by running out of material mid-pour.
When it comes to new construction projects, the common advice often emphasizes planning and budgeting, but the real nuance lies in the details many overlook. Contrary to popular belief, most folks assume that obtaining permits and estimating costs are straightforward steps; however, the devil is in the details that can cause costly delays or mistakes if not addressed properly. One prevalent myth is that permits are merely a formality—many assume once you submit the application, approval follows seamlessly. In reality, permits involve complex review processes, especially for additions or custom builds, which can be delayed if you don’t understand the specific requirements or submit incomplete documentation. This can lead to significant project slowdowns, and I recommend reviewing permitting nuances for a comprehensive understanding.
A trap I often see DIYers fall into is underestimating the impact of local code variations. Many assume that building codes are uniform across regions, but in my experience, they differ significantly, affecting everything from setback distances to material specifications. Ignoring these nuances can lead to rework, fines, or even having to demolish non-compliant structures. It’s crucial to verify local regulations early—checking permit requirements specific to your area.
Let’s talk about estimating costs, where misconceptions are rampant. A common mistake is relying solely on average unit costs or generic quotes, which neglect project-specific nuances, especially for custom or complex builds. For example, estimating concrete or framing costs without accounting for unique site conditions—like soil type, access, or design intricacies—can result in significant budget overruns. Advanced estimating involves breaking down each component into detailed line items, considering variations, and actively managing waste factors. I recommend exploring cost-effective estimating techniques to refine accuracy.
Advanced builders also know that timing and sequencing can significantly affect estimates. For instance, scheduling site prep before obtaining permits might save time but could lead to compliance issues or rework if permits require different site conditions. Carefully integrating permit approval timelines with your construction schedule is an advanced step that pays off.
Finally, a crucial hidden nuance is managing change orders. Many underestimate how alterations during construction, even minor ones, can exponentially increase costs and delay timelines. Maintaining clear documentation and understanding the permit scope can prevent scope creep. For detailed strategies, controlling change orders is essential.
So, have you ever fallen into this trap of underestimating permit requirements or overlooking project nuances? Share your experiences or questions below—I’d love to hear your stories and help you avoid these costly pitfalls.Maintaining your construction tools and equipment is crucial for ensuring consistent performance and extending their lifespan. Investing in high-quality tools not only saves money over time but also enhances safety and efficiency on-site. Personally, I’ve found that regular calibration and cleaning are non-negotiable; a well-maintained power drill or laser level delivers precise results every time. One must also consider software solutions that streamline project management and estimation tasks—tools like Buildertrend or CoConstruct offer features that keep everything organized, from scheduling to budgeting, reducing errors and saving valuable time. Looking ahead, the integration of Internet of Things (IoT) devices in construction tools promises even smarter maintenance and data collection, enabling predictive servicing before issues arise. When I started using dust extractors with HEPA filters during cutting and sanding, I dramatically improved air quality and reduced cleanup time, showing how maintenance extends beyond equipment to health and safety.
How do I maintain my equipment over time? Regularly inspect and clean tools after each job, replacing worn-out parts promptly. Keep a detailed maintenance log to track service schedules and repairs—this proactive approach prevents costly breakdowns unexpectedly. Additionally, scheduling annual calibration for measuring devices like laser levels ensures ongoing accuracy, vital for site compliance and quality standards. Furthermore, investing in protective storage solutions prevents corrosion and damage during off-hours.
To stay ahead, I recommend adopting digital maintenance checklists integrated into your project management software. For instance, setting automated reminders for blade replacements or battery charges keeps your tools in peak condition. Remember, neglecting routine maintenance can lead to equipment failure, project delays, and increased expenses, which ultimately compromise your project’s success.
By maintaining your tools meticulously, you create a foundation for long-term reliability and precision. Start implementing a weekly checklist today—it’s a small step that pays off big in project performance.
How do I maintain construction tools and equipment over time?
Consider routine inspections, cleaning, proper storage, and using software to track maintenance schedules. This habit ensures longevity and dependable performance, making your projects smoother and less costly. For more on estimating and managing project costs effectively, explore cost-effective estimating techniques. Take one advanced tip from this guide—like setting automated maintenance alerts—and see immediate improvements in your workflow.
Lessons That Changed My Approach to Curved Concrete Projects
One of the most eye-opening truths I discovered is that every curved path has its unique quirks, and assuming a simple calculation can lead to costly mistakes. I once underestimated the complexity of a serpentine walkway, which resulted in multiple trips to reorder concrete—an experience that taught me to respect the nuances of irregular shapes.
Another insight is that dividing a winding path into small, manageable segments not only simplifies math but also enhances accuracy. This approach prevents those embarrassing moments of running short or excess concrete, saving both money and time.
Finally, I learned that adding a contingency buffer—like an extra 10%—acts as a safety net against unexpected irregularities and minor mishaps during pouring. Embracing this proactive mindset has made my projects smoother and more predictable.
Tools and Resources That Keep My Projects on Track
For anyone serious about precise estimations, I recommend exploring cost-effective estimating techniques. They offer practical strategies that help break down complex shapes into manageable parts. Additionally, expert insights into project costs can refine your budgeting approach, especially for irregular projects. I also personally rely on flexible measuring tapes and digital tools to record measurements accurately—these small investments pay off in the long run.
Embrace the Learning Curve and Keep Moving Forward
Take it from me: mastering the art of calculating concrete for winding paths is incredibly rewarding. It boosts your confidence, saves money, and ensures your project looks professional. So, don’t hesitate to try detailed segmentation and add that little extra buffer; your future self will thank you. Ready to take on your next curved concrete project with newfound confidence? Share your plans or questions below—I’d love to hear about your experiences and help you succeed.