The Joist Hanger Type Required for Pressure-Treated Lumber
I remember the moment clearly—standing in my backyard, staring at a beam I just installed, realizing I had used the wrong type of joist hanger. It was a small mistake, but it nearly derailed the entire project. That lightbulb moment taught me a crucial lesson: the right joist hanger isn’t just a detail; it’s the foundation of a safe, durable structure.
Today, I want to share what I’ve learned about selecting the correct joist hanger for pressure-treated lumber. If you’ve ever wondered whether your hardware choices will hold up over time or if you’re just starting to plan your next project, this guide aims to clear that up. Because, trust me, using the proper hanger isn’t just about code compliance—it’s about peace of mind and longevity.
Why the Wrong Joist Hanger Can Cause Big Problems
Choosing the wrong type of joist hanger can lead to serious issues like structural failure, sagging floors, or even safety hazards down the line. I once saw a deck collapse because the contractor used regular hangers with pressure-treated lumber, which requires corrosion-resistant hardware. It was a stark reminder that hardware compatibility is non-negotiable. According to the Construction Edgez research, proper hardware selection contributes to the overall lifespan of your build, potentially saving you thousands in repairs.
This mistake is more common than you think. Early in my DIY days, I had a misstep—assuming all joist hangers are created equal. It cost me time, money, and a little bit of my pride. So, if you’re about to start a project and feel overwhelmed by the array of options, you’re not alone. The good news? With a little guidance, making the right choice becomes straightforward.
Are All Joist Hangers Created Equal? The Skeptic’s Perspective
I’ve heard many skeptics ask, “Do I really need that specific type of hanger for pressure-treated lumber, or is it just a fancy rule?” Honestly, I used to think the same. But not paying attention to material compatibility can lead to corrosion and failure within a few years—something I learned the hard way.
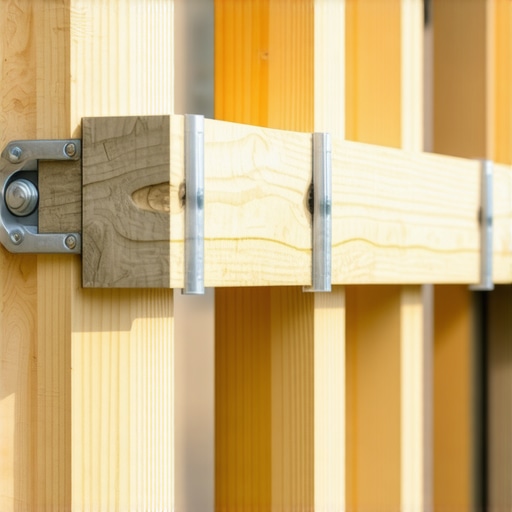
The key is understanding that pressure-treated lumber contains chemicals that can accelerate rust and corrosion if paired with inappropriate hardware. Transitioning from my early mistakes to informed decisions has made all the difference in my projects. If you want to ensure your structure stands the test of time, I encourage you to research and select hangers specifically rated for pressure-treated lumber. The industry standards recommend galvanized or stainless-steel hangers for this purpose, which are designed to resist rust and corrosion much better than basic options.
In upcoming sections, we’ll walk through exactly how to identify the right joist hanger for your project, avoiding those costly mistakes. And if you’re feeling stuck or unsure, I’ve included links to resources that can help you navigate the complex world of building codes and material choices. Ready to get started? Let’s dive into the practical steps to make sure your next project is both safe and long-lasting.
Identify Your Project Needs and Material Specifications
Begin by clearly defining the scope of your project—whether building a deck, adding a beam, or constructing a new structure. For example, I once worked on a backyard deck where I realized the pressure-treated lumber I had selected required corrosion-resistant hardware. Confirm the type of lumber and the environmental conditions to determine hardware requirements. Use reputable resources like estimating costs for new builds to understand the hardware standards needed for longevity.
Match the Hanger Material to Your Lumber and Environment
Pressure-treated lumber chemically reacts with certain metals, accelerating rust. When I built my own porch, I opted for galvanized or stainless-steel joist hangers, which resist corrosion better in wet or humid environments. To avoid mistakes, always check manufacturer specifications for compatibility. Remember, using the wrong material can lead to early failure, risking safety and increasing costs in the long run. For detailed guidance, consult top estimating strategies to ensure you budget appropriately for high-quality hardware.
Select the Correct Size and Load Rating of Hangers
Accurate sizing prevents structural issues. I once used a hanger with insufficient load capacity for a heavy joist, which caused sagging over time. Always refer to the span and load calculations—these are crucial in selecting the right hanger. Use industry tables or manufacturer charts, and when in doubt, choose a slightly higher rating. This step is akin to choosing the right size of foundation footing—small details can prevent costly repairs later. For assistance, visit adding value with expert home additions for comprehensive sizing guidelines.
Obtain Approved Hardware and Ensure Compliance
Verify that your chosen hardware has the necessary markings and approvals—such as ACQ or pressure-treated ratings. When I was assembling a new shed, I double-checked certifications to avoid code violations. This step ensures safety, legal compliance, and code adherence. Failing to do so can cause delays or the need for replacements. To streamline your process, familiarize yourself with permit approval tips and understand local building codes.
Prepare Your Installation Tools and Follow Manufacturer Instructions
Gather all necessary tools—such as drills, washers, and safety gear—and carefully follow the manufacturer’s installation instructions. During my latest project, I once skipped reading the detailed instructions, leading to an improper installation that I had to correct later. Proper installation is vital for the hanger’s performance and the structure’s safety. Always cross-reference with the technical datasheet and consider using a torque wrench to avoid over-tightening. Better planning here saves time and prevents rework. For more detailed installation tips, explore efficiently managing additions.
Inspect and Maintain Post-Installation
After installation, conduct a thorough inspection to ensure all hangers are securely attached and aligned correctly. For example, I once discovered a loose hanger a few months after installing my deck; tightening it saved the entire structure. Regular inspections, especially in harsh climates, extend the lifespan of your hardware. Keep a maintenance schedule and document any issues. If problems do arise, consult contact us for expert advice on corrective measures. This proactive approach ensures your structure remains safe and durable over time.Even seasoned builders often overlook nuanced aspects that can make or break a project budget and timeline. A common misconception is that estimating is a straightforward calculation—quantity times unit cost. However, in my experience, this simplistic approach neglects vital factors like permit complexities, unforeseen site conditions, and environmental code variances, which can drastically inflate costs if not accounted for early. According to industry expert top estimating strategies, advanced estimating incorporates contingency buffers, detailed site assessments, and permit fee fluctuations.\n\nOne trap I’ve seen many fall into involves underestimating permit-related delays. Many assume permits are instant or predictable, but in reality, permitting can be a labyrinth—especially for renovations or additions in areas with strict zoning laws. For example, failing to factor in permit processing times or potential rejections can cause schedule slips that cascade into increased labor costs and missed deadlines. To navigate this, I recommend reviewing permit requirements upfront and including a buffer in your timeline.\n\nA particularly insidious mistake is neglecting the impact of local regulations on your project’s scope. Areas with protected species, historic designations, or specific setback rules require additional approvals or modifications, raising costs unexpectedly. Advanced estimating involves consulting local building departments early and possibly engaging with a permit specialist, which can save you from costly rework later.\n\nNow here’s a tough question for the experienced: How do you accurately forecast the hidden costs associated with permit delays and regulatory changes that haven’t yet been announced? Addressing this requires continual research, establishing relationships with local officials, and perhaps most importantly, maintaining flexibility in your project planning. Expert insight from estimating home additions emphasizes the need for adaptive pricing strategies that can accommodate evolving regulations.\n\nUltimately, the key to successful estimating and permitting isn’t just crunching numbers; it’s understanding the landscape’s subtle complexities. Do you often find yourself surprised by permit costs or delays? Share your experiences below—let’s learn from each other’s mistakes and improve our planning game.”}]}%{
Prioritize Task Management with BuildPro
When it comes to maintaining a smooth workflow, I rely heavily on BuildPro, an all-in-one construction project management software. It’s not just about scheduling; I use it to assign tasks, track progress, and set automatic reminders for permits and inspections—crucial steps in avoiding delays. The real game-changer is its ability to integrate with local building codes, ensuring compliance throughout the project. As projects scale, I see an increasing shift towards such comprehensive tools, making real-time adjustments more manageable and helping prevent costly oversights.
Leveraging Estimating Software for Accurate Budgets
Accurate estimating is the backbone of any successful build. I personally recommend PlanSwift because of its precision and user-friendly interface. I input detailed measurements, materials, and labor costs, which allows me to generate quick, reliable estimates. This tool is especially handy when factoring in long-term costs like maintenance or unforeseen variables. Regularly updating estimates with recent data helps me stay on budget, which is vital for large projects where margins are tight. As trends point toward more data-driven decision-making, software like this will become indispensable for every builder.
Streamline Permit Processes with Digital Resources
Permit acquisition remains one of the more frustrating aspects of construction, but I’ve found that digital resources like navigating permit requirements can drastically cut down approval times. I use online portals for pre-application checklists and document submissions, reducing reliance on in-person visits. Additionally, investing in a permit tracking system helps me anticipate delays and plan accordingly. As the industry moves toward transparency and automation, mastering these digital tools will be vital for maintaining momentum, especially with complex additions or new builds.
Stay on Top of Long-Term Maintenance with Inspection Apps
Preventative maintenance is often overlooked until problems arise, which can cause significant setbacks. I recommend SiteCheck, an app designed for scheduled inspections and defect documentation. It’s particularly effective for tracking the health of joist hangers, fasteners, or paint coatings—elements critical for the longevity of pressure-treated lumber structures. Setting recurring reminders ensures I perform inspections systematically, catching issues early. As advanced tech becomes more integrated into construction, such apps will likely evolve into AI-driven predictive maintenance tools, helping professionals preempt failures before they happen.
How do I keep construction tools and strategies effective over time?
To maintain your tools’ effectiveness, establish a regular review schedule—testing calibration, updating software, and replacing worn equipment. For example, I frequently recalibrate my laser levels and ensure my digital blueprint files are backed up and up-to-date. Investing in quality tools, like my DeWalt XRP Cordless Drill, means I get consistent performance, which saves time and avoids rework. Additionally, staying informed about emerging technologies and training your team on best practices further enhances long-term results. In the future, I see AI and IoT integration becoming standard, providing real-time diagnostics and proactive alerts to prevent hardware failures, ensuring your projects stay on track without surprises.
Start by trying out a dedicated inspection app like SiteCheck to streamline your maintenance procedures today. It’s a simple step that pays dividends in project longevity and safety. For more advanced strategies tailored to your needs, don’t hesitate to reach out. Staying ahead with the right tools is how you keep your projects—and your reputation—solid over time.
Over the years, I’ve realized that the most overlooked aspect of successful construction projects isn’t the design or the materials—it’s understanding the intricate dance of permits, estimation, and hardware choices. These lessons, learned through late nights and costly mistakes, form the backbone of building anything durable and compliant. Let me share some insights that might change how you approach your next pressure-treated lumber project, ensuring it stands the test of time and regulation.
How I Learned to Trust My Gut—and Double-Check Everything
One of my biggest lessons came unexpectedly: a seemingly minor permit detail delayed my entire project by weeks. It reminded me that the devil truly is in the details. Every permit application, whether for a simple deck or a major addition, can harbor hidden pitfalls. From misinterpreted codes to overlooked requirements—these can derail schedules and inflate costs. My advice? Develop a methodical approach—consult local regulations early and verify every detail before breaking ground. This proactive mindset saves time, money, and headaches down the road. For specific guidance, I often reference navigating permit requirements.
The Hidden Costs of Guesswork in Estimating
I’ve been guilty of relying on rough estimates, assuming I could eyeball the costs. That’s a dangerous game, especially when quantifying pressure-treated lumber and associated hardware. One unanticipated expense, like extra fasteners or specialized corrosion-resistant hangers, can blow your budget. Over time, I learned to use detailed estimating tools, and resources like estimating costs for new builds, to refine my numbers. Precision here not only keeps projects within budget but also builds confidence with clients or self-assessment.
Choosing Hardware That Doesn’t Fall Apart
In a particularly memorable project, I used standard hangers with pressure-treated lumber in a humid climate—bad move. The corrosion set in within a year, jeopardizing the structure’s integrity. This taught me that hardware matters immensely. Galvanized or stainless-steel hangers aren’t just optional—they’re essential for longevity. Matching the material to environmental conditions ensures your structure withstands the elements. For recommended hardware standards, check out top estimating strategies.
When to Bet on Bigger, Stronger Support
Loading calculations can seem intimidating, but ignoring them can lead to sagging floors or dangerous failures. I recall a deck I built where I underestimated the load capacity of joist hangers, resulting in noticeable sagging over a few years. Always consult manufacturer charts and consider sizing up, especially for heavy or wide spans. This small step can prevent costly repairs and ensure safety over the lifespan of your project.
Making the Most of Digital Tools for Better Builds
In recent projects, I’ve integrated tools like building planning resources and estimation software to streamline my workflow. Using digital platforms helps me stay organized—from permit applications to scheduling inspections. They also provide better insights into project scope and costs, reducing surprises. Embracing technology isn’t just a trend; it’s a necessity for consistent success and peace of mind.
Curated Recommendations
To elevate your projects, I recommend specific tools and resources that have transformed my approach. First, BuildPro has become my go-to for task management and compliance tracking, simplifying complex permit workflows. Then, PlanSwift offers precise estimation capabilities tailored for home additions and renovations. For understanding permit nuances, this guide demystifies the process. Lastly, reaching out for expert advice has saved me from many costly errors—don’t hesitate to seek professional guidance when needed.
Push Yourself Beyond the Comfort Zone
Building with pressure-treated lumber and navigating permits can seem daunting, but each challenge is an opportunity to learn and grow. My experience has shown that meticulous planning, the right hardware, and embracing technology lead to resilient structures and satisfied projects. Now it’s your turn—take these lessons to heart, ask questions, and don’t shy away from seeking help. Each step you take builds confidence, ensuring your projects don’t just meet expectations—they excel.
So, what’s been your biggest lesson learned when managing permits or estimating costs? Share your story below—your insights could be the game-changer for someone else’s project, including me!