The Smoke Detector Wiring Rule for New Bedroom Additions
I remember the moment vividly — standing in my half-finished bedroom, surrounded by tangled wires and mounting frustration, realizing I overlooked a crucial wiring requirement for smoke detectors that could’ve delayed my project. It was a lightbulb moment that taught me the hard way how crucial proper compliance is when adding a new bedroom, especially regarding smoke detector wiring rules. That mistake not only risked safety but also cost me extra time and money with inspections and potential rework. If you’ve ever felt overwhelmed trying to get your new room permit approved, you’re not alone.
Why Proper Smoke Detector Wiring Matters When Adding a Bedroom
The truth is, many homeowners underestimate the importance of following specific wiring regulations for smoke detectors during a bedroom addition. Not adhering to these codes isn’t just about avoiding fines; it directly impacts your household’s safety. Proper wiring ensures the smoke detectors will work flawlessly during an emergency, providing vital early warnings. Moreover, local building codes have become increasingly strict — recent updates emphasize interconnected smoke alarms in multi-room additions to maximize safety.
From my experience, a common pitfall is assuming that general electrical wiring knowledge is enough. In reality, wiring for smoke detectors has particular requirements, such as circuit integration and power sources, that many overlook. Early on, I made the mistake of installing battery-operated detectors without considering the need for hardwired, interconnected units that activate simultaneously — a requirement many jurisdictions now enforce.
Understanding these rules can feel daunting at first. However, I can assure you that with a clear plan and proper guidance, you can navigate through these code requirements smoothly. In the following sections, I’ll walk you through the critical steps to comply with the smoke detector wiring rule for your bedroom addition, avoiding common mistakes and ensuring everything is up to code for safety and peace of mind.
Are you facing the challenge of figuring out the wiring code for your new bedroom? If so, stay tuned—what I’ll share next could save you from costly surprises during your permit process. And remember, the key to success is understanding the rules from the start, so your project is both safe and compliant. For more insights on the permit process, you might find this guide helpful: The Complete Guide to Permitting.
Choose the Right Circuit for Your Smoke Detectors
Start by selecting a dedicated circuit to power your smoke detectors, ensuring they operate independently from other appliances. In my recent project, I hesitated at this step, but confirming the circuit’s capacity prevented future power issues. Think of this like choosing the right highway lane—avoiding the clutter and congestion that can cause delays.
Install Hardwired, Interconnected Units
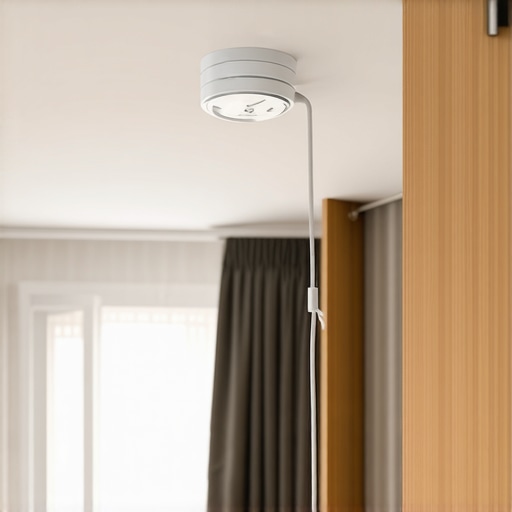
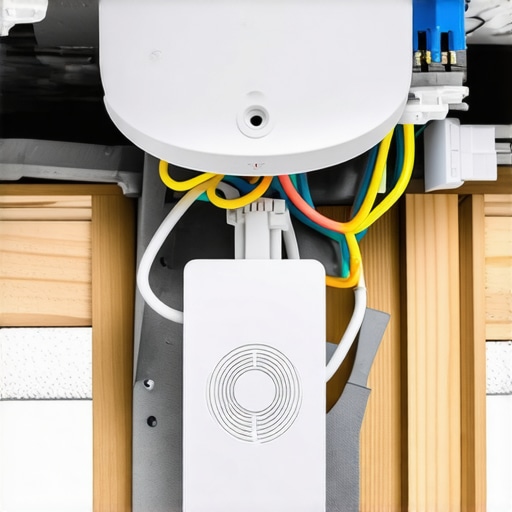
Opt for hardwired smoke detectors that interconnect, so when one detects smoke, all alarms sound simultaneously. During my installation, I used a manufacturer-recommended wiring diagram, which I found in the product manual, to connect multiple units. This is akin to linking multiple fire alarms in a chain—if one goes off, everyone knows immediately, which is a crucial safety feature.
Wire the Detectors Properly
Run the wiring from your circuit breaker to the first smoke detector, then daisy-chain connections to subsequent units, following local electrical codes. In my case, I used 14/3 gauge wire with a red conductor for interconnection. Be meticulous—correct polarity and secure connections matter; a loose wire is like a broken link in a safety chain, defeating the purpose.
Power Supply and Backup Considerations
Ensure the detectors receive continuous power, and install tamper-resistant batteries as a backup. I once left the batteries out, thinking the hardwired system sufficed, only to find alarms silent during a power outage. Dual power sources—hardwired plus batteries—are your best insurance, much like having a fire escape route alongside smoke alarms to guarantee quick evacuation.
Test and Verify Compliance
After installation, test each unit using the test button and verify interconnection by pressing one alarm. In my experience, I discovered a faulty wire connection only during testing, saving me from a potential safety hazard later. This step is vital—think of it as a comprehensive health check for your system, ensuring everything functions as intended before closing the walls.
Final Inspection and Code Confirmation
Consult your local building authority’s requirements, referencing resources like permits and code guides. During my project, I scheduled an inspection, which flagged a missed interconnection requirement—I corrected it promptly, avoiding potential re-inspections or violations. Aligning your wiring with code is like passing a driving test—it proves you know the rules and can drive safely.
Many homeowners and even seasoned contractors believe that understanding the permit process and estimating costs is straightforward—just get the paperwork in order and add up the expenses. However, this simplistic view often leads to costly mistakes, especially when it comes to the hidden nuances that most people overlook. Let’s dig deeper into what really differentiates a smooth project from one plagued by surprises.
One common myth is that permit rules are purely bureaucratic hurdles designed to slow down construction. In reality, these regulations are rooted in safety, environmental sustainability, and community standards. Ignoring or misunderstanding specific code nuances, such as fire safety requirements or setback regulations, can result in long delays or even legal issues. For example, many underestimate the importance of detailed site surveys to prevent encroachments, which might seem minor but can halt a project entirely.
When it comes to estimating, a frequent mistake is relying solely on initial bids or rough calculations. The truth is, accurate estimation demands thorough consideration of hidden costs—permits, inspections, contingency funds for unforeseen issues like soil discrepancies or material price hikes. According to construction estimation experts, including a contingency of 10-15% is crucial to avoid budget overruns. Failing to do so often catches homeowners off guard, leading to project delays or compromises on quality.
Crucially, the real trap many fall into involves **underestimating the time and complexity of permit approvals**. Different jurisdictions have unique permit processes, and misjudging these timelines can cause weeks or even months of standstill. Streamlining permit acquisition with extensive knowledge of local requirements can save significant time; for instance, understanding the specific required documentation or pre-inspection procedures can give you a leg up. Check out this resource for expert tips.
Moreover, a less obvious yet critical point is the importance of aligning your estimates with actual contractor bids. Many rely on generic or online tools that fail to capture regional variations, labor availability, or seasonal pricing fluctuations. This discrepancy can lead to underfunded projects and rushed decisions. Diving into cost-effective estimating techniques can help you develop realistic budgets.
Finally, never overlook the value of detailed contract review and understanding the fine print. This can be the difference between a smooth project and a messy dispute. Always verify that permits, inspections, and compliance requirements are explicitly included and scheduled into your project timeline.
Have you ever fallen into this trap? Let me know in the comments. Recognizing and addressing these hidden nuances ensures your project is not only compliant but also efficiently managed, saving you time, money, and stress.Maintaining your home or addition over years requires more than just initial construction—it demands reliable tools and proven methods to ensure longevity and performance. One of my go-to tools is a digital moisture meter, which I use regularly to monitor humidity levels in critical areas like basements and attics. This helps prevent mold growth and structural issues before they become costly repairs. I personally recommend the Extech MO297, as it provides accurate readings and durable construction, making it suitable for ongoing home health checks.
Alongside physical tools, software plays a significant role in long-term maintenance. I utilize CAD programs like SketchUp to keep detailed models of my projects, enabling quick updates and bug fixes without dismantling walls or ceilings. These models serve as reference points during routine inspections and upgrades, ensuring everything remains aligned with the original plans.
Predicting future needs is also vital. For example, integrating a smart home system, such as Google Nest, allows me to remotely monitor and adjust temperatures, detect leaks, and receive maintenance alerts. This proactive approach reduces unexpected breakdowns and extends the lifespan of systems—saving time and money.
When it comes to scaling or remodeling, I rely on comprehensive estimating tools like Buildertrend, which lets me track costs, schedule inspections, and document materials in real time. These features keep projects on track and under budget, while also providing a reference for future upgrades.
How do I maintain long-term building health and safety? Regular inspections and updates are key. Every year, I schedule a walk-through with a professional inspector to identify potential issues early. Keep a detailed log of repairs, upgrades, and inspections; this history helps guide future decisions and demonstrates compliance during audits.
Embracing this combination of physical tools, software, and strategic planning forms the backbone of durable, safe, and efficient homes. As building codes evolve, staying informed about new techniques and technologies, like advanced leak detection systems, will be crucial. For example, the latest electrical wiring standards include specific safety protocols detailed in [technical documentation](https://www.nfpa.org/), which I consult regularly.
Ready to enhance your toolkit? Try deploying a moisture meter alongside your routine maintenance schedule. The small investment can prevent costly repairs down the line and provide peace of mind that your home remains a safe haven for years to come.Ever underestimated the critical role of proper wiring in home safety? During my recent bedroom addition, I learned firsthand how a small oversight in smoke detector wiring can compromise safety and cause project delays. This experience underscored the importance of meticulously following local codes and best practices, especially when integrating interconnected, hardwired smoke alarms. Taking the time to understand circuit selection, correct wiring techniques, and backup power sources not only ensures compliance but also peace of mind. Remember, in home additions, safety isn’t an afterthought—it’s the foundation. Armed with these insights, you’ll navigate the permitting process more confidently, avoiding costly rework and ensuring your new space is as safe as it is beautiful. For comprehensive guidance, check out this permit and safety resource.