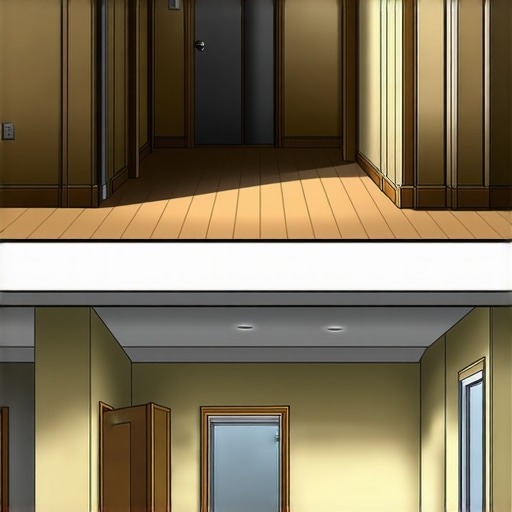
The Load-Bearing Calculation for Open-Concept Remodels
I remember the moment vividly—standing in my partially demolished living room, staring up at the exposed beams, and realizing I had no idea if the new open space was safe. That lightbulb moment hit hard. I’d been so caught up in design choices and permit paperwork that I barely thought about the structural guts holding everything up. If you’ve ever been there, you’re not alone. Many homeowners and DIY enthusiasts hit this snag early on, fearing that a miscalculation could mean costly repairs or even safety hazards.
The Load-Bearing Puzzle in Open-Concept Remodeling
What exactly makes load-bearing calculations so daunting? Well, in open-concept remodels, the challenge is ensuring the existing structure can support the new, expansive spaces without hidden surprises lurking beneath the surface. Failing to get this right isn’t just risky—it can lead to structural failure that’s expensive and dangerous.
Making these calculations might seem like a task reserved for engineers, but with the right approach—and a bit of guidance—you can navigate this yourself. I’ll share my personal experience navigating load calculations and the key steps I discovered for making sure everything stays standing, safe, and compliant. For additional insights, you might check out the comprehensive guide on [estimating costs for new builds](https://constructionedgez.com/estimating-costs-for-new-builds-expert-insights), which also covers related planning considerations.
Is the Load Calculation Process Truly Worth the Hassle?
Early in my project, I made the mistake of assuming I could eyeball the load-bearing capacities. Spoiler alert: That didn’t end well. It led to extra inspections, shuffling permits, and a gnawing feeling of doubt. This taught me a crucial lesson: proper load calculations are non-negotiable if you want peace of mind and a safe home.
Employing accurate calculations from the start saved me headaches down the line. It’s a step worth investing effort in, especially if you’re managing your project without a full-time contractor. For more tips on smoothly managing permits and building codes, explore my favorite [permit-approval tips](https://constructionedgez.com/permit-approval-tips-for-seamless-home-additions). Now, let’s dive into the practical steps to nail your load-bearing assessment and keep your remodel on solid ground.
Gather Accurate Structural Data Before You Start
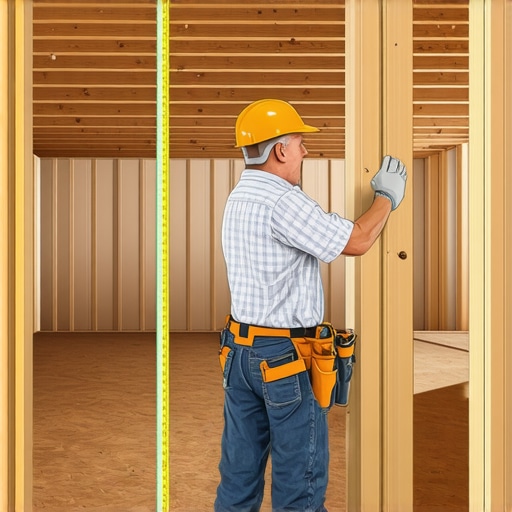
Kick off your load calculation by collecting detailed measurements of your existing structure. Use a laser measure or tape to record joist sizes, spacing, and span lengths. For example, when I tackled my living room removal, I measured the joists to confirm their dimensions, which was crucial for accurate load assessments. Knowing the exact framing details helps you avoid overestimating or underestimating support needs.
Identify Load-Bearing Elements Clearly
Next, distinguish between load-bearing walls, beams, and posts. Typically, exterior walls and interior bearing walls carry significant weight. Use your building plans if available, or check with local codes. During my project, I found a concealed load-bearing wall that I initially thought was a partition. Confirming these elements ensured I didn’t accidentally remove supports, thus preventing future safety hazards. For guidance, review permitting insights on identifying structural components.
Estimate Live and Dead Loads Precisely
Live loads include furniture and occupancy weight, while dead loads are structural materials like drywall, roofing, and flooring. Use standard load values from local building codes as benchmarks. When I added a new open space, I calculated dead loads based on the materials I planned to use, then added a safety margin. This step is vital to ensure your supports can handle actual conditions, avoiding surprises during inspections or after completion.
Calculate Total Load and Compare Against Support Capacity
Add your dead and live loads to find the total expected weight your framing must support. Refer to span tables and support capacity charts, like those found in cost estimation guides for additional reference. In my case, I used steel support span tables to verify that my existing beams could handle the new loads, preventing the need for costly reinforcement.
Decide When to Reinforce or Upgrade
If your calculations show that existing supports are insufficient, plan reinforcement strategies. This might involve adding supplementary beams, posts, or replacing joists with higher-capacity materials. During my project, I installed a steel beam to distribute the load evenly, which I documented for permits and inspections. Consulting a structural engineer for complex upgrades is recommended, but understanding these basics empowers you to identify when professional advice is necessary.
Leverage Resources for Confidence and Compliance
Finally, utilize available tools and resources. Download span tables, use online calculators, and review local building codes thoroughly. For complex projects, consider consulting with a structural engineer, especially if your existing structure shows signs of aging or irregularities. Remember, meticulous load planning not only ensures safety but also smooths out permit approvals, making your remodeling journey more predictable and less stressful.
 When it comes to home additions and new builds, many assume the process is straightforward—simply get a permit, estimate costs, and start construction. However, this oversimplification overlooks critical nuances that can make or break your project. One prevalent misconception is that all permit applications are the same; in reality, each municipality has unique requirements and review processes that can significantly impact your timeline. Rushing through permit submission or relying on generic estimates often leads to project delays or costly reworks.
What’s the Cost of Ignoring Permit Complexities for Advanced Projects?
Overestimating or underestimating permit requirements can result in hefty fines or forced redesigns. For example, a homeowner assuming a simple backyard deck didn’t need specific floodplain considerations ended up facing unexpected drainage and setback violations. Studies show that up to 40% of project delays are caused by permit issues overlooked during planning, emphasizing the importance of thorough research and compliance. To navigate this landscape effectively, consult detailed resources like permit guides for new builds and step-by-step permit navigation.
Keeping your home renovation projects running smoothly requires the right combination of tools, software, and methods. Over the years, I’ve honed a toolkit that ensures efficiency, accuracy, and compliance—saving me time and preventing costly errors. In this post, I’ll share the tools I personally rely on for managing permits, estimating costs, and coordinating construction activities effectively.
Digital Measurement Devices for Precise Data Collection
The foundation of any successful remodel is accurate measurements. I swear by the Leica DISTO laser distance meter. It provides quick, reliable measurements of room dimensions, joist spans, and support placements. Its Bluetooth connectivity allows me to transfer data directly into my project spreadsheets, reducing manual entry errors. Whether you’re assessing load-bearing walls or planning new openings, precise measurements are non-negotiable.
Project Management Software to Stay Organized
Keeping track of permits, inspections, and schedules can be overwhelming. I use Buildertrend because it consolidates communication, document sharing, and scheduling in one platform. Its mobile app allows me to update progress on-site and instantly notify subcontractors. This transparency prevents delays and keeps everyone aligned. For small-scale projects, even Trello or Asana can be tailored to manage tasks effectively.
Permit and Code Navigation Tools to Ensure Compliance
Understanding local permitting processes is key. I utilize online resources like permit guides to review specific requirements before applying. Additionally, leveraging digital permit portals reduces wait times. My tip: always cross-reference your plans with the latest building codes—especially for load calculations and support reinforcement—to avoid rejections or fines.
3D Modeling and Visualization Software for Better Planning
Visual representation helps catch potential issues early. I employ SketchUp for 3D modeling of open-concept spaces. This tool lets me simulate load-bearing wall removals and assess spatial flow. It’s particularly useful when discussing plans with structural engineers or inspectors. Having a visual plan streamlines approvals and minimizes surprises during construction.
Long-Term Maintenance with Monitoring Tools
After project completion, staying on top of structural integrity is vital. I’ve invested in a uHoo air quality monitor and a Nest smart thermostat to ensure the home remains in optimal condition. For structural monitoring, small vibration sensors can alert you to shifting supports or unexpected settling over time. As home technology advances, integrating these tools will become standard for maintaining value and safety.
What’s Next for Tool Innovation in Home Building?
I predict that IoT devices and AI-powered analytics will soon make routine maintenance and compliance checks more autonomous. Imagine a future where your home’s structural health is constantly evaluated by embedded sensors, alerting you in real-time to potential issues before they escalate. Embracing these technologies now can give you a genuine edge in managing your property efficiently.
If you’re ready to optimize your renovation process, start by trying out a laser measurement device like the Leica DISTO for your next project. The precision and speed it offers can be a game-changer in planning load assessments and ensuring safety.
The Hidden Lessons I Didn’t Expect to Learn About Remodeling and Permits
One of the most eye-opening realizations during my home addition project was that structural safety isn’t just a checkbox—it’s the backbone of any successful remodel. I learned that rushing through load calculations can lead to unexpected delays, costly repairs, and even safety issues. The importance of meticulous planning became clear when I discovered hidden load-bearing walls that could have derailed my entire project if overlooked. These lessons taught me that understanding and respecting the structural components makes all the difference between a smooth project and a nightmare.
My Go-To Resources That Keep My Projects on Track
Over time, I’ve compiled a set of tools and references that streamline my approach to additions, estimating, and permits. The Estimating Costs for New Builds guide is invaluable for accurate budget planning, helping me avoid surprises. I rely on permit process insights to navigate local regulations smoothly. For structural data, tools like laser measures and span tables from cost estimation guides are essential. These resources have become my trusted allies in ensuring every project detail aligns with safety and code compliance.
Your Next Step Towards a Safer, Smarter Remodel
Taking charge of load calculations and permit understandings transforms the remodeling experience from stressful to rewarding. With the right knowledge and tools, you can confidently design open spaces that are both beautiful and secure. Remember, thorough planning isn’t just about avoiding problems—it’s about creating a home that stands the test of time. So, whether you’re knocking down a wall or planning a new build, embrace the details, and let safety guide your creative vision.
Have you ever encountered surprises during a load assessment or permit process? Share your story below—I’d love to hear how you navigated those challenges!