Why Your Sunroom Floor Plan Requires a Thermal Break
It hit me like a cold shower during my first sunroom project. I had drawn up a beautiful plan, ordered materials, and even secured the permits—all without considering the little detail that would cause headaches down the line: a thermal break under the floor. That oversight nearly doubled my frustration and costs. If you’ve ever felt that sinking feeling when your new sunroom feels more like an uninvited icebox than a cozy retreat, you’re not alone. Many homeowners and contractors overlook the importance of thermal breaks, thinking it’s just a minor detail, until it’s too late.
The Hidden Perils of Ignoring Thermal Breaks in Your Sunroom Design
When I first jumped into constructing my sunroom, I believed that solid insulation and quality windows would solve all temperature issues. Turns out, the devil’s in the details. Without a proper thermal break—a barrier that prevents the direct thermal connection between the cold ground and your living space—the floor can act like a giant cooling sink in winter and an unintentional heat conduit in summer. This leads to uneven temperatures, higher energy bills, and sometimes even structural issues like frost heave below the slab.
From my experience, the mistake early on was assuming that standard insulation beneath the slab would suffice. But the truth is, thermal bridging occurs when there’s a continuous path for heat to transfer. As noted by building scientist Joseph Lstiburek, ignoring thermal breaks in foundational elements can compromise energy efficiency and occupant comfort (source). That realization transformed my approach, prompting me to focus on effective design strategies to address this overlooked detail.
Worried That Thermal Breaks Are Just Extra Hassle?
Many skeptics think installing a thermal break adds complexity or expense. In reality, the initial effort pays for itself by reducing heating and cooling costs and preventing future repairs. Plus, with modern materials and techniques, installing a proper thermal break can be straightforward and affordable.
If you’re planning a sunroom addition or renovation, ask yourself—have I overlooked how ground temperature might affect my floors? If so, don’t worry. My next steps are going to walk you through the what, why, and how of ensuring your floor plan includes a thermal break that saves you money and hassle in the long run.
Assess Your Foundation and Materials
Start by inspecting your current foundation plan. Confirm if the design includes a thermal break—this usually involves choosing insulating materials like rigid foam boards or neoprene pads. My first project involved a rushed decision to skip this step, which led to temperature issues. To avoid similar pitfalls, review your foundation drawings against best practices on permitting guides and ensure thermal breaks are incorporated.
Plan the Placement of the Thermal Break
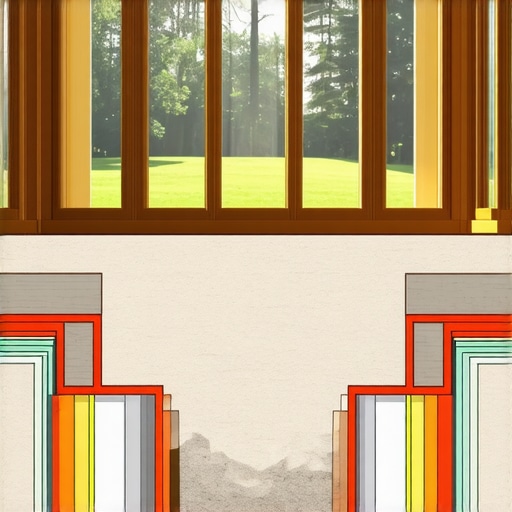
Identify where the thermal bridge occurs—beneath the slab, at wall junctures, or around footings. For my project, I focused on the ground contact point, which was overlooked in initial plans, causing frost heave. Drawing a detailed diagram helps in visualizing the installation. Use a tape measure and your foundation plan to mark exact locations. Remember, the key is interrupting the thermal path for the ground and the structure.
Prepare the Sub-Base and Formwork
Excavate or clean the sub-base as needed. Lay a compacted gravel layer if your plan calls for it; this enhances drainage and stability. Then, set your forms for the slab, ensuring clear space for the insulation material. In one messy session, I learned that inadequate preparation led to shifting insulation during pour, which compromised effectiveness. Be precise with form dimensions to maintain consistent insulation placement.
Install Insulation Materials
Place foam boards or neoprene strips into the formwork, ensuring they are flat and securely fastened. Seal seams with appropriate tapes to eliminate thermal bridges. I used rigid foam panels cut to size, then sealed my seams with foil tape. This simple step drastically improved thermal performance in winter. Confirm that the insulation material has the R-value recommended for your climate, referencing cost-effective estimating techniques for material selection.
Pour and Finish the Concrete
Pour the slab carefully, avoiding moving or shifting the insulation. Use rebar or mesh as specified in your plan. During my pour, I had to juggle finishing while preventing the edge of the insulation from cracking or pulling away. Keep the surface level and smooth to avoid future unevenness. Once cured, inspect the edges—damaged insulation can reduce thermal performance. For more insights on handling foundation details, review estimating techniques for foundations.
Finish and Protect the Thermal Break
Apply a protective barrier or coating over the insulation if exposed, especially at slab edges. This shields it from moisture and mechanical damage. In my experience, neglecting this exposed layer led to early degradation, compromising thermal integrity. Consider adding a waterproof membrane if your climate has high moisture levels. Proper finishing ensures long-term effectiveness and energy savings.
Many assume that estimating costs, securing permits, and planning new builds follow a straightforward process—add materials, get approval, and start construction. But in my experience, there’s a subtle trap that even seasoned professionals often overlook: the underestimation of unforeseen complexities in the permit process and scope adjustments. This oversight can cause project delays and budget overruns that seem to come out of nowhere.
For example, the misconception that permits are a simple formality leads many to underestimate the time and costs involved. According to industry expert sources, permits can involve multiple layers of review, especially for additions or custom builds (click here). Failing to account for this ‘hidden’ bureaucratic layer can leave your schedule and budget vulnerable to unexpected hurdles. I once watched a project stall because the permit had been assumed to be a quick approval, only to discover later that additional documentation and revisits were required, incurring costly delays.
Are Your Estimates Missing Critical Variables? How to Account for Hidden Costs in Permits and Building Scope
Solving this puzzle involves more than just adding a contingency line to your budget. It demands nuanced understanding of local regulations, the permitting timeline, and the specific scope of work that might trigger extra reviews—like structural modifications or zoning adjustments. An advanced pitfall is the misjudgment of scope creep, especially when the initial plans are not precise or comprehensive, leading to change orders that inflate costs.
For example, a common mistake during additions is neglecting to consider the need for extra inspections or engineering reports, which can be compulsory for certain structural elements or setbacks. Recognizing these factors early saves both time and money. For an in-depth guide on managing permit-related uncertainties, check out this resource.
Another critical nuance involves understanding the relationship between estimated costs and actual expenses. The ‘planning fallacy’—the tendency to underestimate the time and cost of future tasks—is well-documented in behavioral studies and applies strongly here (see here). To avoid falling into this trap, experts recommend detailed historical data analysis and conservative budgeting strategies, especially for complex projects.
In essence, accurate estimation and permitting demand a strategic approach that considers the layered complexities many overlook. Misjudging these details can lead to unforeseen expenses and project stalls, eroding confidence in your planning.
Have you ever fallen into this trap? Let me know in the comments and share your experiences. Staying vigilant about these hidden nuances can make all the difference between a smooth build and a stressful nightmare.Ensuring your construction projects stand the test of time requires more than a solid initial plan; it demands diligent maintenance and the right tools. I personally rely on laser distance measurers like the Leica DISTO D5 for quick, accurate measurements, which significantly reduce costly errors during framing or remodeling. Similarly, a quality moisture meter, such as the Fluke 1660, helps monitor moisture levels in concrete and wood, preventing future issues like mold or structural compromise. These tools not only improve precision but also save me hours on a job site, enabling me to identify potential problems early.
Regularly inspecting equipment is crucial. For instance, my digital level from Bosch keeps my readings accurate over time, preventing slab unevenness that can lead to long-term cracking. Maintaining power tools with manufacturer-approved lubricants and timely blade replacements ensures they operate efficiently, extending their lifespan and reducing downtime. When it comes to software, I use project management apps like Buildertrend to keep all documentation, scheduling, and permits organized, minimizing the risk of overlooked details that could delay completion.
Thinking about where this trend is going, I believe automation and IoT-connected tools will become vital. Imagine sensors embedded in foundational elements that relay real-time data on temperature, moisture, and stress—helping us catch issues before they escalate.
Are you wondering how to keep your building projects functioning smoothly over the years? One effective approach is adopting predictive maintenance protocols. For example, regularly scheduling calibration of your laser levels and moisture meters ensures consistent accuracy. Additionally, integrating software that tracks tool usage and wear can alert you when replacements or servicing are due, avoiding unexpected breakdowns.
For those interested in enhancing efficiency, I recommend trying the above tools, especially the laser distance measurer, as it exemplifies how precision in measurements can lead to long-term savings and fewer call-backs. As equipment technology advances, staying updated on new tools and maintenance techniques will be essential for maintaining a competitive edge. Don’t neglect your tools—proper care and strategic upgrades are investments that keep your projects on track and within budget. To explore more about managing your tools effectively, visit this resource.
Lessons that Changed My Approach to Sunroom Projects
One of the most valuable insights I gained was realizing that overlooking thermal breaks not only inflates energy bills but also jeopardizes structural integrity over time. The hard lesson: that small detail can make or break your project’s comfort and durability.
I learned to dig deeper into permit processes early on, understanding that hidden bureaucratic layers often cause delays and unexpected costs. Patience and thorough research are vital, saving you both time and money in the long haul.
Investing in reliable tools like laser distance meters and moisture testers transformed my workflow, helping me detect potential issues before they escalate. These tools may seem simple but are game-changers for precision and peace of mind.
Most surprisingly, I discovered that meticulous planning and awareness of hidden costs can empower homeowners and builders alike, turning a stressful project into a rewarding achievement. The key is not just building smart but thinking ahead and learning from every mistake.
Tools and Resources That Keep My Projects on Track
My go-to resource for permit insights is Understanding the Permit Process. It breaks down complex bureaucratic steps into manageable actions, saving you from costly surprises.
For estimating, I rely on Effective Cost Estimating Techniques. Accurate budgeting is crucial, especially when unforeseen costs lurk around every corner.
When selecting foundational materials, I recommend Cost-Effective Materials Guidance. It helps balance quality and affordability without sacrificing durability.
Lastly, tools like the Bosch digital level and laser meeters from Tools for Construction Precision keep my projects aligned and moisture-free, ensuring long-term success and safety.
Your Next Step Toward Smarter, Safer Sunroom Builds
Empower yourself today by embracing detailed planning, leveraging reliable tools, and diving into the specifics of permits and thermal management. The real magic happens when you turn knowledge into action, transforming your sunroom project into a shining example of craftsmanship and foresight. Remember, every great build starts with a small step—so why not start now? What’s been your biggest challenge in managing permits or estimating costs? Share below, and let’s grow together in this journey of building smarter and better.