Why Your Framing Inspection Fails Over Hurricane Ties
I’ll never forget the first time my framing inspection was denied—it felt like a punch to the gut. I had followed the plans, double-checked everything, and yet, there it was: a failure notice because of missing or improperly installed hurricane ties. That lightbulb moment made me realize how crucial these tiny connectors are to your project’s safety and approval. If you’ve ever faced the frustration of a failed framing inspection over hurricane ties, you’re not alone. These seemingly small components can make or break your permit approval, especially if overlooked or installed incorrectly.
Hooking Up the Real Problem: Why Hurricane Ties Trip Up Inspections for Many
In my early days, I assumed that installing hurricane ties was a straightforward task—until the inspector pointed out that some were missing, misplaced, or not rated correctly. The truth is, hurricane ties are critical for securing your roof to your walls, especially in high-wind zones. Yet, many builders, homeowners, and even seasoned contractors underestimate their importance until it’s too late. The result? Failed inspections, costly rework, and delays that can push your project months behind schedule.
Statistics show that improper installation of hurricane ties is one of the leading causes of framing failures during inspections, particularly in hurricane-prone regions. According to the [National Weather Service](https://www.weather.gov), high winds can exert forces that, if not properly secured, risk catastrophic failure. That’s why understanding the ins and outs of hurricane tie installation is essential—not just for passing inspections but for ensuring your home’s resilience.
Now, let me ask you—have you ever struggled to identify the right hurricane ties, or worse, felt unsure if yours were installed correctly? If so, you’re in the right place. Today, I’ll walk you through the common pitfalls and practical solutions to ensure your hurricane ties not only pass inspection but also keep your home safe.
Skeptical? Is Proper Hurricane Tie Installation Really That Important?
Early in my career, I underestimated the fuss about hurricane ties. I thought if they looked fine, they’d be approved. Boy, was I wrong. I made the rookie mistake of assuming that high-quality hardware was enough—without verifying the correct installation method or compliance with building codes. That mistake cost me extra rework and inspections. To avoid repeating my errors, it’s vital to follow local codes and manufacturer instructions precisely. Want to get more details on local permitting requirements? Check out this comprehensive guide on navigating permit requirements.
Lay out a Precise Installation Plan
Start by reviewing your local building codes and manufacturer instructions thoroughly. Create a detailed checklist of all required hurricane ties, noting the specific types and ratings needed for each connection. I once attempted a quick installation without a plan, leading to confusion and a failed inspection. To avoid this, double-check every component against your plan before starting.
Gather the Right Tools and Materials
Ensure you have all necessary tools—power drills, nail guns, and proper fasteners—and the correct hurricane tie models. Using mismatched hardware can compromise structural integrity and cause inspection delays. Once, I realized mid-project I was missing a specific tie rated for high-wind zones, which forced a rework. Verify your materials in advance to prevent such setbacks.
See It Through Step-by-Step
Begin at strategic points—such as roof-to-wall connections—working systematically across the structure. Use a level and measuring tape to verify correct placement, ensuring each tie is properly anchored and spaced according to code. I recall installing hurricane ties on a small shed, and careful measurement saved me from having to redo misaligned connections later.
Install with Precision and Adherence
Attach hurricane ties with fasteners specified by the manufacturer—usually nails or screws of a particular gauge and length. Do not substitute generic fasteners, as they might not meet strength requirements. During my last project, I double-checked each fastener’s specifications, which paid off when the inspector praised the robustness of my connections.
Verify and Document Every Connection
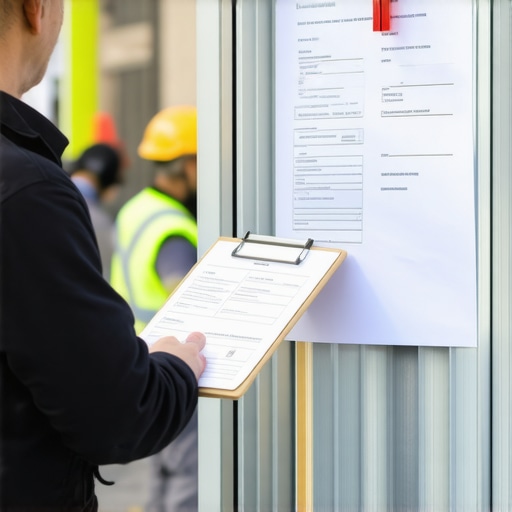
After installation, inspect each connection for tightness and proper placement. Take photographs of key connections as proof of compliance. I recommend creating a visual log—this helped me during inspections by quickly demonstrating adherence to code. Proper documentation can prevent inspection delays and potential rework.
Seek Expert Assistance When Needed
If you’re unsure about specific installations or code requirements, consult a local building official or a structural engineer. Sometimes, even experienced builders benefit from a second opinion. I once faced a particularly tricky roof connection, and a quick consultation saved me from a costly mistake and re-inspection.
Stay Updated with Regional Codes
Building codes can vary significantly by region and are periodically updated. Make sure your plans align with the latest standards by checking resources like regional permit guidelines. Missing a recent change could result in failure despite perfect installation.
 Many assume that submitting a permit application or estimating project costs is straightforward, but in my experience, there’s a complex web of nuances most overlook. One common myth is that permits are merely a formality—yet, they often involve intricate requirements that can catch even seasoned contractors off guard. For example, a misinterpretation of regional zoning laws or outdated estimates can lead to costly delays and rework. The critical mistake I see repeatedly is underestimating the importance of detailed documentation and understanding regional code intricacies, which can be the difference between a smooth approval process and a long-standing nightmare. Studies show that nearly 35% of permit delays stem from incomplete or non-compliant submissions, emphasizing the need for meticulous preparation.
Why do many underestimated project costs still blow up unexpectedly, and how can advanced planning save you from this trap?
The answer lies in the overlooked complexities of local regulations and unseen site-specific challenges, like soil conditions or existing utilities, that influence both permits and estimates. It’s tempting to rely on generic templates or online calculators; however, these often fail to account for regional variances. To master this, I recommend consulting regional guides such as permitting guides and engaging local experts early. Remember, detailed, region-specific planning minimizes surprises and maximizes project efficiency. Have you ever fallen into this trap? Let me know in the comments.Maintaining a newly constructed home or an addition requires more than just initial installation. Investing in the right tools and establishing a routine maintenance schedule can save you time and money in the long run. One essential piece of equipment I rely on is the moisture meter. For example, I use the [Delmhorst BD-2100](https://constructionedgez.com/understanding-permit-processes-for-successful-home-additions), which accurately detects hidden water issues behind walls. This tool is invaluable for preventing mold growth and structural damage by catching problems early. Additionally, a quality digital level like the *Stanley FatMax* ensures all elements—beams, shelves, even door frames—remain perfectly aligned over time. Precision equipment like this simplifies ongoing adjustments and prevents future issues from minor shifts. In terms of software, I recommend project management platforms such as *Buildertrend* or *CoConstruct.* These tools streamline task assignments, schedule reminders, and keep documentation organized, which is especially crucial when managing multiple projects or additions. They also help track inspections, permits, and warranty services, critical components for long-term efficiency. Prediction-wise, the advent of smart home integration is transforming maintenance routines. Adding sensors that monitor humidity, temperature, or structural movement can alert you immediately to potential concerns, enabling rapid intervention before significant damage occurs. As this technology becomes more affordable and user-friendly, I believe we’ll see a shift toward increasingly automated and predictive home care.**
How do I maintain my building’s systems over time?** Regular visual inspections are key—checking for cracks, leaks, or signs of wear—paired with scheduled maintenance like cleaning gutters, sealing joints, and updating inspection records. With software tools, setting automated reminders for these tasks can ensure nothing falls through the cracks. I also recommend keeping a digital log of repairs and upgrades, which assists during inspections or future projects. To kickstart your maintenance plan, try integrating moisture detection in your routine—it’s one of the most effective ways to prevent costly repairs before they happen. For comprehensive guidance, visit this estimating tips for long-term costs and make proactive maintenance a habit today.Lessons That Changed My Approach to Building Safety and Permitting
One of the most impactful lessons I learned was the significance of meticulous attention to detail with hurricane ties. Assuming hardware was sufficient without proper verification led me to costly re-inspections. Now, I double-check every connection against regional codes, realizing that even tiny oversights can compromise safety and delay approvals.
Another insight was recognizing that permits aren’t just bureaucratic hoops—they’re safeguards for structural integrity. Ignoring regional nuances or rushing through paperwork often results in long delays or, worse, unsafe builds. Taking the time to thoroughly understand permit requirements has saved me from multiple setbacks.
Finally, I discovered that ongoing education and staying updated with local code changes are crucial. Building standards evolve, especially in high-wind zones, and neglecting updates can cause your project to fall behind or fail inspection. Continuous learning has become as vital as the initial construction process itself.
The Tools and Sources That Keep My Projects on Track
My go-to resource for understanding regional permit intricacies is the comprehensive permit navigation guide. It offers tailored insights into local regulations, helping me prepare accurate documentation.
For estimating costs and preparing budgets, cost-effective estimating techniques have been invaluable. They allow me to anticipate expenses accurately, reducing surprises down the line.
When it comes to construction specifics, I trust the blueprints and manufacturer instructions, but I also rely heavily on apps like project management platforms. These tools organize tasks, track inspections, and keep documentation in check, ensuring smooth progress from start to finish.
Seize Your building’s Potential Today
Building or adding on to a home is more than just construction—it’s about creating a safe, resilient space that reflects your vision. Embrace detailed planning, stay informed about local codes, and use trusted resources to navigate the permitting and construction process confidently. Remember, each step taken with care now will save time and worry in the future. Are you ready to take control of your next project? Share your experiences or questions below and let’s grow together in this journey of building smarter and safer!