The Framing Error That Causes Squeaky Second Floors
It was one of those nights when the house was eerily quiet, yet I couldn’t ignore the unsettling squeak from the second floor—a sound that seemed to grow louder each time I stepped on it. I’ve been around homes long enough to recognize that telltale cry of a framing problem, and this wasn’t just a minor creak. It was a sign of a deeper issue—one that could turn into costly repairs if left unchecked.
The Hidden Framing Error That Causes Squeaky Floors
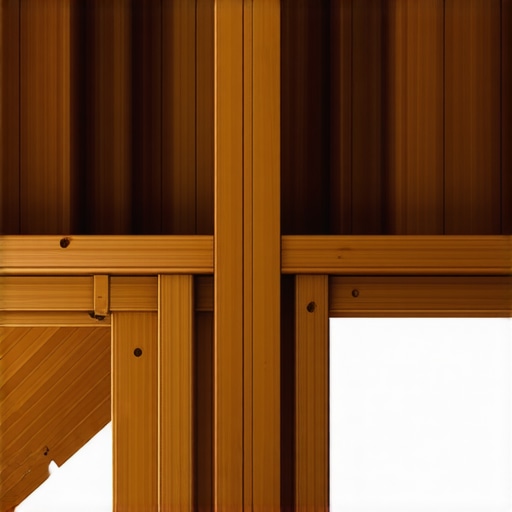
As I delved into the world of home craftsmanship, I quickly realized that many homeowners and even some builders overlook a common, yet sneaky, framing mistake. That squeak? It’s often caused by an improperly installed or misplaced joist, or worse, a framing error that allows movement over time. And let me tell you—this isn’t just about annoying sounds. It’s about structural integrity and your peace of mind.
But here’s the thing: this problem isn’t inevitable. With the right knowledge and approach, you can identify and fix this frustrating issue before it becomes a nightmare. Today, I’ll share real-world insights from my own experiences—mistakes I made early on that cost me extra—and how you can avoid them. Plus, I’ll outline proven strategies to diagnose and resolve squeaky floor issues rooted in framing errors.
If you’ve ever faced a similar squeaking dilemma, or you’re just now starting a renovation and want to do it right from the ground up, this post is for you. Understanding the common pitfalls can save you money and help preserve the soundness of your home for years to come.
Let’s get into the nitty-gritty of what causes these squeaks and how you can pinpoint the exact framing mistake behind them. Ready to take control of your floor’s squeak and restore tranquility to your home? Great. We’re about to dive into some practical steps you won’t want to miss.
Is this framing flaw really worth worrying about?
Early in my building days, I made the mistake of assuming that a squeaky floor was just a cosmetic annoyance. It’s not. According to Building Science Corporation, small movements in framing components can lead to significant problems over time, including noise, uneven floors, and even structural damage (source). Just imagine the expense—and the stress—if ignored until it worsens.
Recognizing this issue early on can prevent costly repairs down the line. If you’ve experienced similar frustrations or want to ensure your home’s framing is solid, stay tuned. The next sections will walk you through identifying the root cause and fixing the squeak properly. No more guessing games—just effective, proven methods that save your peace of mind.
Assess the Floor and Joist Alignment
Begin by inspecting the affected area for unevenness or looseness. Use a level or straightedge to check if the subfloor and visible joists are properly aligned. During a recent project, I used a laser level across the floor surface, which revealed slight dips indicating misaligned joists. Correcting this early prevents future squeaks and structural issues.
Identify the Source of Movement
Walk across the floor while observing or listening for creaking sounds. Slightly lift the suspected joist or subfloor with a pry bar to see if it moves independently of the framing. One time, I found a loose joist hanging slightly asymmetrically, and pressing on it caused the squeak. Securing loose joists with screws or nails fixed the issue permanently.
Secure Loose or Misplaced Framing Components
Use construction-grade screws to fasten loose joists to the ledger or wall framing. If you encounter a gap or misalignment, shim or sister the joist with additional lumber for stability. In my experience, installing a metal bracket or joist hanger added extra support, eliminating persistent squeaks. Proper fastening is crucial—nail guns may not provide sufficient grip, so opt for screws when fixing framing components.
Check for Proper Bearing and Support
Ensure that joists rest adequately on load-bearing walls or beams. If you find unsupported spans, add additional support beams or columns. During a recent retrofit, I installed steel post supports beneath mid-span joists, which eliminated the bouncing and squeaking. Remember, supporting the load distributes movement and prevents future squeaks.
Apply Friction-Reducing Solutions
For minor misalignments that cause rubbing, applying a silencing wax or powdered chalk between the joist and subfloor can help. In a quick fix, I used a talcum powder mix along the edges of a stubborn joist, which smoothed movement and silenced the noise. This step is effective for small, localized squeaks but check for underlying framing issues as well.
Addressing Framing Errors During Construction
To prevent these issues from arising initially, carefully review your framing plan. Use accurate measurements and double-check connections before closing up walls or flooring. When I built my last home addition, I cross-checked all joist placements against the blueprints and verified each one with a measuring tape. Skipping this step can lead to misaligned framing, resulting in squeaks down the line.
Consult Structural Resources and Permits
If you suspect significant framing faults, consider consulting a structural engineer or reviewing local codes. Securing proper permits and inspections ensures your framing meets safety standards. For larger projects or persistent issues, exploring detailed guidelines from resources like this guide can provide clarity on compliance and best practices.
Many homeowners and even seasoned professionals often stumble over the nuances of accurate project estimating, especially when it comes to additions or new constructions. A prevalent myth is that quick, ballpark figures suffice for initial budgets. However, as I’ve learned through hands-on experience, this approach often leads to underestimating costs and causing project delays. In reality, detailed estimation involves accounting for hidden variables that most overlook, such as permit complexities and site-specific challenges.
One trap I encountered early on was relying solely on previous bids without updating for current material prices or labor rates. Construction costs fluctuate, sometimes rapidly, influenced by market trends or regional demand. This oversight can result in significant budget overruns. Experts suggest regularly benchmarking estimates against current market data—something you can find in resources like top estimating strategies—to stay ahead.
Another misunderstood aspect concerns permits and regulatory costs. Many assume permits are a straightforward fee, but the reality is complex. Different jurisdictions impose varying requirements, and overlooked permit fees can unexpectedly inflate your budget. A key mistake is failing to verify permit scope during the planning phase. This can lead to costly revisions or project halts. To avoid this, consult comprehensive guides such as understanding permit processes, which detail how to accurately forecast these expenses.
Have you ever fallen into this trap? Let me know in the comments.
For advanced estimators, understanding the impact of site-specific conditions and coordinate with local building departments early in your planning can save hours and money. For example, some builders overlook the complexity of site access when estimating excavation or foundation costs, leading to underestimated budgets. Incorporating contingency allowances, typically 10-15%, can cushion unforeseen issues, especially in custom builds or when working in older neighborhoods with known infrastructure quirks.
In summary, effective estimation isn’t just about crunching numbers; it’s about understanding the hidden layers that influence costs. Avoid common myths by prioritizing current data, thorough site assessments, and permitting intricacies. By doing so, you’ll not only prevent budget overruns but also ensure smoother project execution. For more insights into managing estimates efficiently, visit this comprehensive guide.
Keeping It Working: Essential Tools and Strategies
Maintaining your home’s structure over time requires a combination of the right tools, disciplined routine, and proactive inspections. One tool I personally rely on is a high-quality stud finder with deep scanning capabilities. It helps me verify framing cavities behind drywall without unnecessary destruction, making inspections quick and accurate. Understanding permits and inspections is crucial, especially when performing structural assessments yourself.
In addition, an inexpensive but precise moisture meter is invaluable for detecting hidden water intrusion that can compromise framing wood or cause mold growth. Regular use of these devices helps catch issues early, preventing costly repairs down the line.
What Tools Do I Recommend for Long-Term Maintenance?
Beyond handheld gadgets, I swear by a laser level combined with a durable moisture analyzer. The laser level ensures your floors stay even over the years, while the moisture analyzer helps you monitor any elevated moisture levels in framing or subflooring, especially in areas prone to humidity or leaks.
Another underrated technique involves capturing regular video inspections using a drone equipped with a high-resolution camera. This non-invasive method allows for comprehensive checks of your roof, eaves, and other hard-to-reach areas without lugging out a ladder every time. Such proactive assessments can extend your home’s lifespan and preserve your investment.
How do I keep my home performing well as it ages?
In the future, I see an increased integration of smart sensors that continuously monitor structural integrity, alerting homeowners to issues before they become visible. Technologies like fiber optic strain sensors embedded in critical load-bearing elements could revolutionize maintenance, transforming it from reactive to predictive.
If you want to start implementing advanced maintenance practices today, I recommend installing a few smart moisture sensors in key areas—initially around foundation points or areas with historical leak potential. These simple additions can give you peace of mind and collect invaluable data over time.
Stay ahead by adopting routine checks and proper tool use
Creating a maintenance schedule that incorporates weekly visual inspections, monthly gadget scans, and annual professional evaluations can dramatically extend your home’s durability. Remember, early detection is your best defense against structural failures.
To deepen your understanding of efficient home maintenance, consider reading this guide on managing additions and upgrades. And if you’re considering tackling a renovation or repair yourself, be sure to check out detailed project planning resources to streamline your process and ensure safety.
Lessons From the Trenches: What I’ve Learned About Framing and Squeaks
One of the biggest lightbulb moments in my journey was realizing that framing errors don’t just cause annoying squeaks—they can be harbingers of long-term structural issues. I once ignored a small misalignment, only to face costly repairs a year later. Early on, I underestimated the importance of double-checking every joist and supporting member, thinking it was tedious. Now, I know that meticulous attention at the framing stage can save thousands down the line.
Another lesson was that fixing framing errors isn’t always about heavy equipment or major demolition. Simple solutions like adding shims or extra fasteners, if done early, can restore stability and silence squeaks. The most valuable insight? Proactive inspection and correction are far cheaper and less stressful than waiting until problems become obvious or, worse, dangerous.
Finally, I learned that understanding your home’s framing structure empowers you to spot hidden issues during routine checks. It’s empowering to know that regular inspections with a good flashlight and a pry bar can reveal problems before they escalate. This knowledge transformed my approach from reactive to preventive, protecting my investment and peace of mind.