The Foundation Drain Tile Requirement for Sloped Lots
It was one of those mornings when I was staring at my property, feeling overwhelmed by the mountain of permits, building codes, and all the little things that suddenly seem crucial—like that pesky rule about foundation drain tiles on sloped lots. You know that lightbulb moment when you realize something you overlooked could spell big trouble? That was me. I had been so excited about my new addition, eagerly jumping into plans, when I hit a wall over a seemingly simple detail: do I need a foundation drain tile? Turns out, for sloped terrain, this isn’t just an optional extra—it’s a necessity that can make or break your project.
Getting to the Bottom of the Drain Tile Conundrum
The moment I grasped the importance of proper drainage, everything changed. I learned that on a sloped lot, water tends to rush toward the foundation, risking flooding, basement seepage, and even structural issues if not managed correctly. Not installing a proper drain tile can lead to costly repairs down the line, or worse, permit issues that delay your project indefinitely. Early on, I made the mistake of assuming that slope wouldn’t impact drainage needs—what a mistake! To avoid my pitfalls, I dug deep into local building codes and found that many jurisdictions explicitly require foundation drain systems for sloped properties. Want to save your project from similar headaches? Stick with me.
Is the Drain Tile Requirement Actually Worth the Hassle?
That was my biggest hope—just a minor hassle. But after a few hard lessons, I realized skipping the drain tile isn’t just risky; it’s nearly impossible to ignore once problems surface. Erecting a project without considering proper drainage on a slope can lead to dramatic damage and permit challenges. I remember reading that effective drainage can prevent up to 80% of basement water issues—shocking, isn’t it? For a detailed look into the permit process and how drainage factors in, check out [permitting tips](https://constructionedgez.com/permit-approval-tips-for-seamless-home-additions). It’s vital to incorporate these elements early, so don’t wait until water starts seeping in.
Have you faced a situation where poor drainage caused delays or added costs? If yes, you’re not alone. Many homeowners learn about drainage needs too late. That’s why in the next sections, I’ll walk you through simple, practical steps to ensure your foundation drainage system is up to snuff, saving you time, money, and stress.
Assess Your Property’s Drainage Needs
Start by evaluating how water flows around your site. Look for signs of pooling or erosion, especially during heavy rain. Use a level and measuring tape to identify the slope’s degree and direction. This step is like drawing a map of water’s natural path—knowing this guides your entire drainage plan. I once spent a Saturday marking low spots after a storm, which revealed exactly where water accumulated around my foundation. This simple check saved me from future headaches.
Consult Local Building Codes and Permits
Before installing anything, review your local requirements. Many jurisdictions require foundation drain systems for sloped terrain to prevent issues like basement flooding. Use resources like permitting guides to understand the permits needed. I remember calling the city hall, confirming I needed a building permit for the drain tile, which streamlined my approval process and prevented delays.
Design a Proper Drainage System
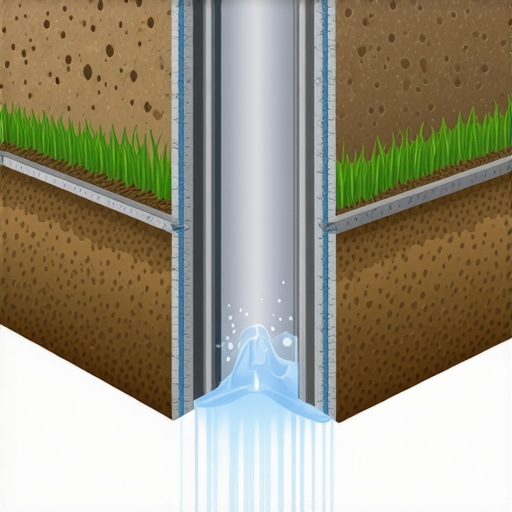
Plan your system using a perforated pipe wrapped in filter fabric, laid in a trench along the foundation’s footing. The pipe should slope at least 1% (1 inch per 10 feet) to ensure water flows away efficiently. Think of it as building a water highway—smooth and unobstructed. I used a level and measuring tape to set the correct slope, avoiding future clogs or blockages that can cause backups—trust me, a well-designed slope makes all the difference.
Choose the Right Materials
Select durable, corrosion-resistant piping and permeable fabric. Proper material choice extends the system’s lifespan and guarantees effective drainage. I learned this the hard way when cheaper materials failed after just a year, causing costly repairs. Investing in quality tools pays off long-term.
Excavate and Prepare the Trench
Dig along the foundation perimeter, deep enough to accommodate the pipe and gravel bedding—typically 12 inches wide and 18 inches deep. Use an excavator or manual tools for accuracy. Keep the trench clean and free of roots or rocks that could impede flow. I used a simple garden spade, working diligently to ensure a consistent slope. Proper excavation is the foundation of a reliable system.
Lay the Drainage System
Place a layer of gravel (around 3-4 inches) at the bottom of the trench, then lay the perforated pipe on top. Cover the pipe with more gravel up to about 2 inches below ground level, then backfill with soil. Compact carefully to avoid shifting. Imagine building a layered cake—each layer provides stability and functionality. I used a tamper to pack the soil lightly, preventing future settling that could disrupt drainage.
Connect to Outlet and Backfill
Ensure the pipe outlets away from the foundation, ideally to a safe drainage area or storm sewer. Avoid directing water toward neighbor’s property to prevent disputes. During my project, I routed the pipe toward the street drain, checking local regulations for stormwater management. Backfill with soil, and re-grade the landscape to prevent surface runoff from re-entering the trench.
Test and Maintain the System
Pour water into the trench to verify proper flow and outlet function. Regular inspections, especially after heavy rains, will identify clogs early. Keep debris away from the inlet and outlet to maintain efficiency. I scheduled annual checks—I learned that neglect causes buildup, ultimately defeating the drain tile’s purpose.
When it comes to home additions and new construction, many homeowners and even some builders fall into the trap of oversimplifying the estimation and permitting process. A prevalent myth is that permits are merely bureaucratic hurdles that add time and cost—something to be minimized or circumvented. In reality, proper understanding of permit nuances can save you significant headaches and expenses. Let’s uncover some advanced nuances that are often overlooked.
One misconception is that all permits are created equal. This couldn’t be further from the truth. Different projects—be it a backyard shed or a full second story addition—may require varying levels of review, approvals, and inspections. For instance, a simple room addition might seem straightforward, but if it involves structural changes, electrical upgrades, or plumbing, your permit process becomes more complex. Knowing which permits are mandatory, understanding their scope, and complying with specific requirements ensures your project doesn’t face unexpected delays or legal issues.
A common myth is that estimates provided early in the planning phase are sufficient for the entire project. However, initial estimates often underestimate costs because they don’t account for hidden nuances like detailed permit fees, environmental regulations, or unforeseen site conditions. An expert approach involves detailed, itemized estimates aligned with local permit regulations. This is where leveraging specialized guides, like estimating guides for home additions, can lead to more accurate budgeting.
Now, let’s address the oops factor—a frequent trap many fall into: underestimating the time and costs associated with variance or special approvals. For example, if your project is in a historic district or on a narrow lot, additional variances may be needed, extending timelines and increasing costs. Some assume that once permits are approved, they are for the entire build—this is dangerous. Permits often come with conditions that must be met during construction, and failure to adhere can result in fines, work stoppages, or even having to redo work.
Furthermore, a critical oversight is neglecting to revisit the project scope in light of permit requirements. A minimal addition can trigger substantial code upgrades—like seismic retrofits or ADA compliance—that inflate initial estimates. Failing to account for these hidden costs often results in budget overruns and project delays.
Lastly, adopting a holistic view of the permitting landscape isn’t just for large projects. Even minor additions benefit from understanding the subtleties of local codes and the importance of proper documentation. This knowledge enables homeowners to avoid penalties and enhances the project’s overall success.
Have you ever fallen into this trap? Let me know in the comments. Remember, mastering these nuances can be the difference between a smooth project and a costly, stressful experience. For more insights, check out guides on permit processes and ensure your project stays on track.Maintaining the momentum of a construction or renovation project requires more than just good planning; it hinges on the right tools and methods that streamline workflow, prevent delays, and ensure quality. From digital software to physical equipment, selecting reliable and efficient tools can make a significant difference.
One indispensable software I rely on is *Buildertrend*, which offers comprehensive project management features including scheduling, communication, and document storage. Its real-time updates help me keep track of progress and address issues before they escalate. I personally use Buildertrend for all my projects because it consolidates communication and provides a clear timeline, reducing misunderstandings.
For document management, *PlanGrid* has become my go-to. Its ability to store, annotate, and sync blueprints and permits on mobile devices ensures I always have the latest versions on site. This is crucial when dealing with complex permit requirements, especially considering the nuances of local building codes. I remember a time when having immediate access to updated permit plans prevented a costly rework, highlighting the importance of such tools.
Physical equipment also plays a vital role. I recommend investing in a high-quality laser measure like the *Bosch GLM 50C*—it’s incredibly accurate and quick for measuring sites, which saves time and reduces errors during layout or material estimation. I personally prefer laser measures over tape because they allow me to swiftly measure large or hard-to-reach areas, ensuring precise planning.
Regular maintenance of tools and equipment is equally important. Scheduled checks and calibrations prevent breakdowns mid-project. For example, a well-maintained laser measure maintains accuracy, avoiding costly re-measurements or mistakes.
Looking ahead, I anticipate a continued integration of digital tools with AI-driven project analytics. As technology advances, software that predicts project delays or cost overruns using historical data will become standard, further empowering project managers.
**How do I maintain tools and software over time?** Establishing a routine schedule for updates, calibration, and cleaning is key. Keeping digital tools current ensures compatibility with new device features and security patches, while physical tools benefit from regular inspection and servicing. Additionally, backing up project data frequently prevents loss from hardware failures.
For anyone managing construction projects, I highly recommend trying out *Buildertrend* for management and *Bosch GLM 50C* for measurements. These tools have consistently helped me uphold quality and efficiency. Remember, investing in reliable tools isn’t just about convenience—it’s an investment in long-term success. For more insights on planning and estimating your builds, check out [new build estimation strategies](https://constructionedgez.com/new-build-estimation-strategies-for-modern-homeowners) or [estimating costs for new builds](https://constructionedgez.com/estimating-costs-for-new-builds-expert-insights).
The Hardest Lesson I Learned About additions,estimating,new build,permit
One of the most valuable insights I gained was realizing that overlooking small details—like drainage on sloped lots—can lead to big problems later. Sometimes, I wish I had paid closer attention to the most obvious signs of drainage issues during planning, as neglecting these early on cost me time and money. Now, I understand that every overlooked nuance can snowball into a significant setback that’s hard to fix after construction begins.
3 Myths About additions,estimating,new build,permit That Held Me Back
In my experience, believing that permits are just a bureaucratic hurdle is a mistake. Permits exist to protect your investment and ensure code compliance—skipping or rushing them only leads to costly delays. Another myth is that estimates are fixed; in reality, they’re dynamic and often underestimate the hidden costs like variances or site-specific challenges. Addressing these myths early can save you from stress and surprises down the line.
What Experts Won’t Tell You About additions,estimating,new build,permit
Many industry professionals don’t highlight how detailed knowledge of local permit nuances can significantly accelerate your project. For instance, understanding how drainage requirements differ based on terrain can prevent delays. Also, engaging with local authorities early and leveraging specialized guides, like permit approval tips, can streamline approval processes and provide clarity on what’s required, making your build smoother.
My Essential Toolkit for additions,estimating,new build,permit
Reliability in tools and resources makes all the difference. I personally rely on *Buildertrend* for project management because it consolidates communication and scheduling, reducing misunderstandings. *PlanGrid* helps me keep blueprints and permits at my fingertips, avoiding costly reworks. For site measurements, a high-quality laser measure like the *Bosch GLM 50C* ensures accuracy, saving time during layout. These tools are part of my secret weapon for avoiding delays and staying on budget.
Where to Go from Here
If you’re inspired to tackle your addition with newfound confidence, start by thoroughly researching local permit requirements and drainage considerations. Adopt digital tools to stay organized and ensure precision. Remember, every detail counts—what you do today sets the foundation for a smooth build tomorrow. For more guidance, explore permitting guides and stay proactive throughout your project.
Believe in Your Next Step: Construction Success Is Within Reach
Embarking on a home addition or new build can be daunting, but with the right knowledge and tools, you can turn challenges into opportunities. Think of each lesson learned as a stepping stone toward your dream project. Trust yourself, plan meticulously, and remember—every small detail, from drainage to permits, plays a crucial role in your success. Don’t wait for problems to arise; be proactive and make informed decisions today.
What’s the biggest permit or drainage challenge you’ve faced in your projects? Share your experiences below—I’d love to hear your story!
,