Why Your Chimney Height Might Fail Local Fire Codes
It was a cold, breezy morning when I finally climbed onto my roof to check the new chimney installation. As I gazed up, a sinking feeling hit me—I had overlooked an essential detail: the chimney’s height might not meet local fire safety codes. That moment of realization was a real eye-opener. I had poured weeks into planning and budgeting for this project, only to risk a costly permit rejection because of a seemingly small technicality.
### Why Your Chimney Height Could Be a Permit Nightmare
The truth is, many homeowners and even some contractors underestimate how critical chimney height is when it comes to compliance with fire codes. Not getting this right can result in your entire project being held up, or worse, safety hazards that could threaten your home and loved ones.
During my early days in home improvement, I made the mistake of assuming that an average chimney height was acceptable everywhere. That led me down a rabbit hole of delays and rework after learning the hard way that local regulations vary significantly and are strictly enforced. To avoid falling into the same trap, I did thorough research and consulted experts. I found that understanding permit processes is crucial — and you can learn more about this in my guide on understanding permit requirements.
Surprisingly, building codes are not just bureaucratic obstacles; they are designed to protect you. For example, the National Fire Protection Association (NFPA) specifies clear standards for chimney height to prevent fire hazards and ensure proper venting. According to NFPA 211, chimney height must often be a specific distance above the roofline—usually 3 to 4 feet—depending on your roof’s pitch and local ordinances.
Are you confident that your chimney adheres to these standards? If not, your project might be at risk of failing inspection, which can cause costly delays and remodels. This is why I recommend everyone involved in the planning phase to double-check local fire codes early on—don’t wait until framing for your new addition is complete, or you’ll find yourself back at square one. To get a better understanding of the actual costs involved, check out my post on estimating costs for new builds.
In this article, I’ll walk you through the key reasons why chimney height matters and how to ensure it meets every regulation the first time. Let’s dive into the practical steps to verify and plan for compliance, so your project won’t just look good but will also stand the test of time and inspection.
Measure Your Chimney Height Early
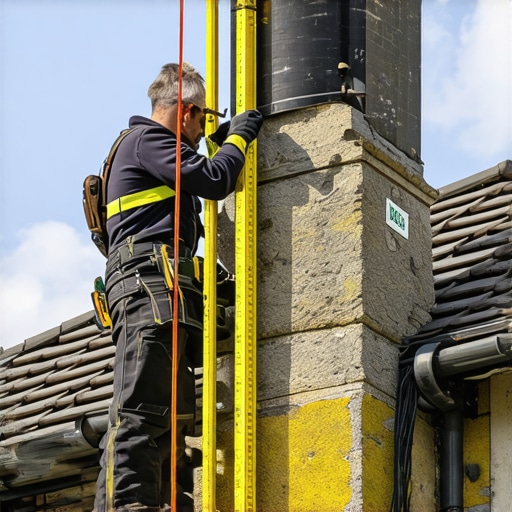
Take precise measurements of your planned chimney’s height relative to the roofline. Use a laser level for accuracy, especially on complex roofs. I recall overlooking this step on a recent project, which led to a last-minute re-measurement before inspection. It’s better to get it right from the start to prevent delays.
Check Local Fire Regulations Precisely
Visit your city’s building department website or contact them directly to access specific chimney height requirements. Think of this like checking the rules of a game before playing; it helps avoid penalties. During my first inspection attempt, I found out my chimney was slightly under the required height—costing me extra time and money to adjust the design.
Identify the Required Clearance
Determine the mandated distance the chimney must extend above the roof surface—typically 3 to 4 feet, depending on roof pitch. This information is often detailed in local amendments to national codes. I once assumed a standard height was enough, only to discover that my roof’s steep pitch demanded additional extension, or risked failing inspection.
Account for Roof Slope and Obstructions
Use a tripod or pole with a level to measure the highest point of the chimney relative to roof obstructions like vents or trees. This step is crucial because obstructions can affect safety compliance. I learned this the hard way when my chimney was too close to a nearby vent, which could have compromised venting efficiency and safety standards.
Consult with a Structural Engineer
For complex rooflines or unusual designs, get a professional opinion. An engineer can confirm whether your planned chimney height and placement meet NFPA 211 standards and prevent costly rework. I hired an engineer when planning my roof addition and saved myself from a potential violation that could have halted my project.
Verify Permits and Code Compliance
Before construction begins, submit your plans for permit review. Use a detailed drawing showing the chimney height with measurements and compliance notes. Think of this as submitting a homework assignment that teachers will grade: accuracy guarantees approval. During my last project, careful permit review saved me from a refusal that would have set my schedule back two weeks.
Document Everything and Revisit During Construction
Maintain records of measurements, regulations cited, and approvals. Regularly verify during build that the chimney height remains within specified limits. This proactive approach caught a small deviation early, avoiding major revisions later.
By following these concrete steps, you minimize the risk of your chimney design failing inspection, which can be costly and time-consuming. Remember, precise planning and early verification are your best tools to ensure code compliance without setbacks. For detailed permit processes, visit this guide.

 When tackling home additions or new constructions, many assume they understand permits and estimating processes completely. However, common misconceptions can lead to costly delays and mistakes. Let’s explore these misconceptions, uncover hidden nuances, and reveal expert insights to help you navigate your project more effectively.
Perceptions That Sabotage Your Building Plans
First, there’s a widespread belief that permits are merely bureaucratic hurdles. In reality, permitting is a safeguard designed to ensure safety, durability, and compliance with local codes. Skipping or rushing this step often results in penalties, fines, or even demolition orders. Many underestimate the importance of understanding permit nuances, such as specific documentation requirements or inspection criteria. To avoid these pitfalls, I recommend reviewing this comprehensive guide to permit processes that I’ve prepared.
Are All Estimation Methods Created Equal?
Many think that ballpark estimates suffice during early planning stages. While rough estimates help to set budgets, relying solely on them can cause surprises later. Advanced estimation involves detailed quantity take-offs, nuanced cost adjustments for material fluctuations, and consideration of local labor rates. A common myth is that estimation is a one-size-fits-all process, but in practice, tailored methods significantly improve accuracy. For a deeper dive into effective strategies, explore this expert estimation tactics article.
Why Do New Build and Addition Costs Often Spiral?
There’s a misconception that initial budgets are comprehensive. The truth is, many projects suffer from overlooked hidden costs—permitting fees, utility upgrades, site-specific challenges, or compliance adjustments. These hidden expenses are often not apparent in early estimates, leading to budget blowouts. I advise on allocating contingency funds and conducting thorough site assessments upfront. For detailed guidance, review my post on estimating true costs in new projects.
How Do I Adjust for Local Regulations that Are Never Mentioned?
Surprisingly, many project owners overlook the importance of understanding local amendments and nuanced code requirements. These regulations can affect everything from setbacks and height restrictions to material specifications. A common mistake is assuming national codes are uniform, which they are not. Consulting with local authorities and experts is essential. For instance, certain fire safety rules, like chimney height adjustments, are critical but often not emphasized in generic guidance. To ensure compliance, check out the resource on navigating local permits effectively.
In summary, dispelling these myths and understanding the hidden nuances can be the difference between a smooth project and a cascade of complications. Do you have stories about permit pitfalls or estimation surprises? Share your experiences in the comments. Remember, thorough research and expert consultation are your best tools to ensure your project’s success. Curious about streamlining your process? Visit this guide to added value and start planning smarter today.
Essential Tools for Seamless Project Management
Staying organized and efficient during building projects requires investing in specific software and equipment that streamline workflows. Personally, I rely heavily on Buildertrend for project scheduling and communication, as it consolidates updates, change orders, and documentation into one accessible platform. Its real-time notifications help me keep track of every milestone, avoiding costly delays. Additionally, I use Procore for comprehensive project management, especially when coordinating multiple subcontractors. Its document control capabilities ensure that permits, plans, and inspections are always up-to-date. To capture precise measurements on-site, I swear by my Leica DISTO laser distance meter—it’s fast, accurate, and durable, eliminating the inaccuracies of traditional tape measures. As construction technology advances, expect more integrated solutions like SmartSpectra sensors that monitor structural stress in real-time, predicting issues before they escalate. Future trends suggest a move towards AI-driven project oversight, enabling predictive analytics for potential delays or budget overruns.
How do I maintain the efficiency of my tools over time?
Regular calibration of measuring devices and software updates are crucial. For example, I schedule quarterly calibrations for my laser tools, ensuring ongoing accuracy. Also, backing up digital data weekly prevents accidental loss of project information. Keeping equipment clean and stored properly prolongs its lifespan and readiness for the next task.
Planning Long-Term Maintenance for Longevity
Maintaining quality work extends beyond project completion. Developing a long-term maintenance plan helps ensure that structures stay compliant and functional well into the future. This includes periodic inspections of critical systems such as HVAC, electrical, and plumbing, which can prevent major failures. I recommend setting reminders every six months, coupled with detailed checklists aligned with local codes, like those outlined in permit and inspection standards. Using digital tools like maintenance management apps can streamline this process, sending alerts and logging each check-up. Additionally, establishing relationships with reliable service providers creates a quick response network if issues arise. Proper documentation of all maintenance activities not only helps in legal compliance but also enhances the resale value of the property. Expect that as homes evolve, so will the requirements for ongoing upkeep, demanding adaptable strategies. I suggest trying out a maintenance schedule app tomorrow, integrating it with your project management suite to keep everything synchronized. Doing so simplifies your long-term planning and reduces unexpected repair costs.
Scaling Up Without Losing Quality
As your portfolio of projects grows, maintaining consistent quality is vital. Adopting scalable processes like modular planning can save time and money. For example, standardizing certain components—such as door and window sizes—reduces procurement delays and simplifies inspections. Using software like CoConstruct allows you to manage multiple sites simultaneously, maintaining oversight without micromanagement. It’s also worthwhile to develop a detailed, adaptable checklist for each project phase—early inspection, framing, electrical, plumbing, finishes—ensuring all standards are met every time. To future-proof your operation, consider investing in remote monitoring tools that provide real-time data from multiple sites, enabling proactive intervention. Consulting expert guides on project scaling can help you understand how to balance efficiency with quality. Remember, the key is to document every process meticulously and stay flexible to adjust methodologies as your project load expands.
Throughout my years in construction, a recurring lesson has been that the devil truly is in the details—especially when it comes to permit and estimation processes. One of the most eye-opening moments was realizing that even a small misstep in understanding local fire codes could translate into months of delays and unexpected expenses. My advice? Never underestimate the power of thorough research and professional guidance. Familiarize yourself with the permitting process early, and always double-check with local authorities before breaking ground. Remember, knowing the nuances of your project’s permit requirements can save you from costly rework and legal headaches. Additionally, leveraging reliable estimation strategies—like those outlined in this resource—ensures your budget remains realistic and adaptable. Being proactive, staying informed, and consulting experts have been my go-to tactics for turning potential pitfalls into smooth sailing. Incorporate these lessons from the start, and your project will not only meet code but thrive beyond expectations.