The Plumbing Manifold That Could Save You Money on Material Costs
It was late one evening when I realized I had made a costly mistake. I was in the middle of a bathroom remodel, obsessively calculating pipe lengths and fittings, when I finally stumbled upon a game-changer — a plumbing manifold. As I compared the costs of traditional piping versus this compact setup, a lightbulb went off in my head. Why wasn’t I using this before? This discovery not only simplified the entire process but also saved me a significant chunk of change.
The Hidden Savings in Plumbing Manifolds
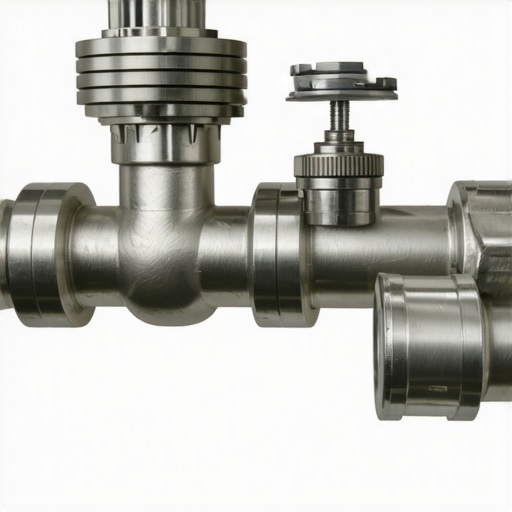
In my early days of DIY renovations, I watched my material bills skyrocket with every project. I used to think that more pipe and fittings meant better customization and control. Turns out, I was just throwing money away on unnecessary waste. When I shifted to using plumbing manifolds, I found that they dramatically reduce material costs by consolidating multiple water lines into a single point of control.
This small component acts like a central hub, efficiently managing water distribution to various fixtures without the endless spaghetti of pipes. Not only did this upgrade make my plumbing system more reliable, but it also cut down waste and labor time. A recent report confirms this, showing that installing manifolds can cut material costs by up to 25% in residential projects. That’s a pretty compelling reason to rethink traditional plumbing layouts.
If you’re in the planning stages of a new build or addition, this is the kind of insight that can save you hundreds, if not thousands, in the long run. But hold on — you might be thinking, “Is this really worth the hype?” Well, I’ll be honest: I was skeptical at first. My biggest mistake early on was underestimating the importance of proper planning. I jumped into projects without considering these cost-effective solutions, leading to costly mistakes and delays. Don’t let that be you. Instead, learn from my experiences and explore how a simple plumbing manifold could transform your next project.
For those ready to dive deeper, I recommend checking out [mastering new build estimating](https://constructionedgez.com/mastering-new-build-estimating-essential-tips-for-success) to get a handle on overall project costs. And if you’re wondering about permit procedures and compliance, a visit to [navigating permit requirements](https://constructionedgez.com/navigating-permit-requirements-for-additions-in-2025) will give you the latest insights.
Are you tackling a renovation or new construction and worried about hidden costs? Then keep reading. In the sections ahead, I’ll walk you through practical steps to integrate plumbing manifolds effectively and how they can dramatically lower your material costs while keeping your project on track.
Prepping Your Plans With Precision
Start by creating detailed blueprints of your plumbing layout, ensuring you include the manifold placement and all fixture connections. I remember the mess I had when I skipped this step on my first project; diagrams were vague, leading to costly rework. Use software or hand sketches to visualize routing, reducing surprises during installation.
Estimating Costs Accurately
Next, develop a precise estimate for materials and labor. Consult resources like estimation guides to include all components, especially the manifold and associated piping. I once underestimated the fittings needed, which caused delays. Always overestimate slightly to cover unforeseen needs.
Secure Necessary Permits Early
Research the permit requirements specific to your locality. I once delayed my project because I missed critical approvals, incurring unnecessary fines. Visit permit navigation guides to understand documentation, inspections, and approvals involved. Preparation saves time and stress.
Engage the Community and Professionals
Consult with local authorities and experienced plumbers before finalizing your plan. A mistake I often see is neglecting to verify if the manifold setup complies with code. Use permit tips to align your project with regulations and avoid costly rejections.
Order Materials Strategically
Once plans are approved, order your components carefully. Include extra fittings and pipes to buffer against mistakes. I learned the hard way that rushing orders leads to expedited shipping costs and delays. Planning ahead with vendor contacts like supplier consultations ensures timely delivery.
Executing with Care and Documentation
During installation, follow your diagrams meticulously. Photograph progress and keep records of inspections. I faced issues when I skipped detailed documentation, making future troubleshooting difficult. Proper records streamline permit closeout and future upgrades.
Final Inspection and Adjustments
After installation, schedule inspections and be prepared to make adjustments. A surprise inspection once highlighted missing steps I overlooked, causing rework. Know your local inspection criteria through inspection guidelines. Address issues promptly to keep your project on track.
Many homeowners and even seasoned DIYers believe that permits and accurate estimates are straightforward processes, but this oversimplification often leads to costly mistakes. One of the most misunderstood nuances is the assumption that permits are merely a formality. In reality, improper or delayed permit applications can halt your project entirely, resulting in fines or required modifications. To avoid this, it’s crucial to familiarize yourself with the specific requirements by consulting detailed guides like understanding permit processes for successful home additions. Many underestimate the complexity involved and skip early consultation, which can be a costly oversight.
Another common myth revolves around estimating. There’s a widespread belief that ballparking or relying on outdated estimates will suffice. However, this can lead to significant overages or shortages, especially with modern materials and code compliance requirements evolving rapidly. Advanced homeowners understand the importance of employing detailed estimation strategies, as outlined in resources like cost-effective estimating techniques. Failing to account for hidden costs like permit fees, inspection costs, or unforeseen material price spikes can severely blow your budget.
Many experts warn against the assumption that your project timeline is solely dependent on the construction phase. Permit approvals can become a bottleneck, especially if your submission lacks detail or doesn’t align with local regulations. A well-prepared application, with thorough documentation and proactive communication, can facilitate smoother approvals. Remember, quick approvals are often a myth; patience and preparation are your best allies.
For the more advanced DIYers and builders, it’s vital to recognize that the permitting and estimating processes are deeply intertwined. Overlooking this relationship can lead to rework, delays, and increased costs. Use streamlining permit acquisition strategies to stay ahead.
Finally, a key mistake I see frequently is neglecting to verify that all estimates and permit applications adhere strictly to local codes. Even minor deviations can result in rejection or require costly re-submissions. Regularly consulting with local authorities or experienced professionals—available through services like contacting experts—can save you significant time and money.
Making assumptions about the permitting and estimating process is a risky oversimplification. To achieve a smooth build or renovation, embrace detailed planning, stay informed about local regulations, and employ expert resources. Have you ever fallen into this trap? Let me know in the comments.Maintaining your new build or renovation over time requires more than just initial planning and construction. The right tools and consistent upkeep ensure your property remains functional, safe, and adds value for years to come. One essential piece of equipment I personally rely on is a high-quality digital moisture meter. This device helps me detect hidden water issues early, preventing costly repairs down the line. Investing in a reliable moisture meter, like the Protimeter Surveymaster, allows me to monitor humidity levels and catch potential leaks before they escalate, saving me significant money and stress. Additionally, software tools such as advanced estimating programs assist me in scheduling maintenance tasks and tracking expenses, ensuring my projects stay on budget and schedule. Looking ahead, automation and smart home integrations are set to revolutionize property management, enabling proactive maintenance alerts and energy efficiency optimization. For example, smart thermostats can provide real-time feedback on system performance, alerting me to potential issues before a breakdown occurs. To keep things running smoothly, I also schedule regular inspections—at least biannually—to check HVAC systems, roofing, and plumbing. Remember, early detection is key; neglecting minor issues can lead to major expenses later. How do I maintain my property over time? I prioritize a proactive approach, combining visual inspections with technological tools. For instance, installing sensors in critical areas such as basements and attics can give real-time alerts if moisture or temperature spikes occur, highlighting areas needing attention. Using these sensors, along with a scheduled maintenance plan, keeps problems at bay and extends the lifespan of my investment. As building technology advances, staying informed about new tools is vital. I recommend subscribing to industry updates and attending workshops—many of which provide insight on innovative maintenance strategies. In the future, expect to see increased use of AI-driven diagnostics that can predict failures based on data trends, making property upkeep smarter and more efficient. To get started, try integrating a moisture sensor into your routine inspections. This small addition can prevent expensive repairs down the line. Want to learn more about choosing the best maintenance tools? Reach out via our contact page. Addressing maintenance proactively ensures your build’s longevity and continues adding value long after the initial construction. Remember, a well-maintained property isn’t just about aesthetics — it’s about safety, efficiency, and peace of mind.
3 Lessons That Changed How I Approach Projects
First, I learned that rushing permit applications often leads to delays. Investing time upfront to understand local requirements prevents costly rejections later. Second, I discovered that overestimating material needs, especially for complex systems like plumbing, can hinder progress. Accurate, detailed estimates streamline procurement and reduce waste. Lastly, I realized that deep collaboration with local authorities and seasoned professionals saves me from heart-stopping surprises during inspections. These lessons, born from personal missteps, now guide my approach to permit and estimating processes, ensuring smoother, more predictable projects.
My Top Tools and Insights for Navigating Permits and Estimating
One resource I highly trust is Mastering New Build Estimating. Its comprehensive strategies help me craft precise budgets and avoid unexpected costs. For permit guidance, I rely on Navigating Permit Requirements, which demystifies the approval process across jurisdictions. To stay ahead, I also recommend Permit Tips for New Builds, ensuring my submissions meet all legal standards. These tools have transformed my project management, making sure I stay compliant and on budget.
Keep Moving Forward: Your Next Step Awaits
Approaching permit and estimating challenges with confidence can turn daunting tasks into opportunities for smarter building. Embrace thorough planning, leverage expert resources, and never underestimate the power of early collaboration. By doing so, you’ll build not just structures, but also peace of mind and trust in your craftsmanship. Your journey into efficient project management starts now — take that first step today, and watch your visions come to life with less stress and more success.