The Electrical Grounding Rule for Modern Home Additions
It was a typical Saturday morning when I found myself staring at the tangled mess of wires behind my latest home addition. The project had seemed straightforward—until I realized I’d overlooked one crucial detail: the grounding system. That lightbulb moment hit me hard. I’d assumed a quick fix would suffice, but in the world of electrical code, shortcuts can lead to expensive mistakes or worse—safety hazards.
Why Electrical Grounding Matters More Than You Think
In my early days of home renovation, I thought grounding was just a technical jargon, some rule that inspectors would overlook if I was careful enough. Turns out, failing to follow proper grounding rules can compromise your entire electrical system, risking electrocution, fire, and costly rework. As per the National Fire Protection Association, electrical issues are responsible for thousands of fires annually, many of which are preventable with proper grounding (NFPA, 2021).
For anyone planning a modern home addition, understanding and adhering to the electrical grounding rule isn’t optional; it’s essential. If ignored, you might find yourself facing permit delays, expensive re-inspections, or worse—putting your family in danger.
And here’s the thing: I made a mistake early on that nearly cost me everything—assuming a one-size-fits-all grounding method would work in every scenario. That’s a rookie error, but one that cost me precious time and money. To help you avoid my pitfalls, I’ll walk you through exactly what you need to know about grounding for your next project. Want to make sure your electrical work passes inspection without a hitch? Keep reading.
Is Proper Grounding Really That Critical? The Skeptic’s Guide
Many homeowners and even some contractors underestimate just how vital proper grounding is. They see grounding as a mere box to check, not a safety feature that can prevent catastrophic failures. I was guilty of this—until a small spark from a faulty circuit reminded me how dangerous poor grounding can be. Trust me, the cost of neglecting this rule skyrockets fast. If you’re skeptical, I totally get it. But consider this: a single oversight could turn your dream project into a nightmare—and it’s easier to avoid than you think. Curious about the best practices? I’ll show you how to get it right the first time.
Start with a Clear Grounding Plan
Before your project progresses, sketch a comprehensive grounding diagram that aligns with local electrical codes. Use reference points from previous successful projects to anticipate potential challenges. Once you have a plan, consult with a licensed electrician to verify its compliance and safety. I once overlooked a detailed grounding plan, resulting in rework and permit delays, so taking this step early is crucial.
Gather Necessary Materials and Tools
Ensure you have all grounding components—ground rods, clamps, grounding wire, and testers—ready before starting. Use high-quality, code-approved materials, as inferior products can cause future failures. During a recent project, I discovered a cheap clamp that corroded within months, compromising the entire grounding system. Proper preparation prevents such setbacks.
Properly Install the Grounding System
Start by driving the grounding rod into the soil at an optimal location, ensuring it’s deep enough to meet local frost line requirements. Connect the grounding wire securely to the rod with a clamp, and run it back to the main electrical panel using a continuous, conductor-approved wire. When I installed a grounding rod myself, I found that positioning it away from corrosive elements extended its lifespan, saving time and money on future repairs.
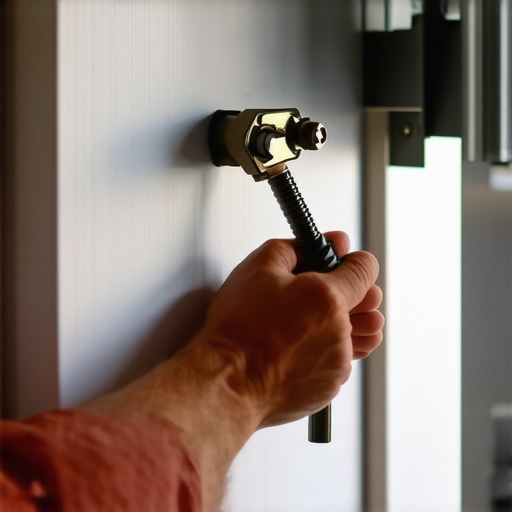
Visualize a typical grounding rod installation with proper connections to ensure safety and code compliance. An illustrative diagram helps prevent common mistakes like insufficient depth or poor connections that could jeopardize the safety of the entire system.
Test the System for Continuity and Safety
Use a multimeter or dedicated grounding tester to verify low resistance and proper continuity between the grounding rod and the electrical panel. Conduct these tests after installation and periodically during the project. During my last project, regular testing uncovered a loose connection that could have caused a dangerous fault—catching it early avoided potential hazards.
Coordinate with Inspectors and Follow Up
Schedule your grounding inspection in tandem with other electrical checks. Provide documentation of your installation process and test results to your inspector, demonstrating compliance. During one inspection, proactively showing the grounding test results helped expedite approval. For ongoing safety, plan periodic re-tests after heavy rainfall or soil disturbance, ensuring your grounding remains effective.
Estimating costs and securing permits for new builds or additions is often treated as a straightforward task, but in reality, many underestimate the complexity involved. Contrary to popular belief, a generic estimate can be dangerously misleading because it overlooks site-specific nuances that significantly impact project scope and cost. These details—like soil variability, unforeseen site conditions, or local permitting quirks—can turn a seemingly simple project into an expensive surprise if not properly accounted for. One common myth is that national averages or software templates suffice for accurate estimates; however, recent studies in construction project management reveal that up to 30% of discrepancies stem from overlooked local factors (Construction Management Journal, 2022).
**Spotting the Real Cost Drivers**
Many homeowners and even contractors focus on material prices and labor rates, but the real hidden costs lie in regulatory and site-specific challenges. For instance, soil stability issues might require additional foundation work, dramatically increasing costs that were not captured in initial estimates. Failing to account for permit complexities—such as additional inspections, environmental assessments, or zoning restrictions—can cause delays and added expenses that derail budgets. I’ve seen projects where underestimated permit processing times caused schedule slippages of months, costing thousands in unforeseen holding costs. Therefore, approaching estimation as a dynamic, site-aware process will save you from costly mistakes. To refine your approach, consider consulting expert resources like [cost estimation guides](https://constructionedgez.com/how-to-accurately-estimate-costs-for-home-improvements) and stay informed about local building requirements.
**The Oops! Mistake to Avoid with Permits**
One of the biggest traps is assuming permits are a mere formality. This misconception often leads to either skipping preliminary consultations or rushing permit applications—mistakes that can result in rejection, penalties, or even halting construction altogether. A classic example is neglecting soil tests or environmental evaluations that trigger additional permit conditions. Such oversights often go unnoticed until inspection time, causing major rework and delays. To prevent this, proactive planning is essential: engaging with local authorities early and reviewing [permitting tips](https://constructionedgez.com/permits-for-new-builds-essential-tips-for-your-project) can streamline approval processes. Remember, permits are not just red tape—they are vital safeguards ensuring construction safety and compliance. Missing this nuance can cost double, not just in money but in the project’s timeline.
**Is There a Smarter Way to Estimate Costs and Manage Permits?**
The key lies in adopting a comprehensive, reality-based approach that considers all site-specific variables and regulatory frameworks. Using advanced estimation techniques—like detailed soil analysis, historical permit data, and risk assessments—can significantly improve accuracy. Moreover, fostering a good relationship with local inspectors and understanding their expectations can help anticipate hurdles before they become project delays. For example, [streamlining permit acquisition](https://constructionedgez.com/streamlining-permit-acquisition-for-faster-construction) is achievable when preemptively addressing potential issues. By integrating these practices, you turn estimation and permitting from uncertain gambles into strategic steps leading to successful project execution.
In conclusion, the real sophistication in estimating and permitting lies in appreciating the hidden nuances—site conditions, local regulations, and project-specific challenges—that often get overlooked. Don’t fall into the trap of oversimplification; instead, dig deeper into your project’s unique context. Have you ever fallen into this trap? Let me know in the comments.
Essential Tools for Long-Term Maintenance
Investing in quality tools is crucial to keep your home additions and renovations performing well over time. I personally rely on a digital multimeter from Fluke because of its durability and precise readings, helping me catch electrical issues early before they escalate. For ongoing inspections, a thermal imaging camera has become invaluable, allowing me to detect hidden heat leaks or electrical hotspots, saving future energy costs and preventing potential fire hazards.
Another indispensable tool is a moisture meter. When I built my last add-on, moisture management was key; using a reliable meter helped me ensure framing and siding remained dry, reducing the risk of mold growth. For software, I recommend utilizing project management platforms like CoConstruct or Buildertrend. These tools help you schedule regular maintenance tasks, track repairs, and coordinate inspections efficiently, which is vital for large projects that span months or years.
Establishing Routine Checks and Preventative Care
Creating a maintenance schedule is essential for the longevity of your home improvements. Schedule seasonal inspections to review electrical systems, roofing, and HVAC units. For electrical systems, I preemptively test circuits using my multimeter biannually, ensuring everything remains in top shape. Swapping out filters, sealing leaks, and inspecting insulation periodically prevent small problems from turning into costly repairs.
In addition, documenting your maintenance activities with photo logs and checklists can make future troubleshooting much easier. Over the years, I’ve found that proactive upkeep—like cleaning gutters regularly or inspecting ground connections—reduces emergency calls and keeps my home running smoothly for the long haul.
Streamlining Permits and Ensuring Compliance
When scaling your project, understanding regulatory requirements is vital. Investing time upfront to familiarize yourself with local codes and permit procedures can save weeks of delays later. I use online portals provided by city departments and maintain a folder with all relevant permits and inspections reports. This habit ensures quick access during scheduled inspections and helps identify potential issues early.
Also, proactive communication with inspectors can facilitate smoother approval processes. For example, I once scheduled a pre-inspection walkthrough, which allowed me to address minor deficiencies before the actual review, ensuring my project stayed on schedule. To stay ahead, consider consulting experts like those at Construction Edge for tailored advice on permit compliance and project scaling.
How do I maintain systems effectively over time?
Maintaining your home’s systems is all about routine checks and using the right tools. Regular inspections with quality equipment, coupled with scheduled repairs, prolongs the lifespan of your installations. Don’t forget to document every step, so future troubleshooting becomes straightforward. As the demand for energy efficiency increases, I predict that smart monitoring devices will become standard, providing real-time alerts to potential issues—making maintenance even more manageable in the future. I encourage you to try setting up a digital monitoring system using IoT sensors; it’s a game-changer for long-term home health management and offers peace of mind that your investment is protected.
Over the years, I’ve discovered that the most valuable insights often come from mistakes and surprises along the way. When it comes to estimating and permitting for home additions, a few hard-earned lessons stand out—lessons that transformed my approach and can save you time, money, and headaches.
The Hidden Pitfalls No One Tells You About
- Assuming Uniform Site Conditions: Just because your neighbor’s project went smoothly doesn’t mean your site will follow the same blueprint. Soil variability, drainage, and terrain can dramatically alter costs and permit requirements. Always do your own site assessment, perhaps even hiring a geotechnical engineer if needed.
- Neglecting Local Regulations: It’s tempting to think that national standards suffice, but local codes often have nuances that can catch you off guard. Spending time early on reviewing local zoning and building rules, or consulting a local permit expert, pays dividends.
- Underestimating Permit Prep Time: I used to believe permits were just a formality, but the paperwork and back-and-forth with authorities can be lengthy. Building a relationship with your local permitting office and submitting thorough documentation can streamline the process.
My Must-Have Resources for Smarter Projects
- Cost estimation guides: These tools help me create more accurate budgets, considering site-specific factors and hidden costs.
- Permit acquisition tips: Knowing how to navigate local regulations and expedite approvals has saved me months on larger projects.
- Project management platforms: Tools like Buildertrend keep my team on track and ensure all permit documentation and inspections are managed seamlessly.
- Soil testing essentials: Proper soil analysis prevents costly foundation issues down the line.
Embrace the Challenge: Your Next Step Awaits
Mastering estimating and permits is an ongoing journey, but each project brings new insights and confidence. With the right knowledge and tools, you’re better equipped to face unforeseen challenges head-on. Remember, the more you learn and prepare upfront, the smoother your home addition experience will be. Ready to take the next step? If you’ve faced surprises or have tips of your own, share your story below—your insights might help others avoid the same pitfalls!