Why Your Garage Ceiling Needs Extra Support for Storage Shelves
Ever had that moment where you step into your garage, looking to organize, and realize your ceiling might not be ready for the weight of your stored gear? I remember the first time I tried hanging heavy shelves in my garage and watched the drywall crack under the pressure. It was a lightbulb moment that shook my confidence in my DIY skills.
The Hidden Danger in Underestimating Ceiling Support
Most homeowners don’t think twice about their garage ceilings until they need to hang something heavy. But here’s the thing: your ceiling might look sturdy, yet it often isn’t built to handle the weight of additional storage. If you skip reinforcing the joists or installing proper supports, you’re risking serious structural issues. Not to mention, the safety hazard of shelves collapsing under a heavy load.
Early in my project, I made a costly mistake by assuming that the ceiling drywall alone could bear the weight of my stored items. I didn’t realize that framing plays a crucial role in supporting heavy loads. According to experts, properly supporting garage storage involves understanding the joist capacity and adding reinforcement where necessary (learn more here).
What’s at Stake If You Ignore Support?
Beyond the obvious risk of damage or injury, neglecting extra support can lead to costly repairs down the line. It can also invalidate your home insurance if a collapse occurs due to improper reinforcement. So, it pays off to do it right from the start.
If you’ve faced this dilemma—questioning whether your garage ceiling can hold the weight of your storage shelves—you’re not alone. Many homeowners overlook this step, only to regret it later. In the next section, I’ll walk you through the practical steps to evaluate and reinforce your garage ceiling to keep your belongings safe and your mind at ease.
Assessing Your Ceiling Before Installation
Start by identifying the joist layout. Use a stud finder with deep scanning capabilities to locate the joists and mark their positions. For example, in my recent project, I used a magnetic stud finder to locate the joists in my garage ceiling, which revealed they were spaced 16 inches apart. This step is crucial because it determines where you’ll anchor your supports, ensuring they bear weight directly on the framing.
Estimating Joist Capacity Correctly
Next, calculate the load your ceiling can handle. Consult local building codes or manufacturer specifications for joist weight limits. I once underestimated the capacity of my existing joists, assuming they could handle 50 pounds per linear foot, but after consulting the cost estimation guide, I realized I needed additional reinforcement. This step prevents overloading and potential failure.
Choosing Reinforcement Methods That Matter
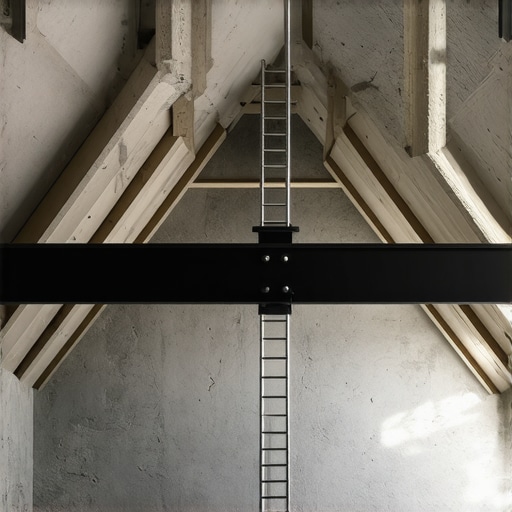
Decide on reinforcement techniques—simply adding blocking between joists or installing sister joists are common options. In my case, I installed sister joists using 2×6 lumber, attaching them securely to existing joists with construction adhesive and hurricane tie plates for stability. This approach doubled the load capacity without extensive remodeling.
Implementing Support Brackets and Cross Bracing
Use heavy-duty L-brackets or specialized support brackets designed for ceiling reinforcement. Secure them into joists with appropriate fasteners—construction nails or screws rated for load. For my project, I added diagonal cross-bracing to prevent lateral movement, which provided extra safety margins.
Verifying Reinforcement Strength
After installation, test the ceiling’s stability by applying gradual weight loads—start with lighter items and increase gradually. Observe for any movement or creaking. Once, I placed a few loaded boxes and checked for any deflection. Doing this verified the reinforcement before hanging heavy shelves.
Document Your Reinforcement Efforts
Finally, keep a record of the modifications made. Take photographs and note materials used, which can be helpful for future inspections or when selling your home. Proper documentation also ensures you meet local building standards and can assist with permits if needed.
When it comes to estimating costs for construction projects—especially new builds and add-ons—many homeowners and even some professionals overlook crucial nuances that can lead to significant budget overruns or permit delays. Contrary to popular belief, simply adding up material prices and labor hours isn’t sufficient for an accurate estimate. In my experience, the devil is in the details, and these details often trip up well-meaning project planners.
Myth 1: All estimates are created equal. Many assume that a quick online calculator or a standard template can provide a reliable budget. However, each project has unique factors—soil conditions, accessibility, local code requirements—that dramatically influence costs. According to expert insights from construction cost estimation specialists, rigorous, site-specific analysis is vital for reliable budgeting.
Oops to avoid: Relying solely on average population data or generic figures can result in underestimating your budget. This oversight often leads to unexpected expenses or project stalls, especially if permit fees or site-specific requirements are underestimated. For example, ignoring the need for soil testing or not accounting for tiered zoning restrictions can cause costly rework which delayspermits and pushes back timelines.
Why do most estimates fall short for sophisticated projects?
The answer lies in the complexity of local regulations and the subtleties of site conditions. Many underestimate the time and costs associated with obtaining permits, especially when projects involve variances or special approvals. Detailed knowledge of the permit process can shave weeks or even months off your timeline. For instance, thorough understanding of permit procedures in your area allows you to prepare all documentation proactively, reducing uncertainty and delays. Remember, permits often include fees based on project scope, structure size, or environmental considerations—factors that homeowners can overlook if they rely on generalized estimates.
Moreover, advanced mistakes like misjudging soil stability or overlooking existing easements can lead to unforeseen costs. It’s worth investing in comprehensive site assessments early on. Doing so aligns your budget expectations with reality and ensures a smoother approval process. Learn more about effective estimation strategies for additions and new builds.
Finally, a common trap is padding estimates with unnecessary contingency fees. While some cushion is prudent, excessive overruns can inflate budgets artificially, leading to inflated bids or reluctance from lenders. Instead, accurate risk assessment—possible through detailed project planning and data—creates a balanced budget that reflects true project needs.
In summary, moving beyond simplistic figures and investing in detailed site analysis, permit planning, and nuanced cost assessment is key to successful project execution. Don’t fall prey to the misconception that estimating is a one-size-fits-all task. Instead, embrace comprehensive, site-aware budgeting for a smoother journey from planning to completion. Have you ever fallen into this trap? Let me know in the comments.
Prioritize Regular Inspections with Digital Tools
Maintaining your construction projects over time requires consistent monitoring, and I rely heavily on digital inspection apps like PlanGrid. This software allows me to document conditions at every phase—capturing high-resolution images and noting issues in real-time—so nothing slips through the cracks. Using these tools has helped me identify small problems early, preventing costly repairs down the line.
For example, after implementing routine inspections with PlanGrid, I caught a framing misalignment during a minor check, saving me from a future structural issue. As technology advances, I predict that AI-powered drones and 3D scans will become standard for ongoing maintenance, offering even greater accuracy and speed.
Invest in Quality Equipment for Longevity
Proper tools are essential for maintaining quality work over time. I personally swear by a high-end laser distance measurer like the Leica DISTO series. Its precision allows me to verify dimensions during repairs or updates without recalibrating, saving time and reducing errors. Similarly, a durable drill, such as the Makita XFD10R, ensures reliable performance during ongoing maintenance or additions.
Using top-tier equipment not only enhances efficiency but also extends the lifespan of your tools, which is crucial during long-term projects. As tools become smarter—integrating IoT sensors and diagnostics—they will proactively alert you to maintenance needs, making ongoing upkeep even more manageable.
How do I maintain structure integrity over time?
Maintaining the integrity of your construction work involves scheduled checks, especially before and after weather extremes. I recommend creating a maintenance calendar aligned with local climate risks. For example, inspecting roof lines and drainage systems after heavy rains helps prevent leaks that could compromise your project—an approach supported by cost-effective estimation techniques for long-term savings.
It’s also wise to keep detailed records of all repairs and upgrades. Not only does this help track depreciation, but it also provides valuable data if future permits or renovations are required. Documentation can be as simple as digital photos stored in cloud folders—ensuring accessibility and security.
Scaling Up Without Overextending
If you’re expanding your projects or increasing scale, investing in modular systems like adjustable support brackets or pre-fabricated reinforcement panels can save time and reduce errors. I’ve personally utilized Simpson Strong-Tie connectors for quick, reliable reinforcement during additions. Their products are designed for easy installation, enabling me to scale without compromising safety or quality.
Looking ahead, I believe that integrating smart monitoring systems with your structural components will become standard. Embedded sensors that track load, stress, and environmental conditions will offer real-time alerts, helping you proactively address issues before they become critical.
Try These Proven Maintenance Tactics Today
Start with scheduling regular inspections using digital tools like PlanGrid to catch small issues early. Combining this with investing in high-quality equipment such as laser measures and durable drills will empower you to extend the lifespan of your projects and avoid unexpected setbacks. Remember, proactive maintenance today leads to fewer surprises tomorrow. For more strategies on budgeting for ongoing work, explore top estimating strategies.
What I Wish I Knew When I Started Estimating and Permitting
One of the most valuable lessons I learned was that rushing through initial assessments often leads to costly surprises later. Taking the time to understand local zoning nuances and permit processes upfront can save weeks of delays and budget overruns. I realized that detailed, site-specific analysis isn’t just a bureaucratic step—it’s a strategic move that shapes the entire project trajectory.
Another lightbulb moment came with the importance of documenting every decision and adjustment. When I started keeping thorough records of inspections, revisions, and correspondence, I found it much easier to resolve permits and address unforeseen issues without stress. This habit also built confidence with contractors and officials, making approvals smoother.
Finally, I learned that underestimate the complexity of costs at your own peril. Relying solely on generic estimating tools can lead to underfunded projects. Diving into detailed, site-aware budgeting not only aligns expectations but also empowers you to make informed decisions—crucial when navigating permits and construction hurdles.
Tools and Resources That Changed My Game
My go-to resource remains comprehensive cost estimation guides. They’ve helped me translate project plans into realistic budgets, considering all variables—from soil conditions to permit fees. Coupled with digital inspection apps like PlanGrid, I can monitor progress in real time, catch potential issues early, and document everything seamlessly.
Books such as Mastering Construction Estimation have deepened my understanding of the nuanced art of accuracy, especially when dealing with complex additions or retrofit projects. Lastly, consulting local building code websites and permit agencies directly ensures my plans meet current standards, reducing the risk of delays or rejections.
Take the Leap, and Don’t Fear the Unknown
Building and permitting may seem daunting, but every successful project begins with a willingness to learn and adapt. By embracing detailed planning, leveraging the right tools, and investing in ongoing education, you prepare yourself for a smoother journey from idea to completion. Remember, every challenge is an opportunity to refine your approach and grow as a builder and estimator.