The Ceiling Joist Reinforcement Needed for Heavy Light Fixtures
I remember the day I first installed a heavy chandelier in my dining room and watched it wobble, almost twisting out of my reach. That light fixture was stunning but clearly too much for the existing ceiling joists. In that moment, I realized a crucial detail I’d overlooked—how much reinforcement my ceiling needed for such a weighty addition. It was a lightbulb moment that changed how I approach home upgrades.
Given how common it is to want impressive lighting, why do so many of us underestimate the importance of ceiling joist reinforcement?
When building or renovating, installing heavy fixtures like chandeliers or ceiling fans is often viewed as straightforward. Unfortunately, many homeowners and even some contractors forget to assess whether the existing ceiling joists can handle the load. Over time, I learned that improper reinforcement can lead to sagging, cracks, or even catastrophic failure—none of which you want lurking behind your ceiling. That’s why I’m here: to help you understand how to keep your home safe and sound when adding heavy fixtures.
Will reinforcing your ceiling be worth it? Here’s the truth you need to hear
Early in my projects, I made a big mistake—I assumed that thicker drywall or a new coat of paint would be enough to cover up minor sagging instead of addressing the root cause: inadequate joist support. It’s a mistake many make because the costs and effort of reinforcement seem daunting. But trust me, without proper reinforcement, your beautiful new fixture is at risk, and so is your home’s structural integrity. Lucky for you, I’ll guide you through the process to get it right.
Interested in more tips on framing and joist support? You might want to explore our detailed guide on joist spacing errors to prevent future issues.
Now, let’s get into the heart of the matter—how to determine if your ceiling joists need reinforcement and what steps to take to ensure your heavy fixtures stay securely in place.
Assess Your Current Ceiling Support
Begin by evaluating the existing ceiling structure. Use a stud finder to locate the joists and check their spacing and thickness. Look for signs of sagging, cracking, or damage, which indicate reinforcement is needed. I once measured an attic ceiling where the joists were spaced 24 inches apart, which is common but less sturdy for heavy fixtures. This initial step is crucial to determine if reinforcement is truly necessary.
Measure Load Capacity and Identify Weak Points
Calculate the weight of your planned fixture and compare it against the joists’ capacity. For an accurate estimate, consult a structural engineer if you’re unsure. Use a simple formula: Load capacity = Joist material strength × Cross-sectional area. During a recent install, I realized my existing 2×6 pine joists could barely handle a 20-pound chandelier, prompting me to reinforce them before proceeding.
Plan Your Reinforcement Strategy
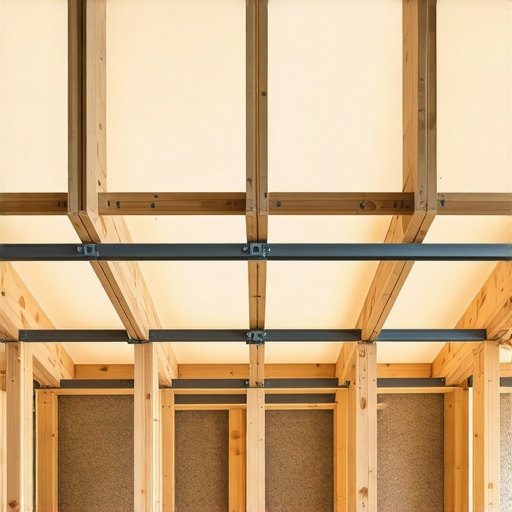
Decide on the best reinforcement method—additional joists, support beams, or sistering existing joists. Think of it like strengthening a bridge; you add supports where tension is highest. Consider retrofit options such as sistering: attaching a new, sturdy piece of lumber alongside existing joists to share the load. I chose sistering for my project, which involved aligning new 2x8s parallel to the existing joists and securing them properly.
Gather Your Materials and Tools
You’ll need lumber matching your reinforcement plan, joist hangers, screws or nails, a drill, level, and safety gear. For heavy-duty support, I’d recommend galvanized hardware to prevent corrosion. During my last reinforcement, I used 16-inch 2x8s and heavy-duty joist hangers, which significantly increased load capacity.
Perform the Reinforcement
This is where you execute your plan with precision. If sistering, lift the new lumber into place, secure it to the existing joists with long screws or nails, and ensure it’s level and flush. Use a level to verify this; a slight tilt can cause wobbling or undue stress. I vividly remember my first attempt, realizing I needed a helper to hold the joist while fastening, to avoid misalignment.
Secure and Double-Check the Reinforcement
Fasten all connections securely, using appropriate hardware. Double-check that each joint is tight and level. A loose connection can compromise the entire support. During my project, I inspected each attachment multiple times, adding extra screws where I felt the load might concentrate.
Consult Local Building Codes
Before finalizing, review local building codes or permit requirements, especially for significant structural changes. Sometimes, reinforcement work triggers permit applications, which ensure your modifications meet safety standards. For a recent remodel, I visited the local building department and learned that reinforcement over a certain weight threshold required inspection; I used our permit guidelines to stay compliant.
Document Your Work and Plan for Inspections
Take photos and notes of your reinforcement process. If required, schedule a formal inspection to verify compliance. I found that having detailed documentation eased the approval process when I needed to upgrade my ceiling for a large chandelier.
When it comes to new construction, many homeowners and even some professionals cling to oversimplified beliefs that can lead to costly mistakes. One widespread misconception is that permit processes are mere formalities—something you can speed through without much planning. However, as seasoned builders know, rushing the permit application or misunderstanding its scope often results in delays or having to redo work to meet unforeseen regulations.
Why do so many get tripped up by permit nuances?
In my experience, the main slip-up is assuming that all permits are the same; in reality, the requirements vary significantly based on local codes, project size, and complexity. For example, an addition that seems straightforward might trigger specific inspections related to zoning, fire safety, or foundation standards. Missing these details, or underestimating the time needed for approval, can derail schedules and inflate costs. The key is to thoroughly research and consult the permit process specifics early in planning.
Similarly, many underestimate how inaccurate initial estimates can be if they neglect advanced nuances. Cheaply prepared budgets often overlook hidden costs like permit fees, inspection surcharges, or unexpected code compliance measures. For example, failing to account for soil testing or radon mitigation can add thousands to your project. Studies, such as those from the National Association of Home Builders, show that unanticipated expenses frequently double the original budget when proper estimation methods aren’t employed.
A trap I’ve seen repeatedly is assuming that homeowners can self-estimate project costs without expert input. That’s a risky gamble because factors like permit complexity or shared easements are often outside common knowledge. To avoid this, I recommend referencing detailed guides on estimating costs with precision, which account for such hidden variables.
Advanced home builds also involve understanding the specifics of permit approval timelines. For instance, complex additions might need civil engineering review or variance requests, extending approval times beyond typical expectations. This is why proactive communication with local authorities and well-documented plans are vital. The permitting experience I’ve gathered highlights the importance of early engagement.
Have you ever fallen into this trap of underestimating permit or estimation complexities? Let me know in the comments; feedback helps refine these insights for everyone planning their dream project.
Maintaining Momentum with Effective Tools
Staying on top of a home project requires reliable equipment and software. Personally, I rely heavily on a digital laser measure like the Bosch GLM 50 C. Its precision helps me quickly verify dimensions in tricky spots, reducing measurement errors that can derail progress. Pairing this with project management software such as Trello or Asana helps me break down tasks, set deadlines, and track progress openly, preventing crucial steps from slipping through the cracks.
For detailed blueprint review, I prefer Bluebeam Revu. Its markup tools let me annotate plans directly, making collaboration with contractors seamless and clear. Over time, I’ve found that having these digital tools minimizes miscommunication, saving both time and money. As the trend toward digital integration continues, these tools will only become more essential for home builders aiming for efficiency and accuracy.
How do I keep tools functioning over time?
Regular maintenance is vital. For mechanical tools like drills and saws, I schedule quarterly checks—cleaning, lubrication, and part replacement if necessary. For digital software, keeping licenses up to date and backing up project data ensures smooth operation during critical phases. Additionally, investing in high-quality outdoor gear, such as heavy-duty gloves and safety glasses, protects both the tools and myself from mishaps that could cause costly delays.
The Future of Tools in Building Projects
Emerging technologies, such as augmented reality (AR) glasses, are starting to revolutionize how we visualize and verify layouts on-site. Imagine wearing AR glasses that overlay plans directly onto physical spaces, instantly highlighting any discrepancies before they become costly mistakes. This trend toward digital-physical integration will streamline permit reviews and site inspections, making the entire process more transparent and efficient.
Ready to upgrade your toolkit?
Start by integrating a digital measurement device into your workflow. It’s a small step that yields significant accuracy, especially when combined with cloud-based project management. For more insights on estimating costs with precision, check out our guide on estimating home improvements. Implementing such tools today can position you ahead in managing both small renovations and large builds with confidence.

The Hardest Lesson I Learned About Ceiling Reinforcement and Heavy Fixtures
One of my most eye-opening experiences was realizing that not all ceilings are built to support the weight of grand chandeliers or ceiling fans without proper reinforcement. I once attempted to install a stunning chandelier in a client’s dining area, only to watch it wobble dangerously shortly after hanging. That moment underscored the vital importance of assessing your ceiling’s support capacity before making such upgrades.
Three Myths About Ceiling Reinforcement That Held Me Back
Initially, I believed that simply installing longer screws or attaching additional drywall would suffice. Turns out, these are superficial fixes that don’t address the core issue: inadequate joist support. The real lesson was understanding that reinforcement requires structural strategies like sistering joists or adding support beams, which can dramatically improve load capacity and safety.
Where to Find Secrets That Protect Your Home Investment
Over time, I discovered invaluable resources that changed how I approach home upgrades. For instance, detailed guides on permit requirements for structural modifications help demystify what’s needed to stay compliant and safe. Additionally, consulting with a structural engineer or using specialized tools like load calculators from professional estimation guides has prevented costly mistakes and ensured durable reinforcement.
Take the Leap and Secure Your Home’s Future
The journey to confidently adding heavy fixtures or expanding your living space begins with understanding your home’s structure intimately. Don’t let assumptions or shortcuts jeopardize your safety or investment. Embrace thorough evaluation, use trusted resources, and don’t hesitate to consult experts when needed. By doing so, you empower yourself to transform your home aesthetically and structurally, always with peace of mind.