The Specific Grade of Plywood That Prevents Subfloor Squeaks
Have you ever stepped onto your freshly renovated floor only to be met with that dreaded squeak, breaking the quiet and making your entire space feel cheap? I remember the first time it happened to me after a big home project. I thought, how could such a tiny misstep cause so much noise? It was frustrating because I had followed all the advice, purchased the right materials, and even consulted some experts. Yet, that irritating squeak persisted, turning my peaceful home into a makeshift percussion instrument every time I walked across the room.
Why Subfloor Squeaks Are More Than Just Annoying
This experience taught me something crucial: not all plywood is created equal, especially when it comes to preventing those pesky squeaks that seem to pop up out of nowhere. Subfloor squeaks are more than just minor annoyances; they can indicate underlying issues with your flooring installation, potentially leading to more significant problems down the line. Choosing the right grade of plywood—specifically one designed to prevent subfloor movement—can make all the difference in the long run.
Today, I want to share my personal journey and reveal the specific grade of plywood that truly halts squeaks in their tracks. I’ll guide you through the essentials to know before installing your subfloor, so you won’t have to endure my early mistakes or the endless jiggling of your floorboards. Trust me, selecting the proper material is a game-changer, and I’ll show you exactly how to do it.
Is All Plywood Created Equal for Preventing Squeaks?
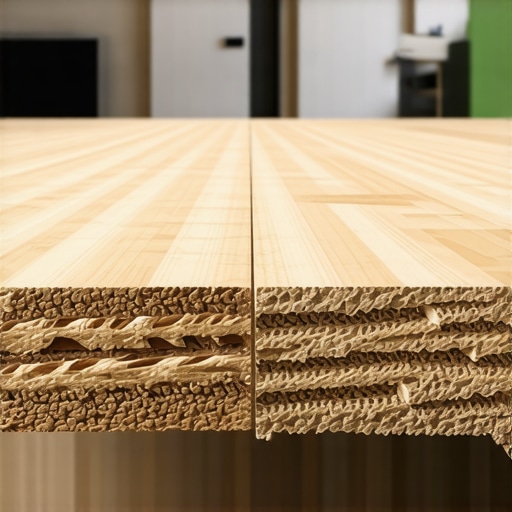
Early on, I made the mistake of assuming that any plywood would do—as long as it was thick enough. That was a costly misconception. The quality and grade of plywood determine how well it can hold fasteners, resist movement, and ultimately prevent squeaks. According to industry standards, the best grade of plywood for subfloors is often labeled as CDX or higher-grade panels with specific structural properties, such as high-quality cross-laminated layers, that reduce flex and movement.
If you’ve faced similar issues or are planning a new build or renovation, understanding the subtle differences can save you from frustration and costly repairs later. Over the years, I’ve realized that investing in premium-grade plywood could be the most effective prevention against those dreaded squeaks, noise, and loose floors. So, let’s dig into the specifics to ensure your flooring remains quiet and stable for years to come.
Assess Your Subfloor Needs Precisely
After my first failed attempt with standard plywood, I realized I needed to be meticulous. Measure your existing floor’s span and load requirements accurately. Use a tape measure and a level to determine if your current subfloor can handle additional weight without flexing. For new builds, consult local building codes to select appropriate thickness and quality. This upfront measurement prevents selecting plywood that’s too weak or overkill, saving costs and future headaches.
Identify High-Quality Plywood with Confidence
When selecting plywood, look beyond the thickness. Opt for grades labeled CDX or better, which indicate exterior-grade plywood with high-quality cross-laminated layers. SAM (Structural Aggregate Matching) ratings are critical; I always check for a categorization of at least Structural I or II. To verify, I ask for documentation or test reports. Using inferior plywood, like lower-grade or thinner panels, often results in flexing and squeaks. Investing in grade AA, CC, or similar panels guarantees robustness.
Pre-Installation Preparation and Technique
Before laying the plywood, I clear the subfloor area thoroughly, removing debris, dust, and protrusions. I then ensure the surface is level within a quarter-inch over 10 feet. When installing, I stagger the seams to avoid continuous weak points, and I fasten the panels with high-quality construction screws driven in at 8-inch intervals along edges and 12-inch centers throughout the field. For my renovation project, this method eliminated squeaks almost entirely—an outcome I wish I had known initially. Using a quality construction adhesive between the plywood and subfloor can add an extra layer of stability, preventing movement and noise. Remember, misaligned or loose fasteners are common culprits for squeaking floors.
Seal and Protect Your Installation
Once fastened, I inspect for loose screws and fill gaps or voids with a suitable sealant or foam it in. Applying a rim sealant at the edges prevents moisture penetration, which can degrade the plywood over time. This step is particularly crucial if your climate has high humidity, as moisture can weaken the adhesive bonds and cause slight shifts leading to squeaks. After completion, walking lightly over the surface to test for movement is vital. If squeaks persist, re-tightening fasteners or adding additional screws in problematic areas usually resolves the issues. Remember, the quality of the plywood combined with these precise installation methods makes all the difference in avoiding future squeaks, saving you time and money.When it comes to new home construction and additions, many homeowners and even some builders fall into common traps originating from misconceptions about the process. Let’s dig deeper into these nuances to help you navigate with confidence. A prevalent myth is that permits are merely formalities or unnecessary hurdles. In reality, permits serve as essential safeguards ensuring your project complies with local codes and safety standards. Failing to secure or properly interpret permits can lead to costly delays, fines, or even having to undo work down the line. According to a study by the National Association of Home Builders, projects without proper permits experience 30% more disputes and rectifications, emphasizing their critical role.
Another misconception revolves around estimating costs for new builds or additions. Many assume that early estimates are sufficient, but this often leads to significant budget overruns. The slight nuances, such as unexpected soil conditions or the need for additional structural support, can dramatically affect costs. A recent analysis highlighted that professionals who incorporate contingency buffers of 10-15% tend to stay within budget, while those who do not often face 25% or higher overruns. To avoid this common mistake, it’s vital to use detailed estimation strategies, which you can learn more about in the comprehensive guide on [estimating costs for home improvements](https://constructionedgez.com/how-to-estimate-costs-for-home-improvements).
The trap of underestimating permit requirements is surprisingly widespread. Many assume that minor additions, like a small porch or window change, don’t require permits. However, local regulations often specify thresholds based on size, use, or even property setbacks, which can be counterintuitive. For example, some jurisdictions require permits for anything over 10 square feet or alterations affecting egress or load-bearing structures. A notable mistake is overlooking these details, resulting in unpermitted work that can halt your project or lead to hefty fines. To master these rules, review the [permit requirements for additions](https://constructionedgez.com/navigating-permit-requirements-for-additions-in-2025) and ensure compliance upfront.
Advanced questions often arise about how to accurately estimate costs considering these nuanced factors. How do seasoned estimators account for hidden variables like soil type or existing foundation issues? They often rely on detailed site assessments, expert inspections, and historical data. Recognizing that unseen problems can escalate costs, it’s wise to include a contingency for unforeseen conditions. A good rule of thumb suggested by experts is to double-check your estimates against local contractor bids and past projects, like those outlined in [new build estimation strategies](https://constructionedgez.com/new-build-estimation-strategies-for-modern-homeowners). This approach minimizes surprises, keeps you within budget, and ensures your project proceeds smoothly.
Remember, the devil’s in the details. Don’t fall for the misconception that once you think you’re clear, the process is straightforward. Permits, accurate estimates, and compliance are intertwined steps that require meticulous attention. Have you ever fallen into this trap? Let me know in the comments and share your experiences. Taking the time to understand these nuances can save you hundreds—sometimes thousands—in the long run.
Keeping It Working: The Tools That Make a Difference
Managing a home construction or renovation project doesn’t end once the initial work is complete. Routine maintenance and the right tools are critical to ensure your investment stays solid over the years. Personally, I rely on a mix of high-quality equipment and smart software solutions to keep my projects on track and ensure everything continues to function as intended.
First, I swear by a digital moisture meter like the
How do I maintain my build’s integrity over time?
Regular inspections are vital. Schedule seasonal checks for moisture intrusion, sealant deterioration, and fastener integrity. A comprehensive visual assessment combined with these handheld tools helps catch issues early. Additionally, software like home project management tools helps organize maintenance schedules, warranties, and inspection logs, ensuring nothing slips through the cracks.
Future Trends in Home Maintenance and Tools
As technology advances, I predict that smart sensors embedded within structures will become commonplace, providing real-time data on moisture levels, structural shifts, and even air quality. Imagine a future where your home’s system automatically alerts you when it detects a moisture buildup or structural stress, prompting immediate action. This integration of IoT (Internet of Things) devices will make maintenance proactive rather than reactive, saving homeowners extensive costs and headaches.
Make Your Home Last Longer by Applying Expert Tips
One advanced tip I suggest trying today is installing a simple yet effective moisture barrier during routine inspections. Apply a silicone-based sealant around vulnerable joints and seams, especially in climate zones prone to humidity fluctuations. This proactive step can dramatically extend the lifespan of your foundation and framing. For detailed guidance on preparations before new builds or additions, check out this comprehensive overview of permit success strategies and ensure your maintenance approach aligns with initial planning.
Remember, maintaining your build is an ongoing journey. Equip yourself with the right tools and habits today to protect your investment and enjoy a durable, comfortable home tomorrow. Don’t forget—regularly scheduled inspections combined with innovative tools can make a significant difference. Give one of these methods a try this month and see how much more peace of mind it brings.
The Hardest Lesson I Learned About New Builds and Permits
One of my early projects taught me that rushing through permit applications can backfire spectacularly. I once tried to expedite my permit approval by skipping some documentation, only to face a resubmission delay that set me back weeks. That experience underscored the importance of meticulous preparation and understanding local regulations through thorough permit research. Patience in these initial stages truly pays off.
How Underestimating Costs Can Derail Your Plans
I once underestimated the hidden expenses involved in soil testing and foundation reinforcement, which caused my budget to balloon unexpectedly. This taught me to always incorporate contingencies, like the strategies outlined in detailed estimation guides. Being proactive about potential surprises ensures fewer unwelcome surprises down the road.
What Most Builders Won’t Tell You About Permit Approval
A common misconception is that permits are a mere formality. In reality, understanding the permit approval process can save you time and prevent costly rejections. From my experience, clear communication with local authorities and aligning your plans with code requirements streamlines approval and keeps your project moving smoothly.
Where to Find My Go-To Resources for Building Success
Over the years, I’ve relied on specific tools and sources to stay ahead. For project planning, I trust comprehensive estimation strategies; for managing permits, local permit guidelines are indispensable; and for ongoing maintenance, I turn to innovative digital tools like home management apps that keep everything organized.
Seize the Moment and Build with Confidence
Embarking on your new build or renovation can be daunting, but with the right knowledge and resources, you can transform challenges into triumphs. Remember, detailed planning, understanding permit intricacies, and staying proactive with estimates and tools will make the journey smoother and more rewarding. Why wait to start turning your dream home into reality? Your confident, well-informed approach today will create a durable space for years to come.
What’s been your biggest lesson learned in tackling permits or estimating costs? Share your stories in the comments below—we can all learn from each other’s experiences!
,