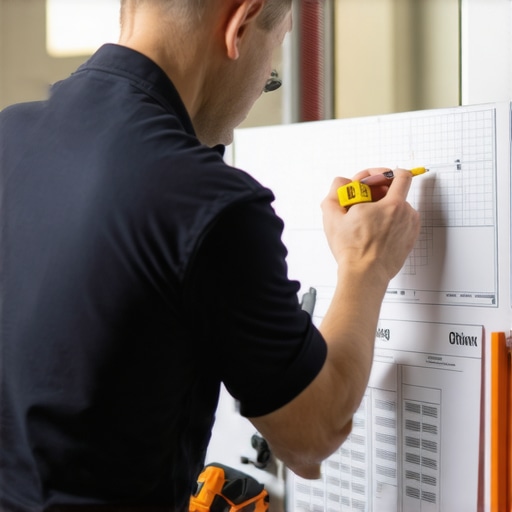
How to Calculate True Waste Factors for Tile Work
Have you ever laid down a beautiful new tile floor only to realize you’re short on materials halfway through? Or maybe you’ve overbought, only to be left with a mountain of leftover tiles and an empty wallet. I remember the first time I faced this dilemma—nothing quite jolts your confidence like realizing your estimates are off because of overlooked waste.
Why Estimating Tile Waste Matters More Than You Think
In my years of working on home renovations, I’ve learned that understanding the true waste factor isn’t just about avoiding spazzy moments with extra trips to the store. It’s about precision—saving time, money, and headaches. If you’re like me, you want your projects to run smoothly without those costly surprises. But here’s the thing: calculating waste isn’t a perfect science, and a small miscalculation can turn a tidy budget into a financial nightmare.
Let me be honest—early in my career, I made a rookie mistake. I used a flat 10% waste factor for every project, assuming that all tile types and layouts required the same margin. Spoiler: it doesn’t. Different tiles, cuts, and layouts demand different waste considerations. Knowing how to accurately determine the real waste factor can elevate your estimating game from guesswork to a reliable science. It’s not about being overly conservative or risky; it’s about striking a balance that protects your margins while keeping your project on schedule.
Have you ever faced this problem? If so, you’re not alone, and I’ve got some insights to share that will help you avoid the common pitfalls.
For reference, a survey by the Tile Council of North America highlighted that improper waste estimation can add up to 15% of your total tile cost—a significant amount that many underestimate. Trust me, the impact of a more precise waste calculation can be the difference between a profitable job and a budget-busting fiasco.
So, are you ready to learn how to calculate true waste factors with confidence? Let’s dive into the process, so you can plan smarter and avoid those costly errors that seem to pop up every time you’re deep in a tile project.
Calculate Your Waste Factor Precisely
Start with measuring the total square footage of your tile area, including edges and odd-shaped sections. For instance, on a recent project, I marked out the entire layout, noting any irregular cuts. I then added a waste margin—typically 10% for straightforward patterns or up to 15% for intricate designs—based on the tile type and layout complexity. This initial step prevents shortages or overbuying and is crucial for accurate material estimation.
Observe Your Material and Pattern
Different tiles and patterns affect waste. Large-format tiles tend to waste less, while mosaics generate more cuts. When I worked on a backsplash with mosaic tiles, I noticed the small pieces created more scrap. To estimate waste accurately, analyze your pattern, tile size, and cutting difficulty. Incorporate this understanding into your waste percentage to refine your total material needs.
Factor in Cutting and Breakage Losses
Cutting inevitably produces waste—about 5-10% additional tiles. I vividly recall a project where I purchased 10% extra, but actual waste ended up around 12% due to miscuts. Always round up your waste percentage to account for accidental breakage or pattern shifts. Use contractor-grade tools to minimize breakage and plan for a margin to cover unforeseen errors.
Create a Detailed Material List
Break down your total area into smaller sections, tally the number of full tiles needed, and multiply by your waste factor. In a recent bathroom renovation, I listed each wall segment separately, calculated the tiles required, and applied my waste percentage—this detailed approach prevented ordering errors. Review your calculations meticulously before ordering to avoid surprises.
Adjust for Specific Project Conditions
If your project involves complex cuts around fixtures or unconventional layouts, increase your waste estimate accordingly. For example, in a recent kitchen floor with irregular shapes, I increased my waste factor to 15%. Also, consider the quality of your tiles; fragile or delicate styles tend to break more during installation, requiring additional material planning. Recognizing these nuances ensures precise ordering and cost control.
Leverage Project Management Tools
Use software or spreadsheets to organize your measurements, calculations, and waste margins. On my latest project, I used a digital tool that automatically adjusted my material quantities when I tweaked measurements. This flexibility allowed me to experiment with layouts without risking over or underestimating tiles, streamlining the process and reducing errors.
Learn from Past Projects
Keep records of your waste percentages from previous work. For instance, I noted that my typical waste runs around 12-15%. Applying these historical insights to new projects enhances estimation accuracy over time. If a certain tile or layout consistently results in higher waste, adjust your percentages proactively to prevent shortages.
Check Local Regulations and Suppliers
Verify any specific waste allowances recommended or mandated by local building codes or tile suppliers. Sometimes, suppliers provide guidelines based on their product lines, which can influence your calculations. Consulting their literature or asking directly helps avoid compliance issues and ensures your purchases align with standards.
Don’t Skip the Final Review
Before placing your order, double-check all measurements, waste calculations, and supplier recommendations. In a recent project, I reviewed my estimates twice, catching an overlooked 5% extra needed for wall cuts, saving me from future delays. A thorough review minimizes risks of delays, shortages, or excess leftovers.
By applying these targeted strategies, you’ll transform guesswork into a disciplined estimation process—saving money, time, and frustration on your tile projects. Remember, precise waste calculation is a skill that improves with practice and attention to detail, making your renovations smoother and more predictable.
Many homeowners and even new contractors operate under common misconceptions when it comes to new build projects, permits, and cost estimation. Let’s challenge some entrenched beliefs and uncover nuanced pitfalls that can make or break your project. Contrary to popular advice,: simply adding a fixed percentage for contingencies—like 10%—often falls short, especially for complex projects involving permits and additions. Instead, a detailed understanding of permit intricacies and local zoning nuances can significantly improve your accuracy.
Are Permits Just a Formality? Think Again
Many assume permits are just bureaucratic hurdles, but in reality, rushing through permit applications or ignoring specific requirements can lead to costly delays or legal issues. Verifying permit conditions early, such as permit requirements for new builds, saves time and money. I’ve seen projects delayed or halted entirely because they overlooked specific zone variances or failed to acquire necessary approvals—mistakes that can easily be avoided with diligent planning.
Furthermore, permit fees can be unpredictable. A common trap is underestimating costs due to not accounting for hidden or regional fees, which in some cases can add up to 20% more than initial estimates. Knowing this, some builders advocate for a detailed permit cost analysis, potentially utilizing zone-specific strategies to streamline approval processes.
The Myth of Flat Contingency Percentages
While many estimate projects by tacking on a flat contingency—say, 10-15%—this approach ignores the project-specific risks. For instance, a renovation near a historic district may require special permits or compliance measures, escalating costs beyond the standard buffer. An expert approach involves analyzing potential issues such as soil conditions, neighborhood restrictions, or structural complexities, and adjusting contingencies accordingly. Research indicates that projects with tailored contingency plans have a 25% higher success rate in staying within budget.
For advanced estimators, the key lies in breaking down the project into smaller components and assigning risk-based buffers. This granular method helps avoid the ‘oops’ factor—unexpected costs that can derail schedules and budgets. Read more about cost estimation techniques to refine your approach.
How Can Builders Avoid Costly Permit Delays?
One often overlooked nuance is the timing and preparation for permit approval. Submitting incomplete or inaccurate applications is a frequent mistake that causes delays. Utilizing permit approval tips and conducting pre-submission reviews can vastly reduce rejection rates. Additionally, engaging early with local planning departments and understanding their documented requirements fosters smoother processing.
External experts emphasize that proactive communication—like confirming your project complies with recent zoning updates—can prevent 30% of permit rejections. It’s often worth investing in preliminary site reviews or consultations to identify hidden pitfalls before formal submission.
In sum, mastering the nuances of permits and precise estimations saves money, reduces delays, and ensures your project progresses smoothly. Remember, assumptions and one-size-fits-all solutions rarely work here. Take the time to understand local regulations, tailor your contingencies, and verify all paperwork—these steps elevate your success rate dramatically. Have you ever fallen into this trap? Let me know in the comments and share your experiences.
Keeping It Working: Top Tools for Seamless Renovations
Maintaining a smoothly running renovation project relies heavily on the right set of tools and systems. Over the years, I’ve honed a toolkit that ensures accuracy, efficiency, and long-term durability. From software that streamlines estimation to equipment that guarantees quality workmanship, these tools are integral to my process.
First and foremost, I depend on dedicated project management software like Buildertrend. It’s not just about scheduling; it allows me to track costs, manage permits, and communicate effectively with clients and subcontractors. Its cloud-based nature means I stay updated no matter where I am, reducing the risk of miscommunication or missed deadlines. For estimating, I prefer EstiSense, a tool that helps create detailed, customizable estimates, taking into account waste factors, permit fees, and potential contingencies. Its accuracy has saved me countless hours and prevented budget overruns.
When it comes to site measurements and layout, I rely on the Bosch GLM 50 C laser distance measurer. Its precision ensures that my layouts are spot-on, reducing material waste and rework. And, with its Bluetooth connectivity, I can sync measurements directly into my estimates or project plans, streamlining workflow significantly.
Quality equipment doesn’t stop at measurements. For cutting tiles and materials, I champion my Dewalt D24000 wet tile saw. Its reputation for durability and clean cuts minimizes breakage and waste, directly impacting my waste calculations and cost estimates.
In the realm of permit management, I recommend understanding permit processes to stay ahead of potential delays. I also maintain a dedicated digital folder with all permit documentation, inspection reports, and correspondence. Having everything organized not only speeds up inspections but also ensures compliance, reducing costly rejections or delays.
What’s on the Horizon?
Emerging technologies like AI-driven estimation tools and IoT-enabled site monitoring are poised to revolutionize home renovation management. I predict that in just a few years, integration of these innovations will lead to even more precise estimates and proactive maintenance, further reducing waste and boosting project longevity.
If you haven’t yet, I encourage you to try incorporating a cloud-based project management platform into your workflow. It’s a game-changer for keeping your projects on track and ensuring that each phase remains seamlessly functional from start to finish.
Lessons That Changed My Approach to Home Building and Permits
- One of the toughest lessons I learned was that every project has its unique waste factors, and relying on flat percentages leads to surprises. Tracking actual waste on past projects revealed patterns that refined my estimates, saving time and money.
- Underestimating permit complexities can be a project killer. Engaging early with local authorities and understanding specific zoning nuances prevented costly delays and rework, turning permit hurdles into smooth sailing.
- I discovered that combining technology with detailed planning transforms estimation accuracy. Using project management tools and digital measurement devices helped me catch potential issues before they became expensive mistakes.
My Arsenal for Successful Building and Permitting
- Buildertrend — I trust it for seamless project scheduling, budgeting, and communication, which keeps everyone aligned and reduces errors.
- EstiSense — this estimation software allows me to customize waste factors based on tile types and layouts, making my budgets more reliable and professional.
- Bosch GLM 50 C laser measure — its precision and Bluetooth capabilities integrate measurements directly into my plans, minimizing rework and material waste.
- Comprehensive permit guides like those found at Understanding Permit Processes help me navigate local regulations confidently, avoiding delays and legal issues.
Seize the Moment to Elevate Your Projects
Embarking on a new build, permit, or addition can seem daunting, but with the right insights and tools, you can turn what feels like chaos into a predictable process. Trust in your learning curve, embrace technology, and dive into the details — success is within reach. Every project is a new opportunity to refine your skills and build something truly special.
What’s been your biggest challenge in estimating or managing permits? Share your experiences below and let’s learn together!
}#}]}`}#}]}**}#}]{