The Specific Type of Pipe Bedding Required for Sewer Lines
I remember the first time I tackled installing a new sewer line in my backyard. Everything was going smoothly—measurements seemed perfect, the trench was ready—and then I got to the part about pipe bedding. That was when I realized I’d overlooked a detail that could make or break the entire project. A lightbulb went off: the type of bedding I used wasn’t just a minor detail; it was the crucial foundation for long-term septic system health.
Choosing the correct pipe bedding material can seem like a bureaucratic hurdle, especially when you’re eager to get your project underway. But skipping this step—or choosing the wrong type—can lead to future problems like pipe shifting, cracking, or even pipe failure, which might mean costly repairs down the road.
Today, I want to share how understanding the specific bedding requirements for sewer lines can save you tons of trouble and money. We’re going to cut through the confusion about bedding types, help you make informed decisions, and avoid the rookie mistakes I once made.
Why Your Sewer Line’s Foundation Matters More Than You Think
Think of your sewer pipe like a foundation of a house. If it’s not properly supported, every bit of your project’s stability and longevity comes into question. Proper bedding ensures the pipe is uniformly supported, preventing uneven settling that could crack or displace it.
But here’s the thing—there’s more to it than just putting some gravel at the bottom. The specific bedding material depends on local codes, pipe type, soil conditions, and environmental factors. For example, using regular gravel when fine soils are present can lead to shifting and pipe misalignment. Conversely, too much compaction or unsuitable materials can cause stress and deterioration.
If you’re like me, early on I thought a few inches of crushed stone would do the trick. Turns out, that’s not always ideal. Experts recommend particular gravel grades, and sometimes even a layer of bedding sand, especially for certain pipe types like PVC or clay. It’s not just about filling; it’s about supporting.
To get this right, it’s worth consulting the specific codes and guidelines applicable in your location. For instance, many municipalities require specific gravel grades for sewer installations, and following those makes all the difference. You can find helpful insights in construction guides that emphasize adhering to local ordinance and best practices.
Don’t Let this Slip Through the Cracks
Have you faced uncertainty about what material to use for your sewer pipe bedding? It’s more common than you think, and making the wrong choice can hit your wallet hard later. A simple mistake early on could mean excavating again or dealing with pipe damages—none of which are desirable.
Addressing these concerns isn’t just about avoiding mistakes; it’s about ensuring your installation will stand the test of time. Ensuring proper bedding is an essential step that often gets overlooked, yet experts agree it’s a key factor in successful sewer line projects (see more on efficient project management [here](https://constructionedgez.com/efficiently-managing-additions-from-planning-to-execution)).
Next up, I’ll walk you through the different bedding options, how to choose the right one, and tips to make sure your sewer line stays secure for years to come. Stay tuned—these insights will help you avoid the pitfalls I encountered and set you up for a smooth project.
Prepare Your Site with Precision
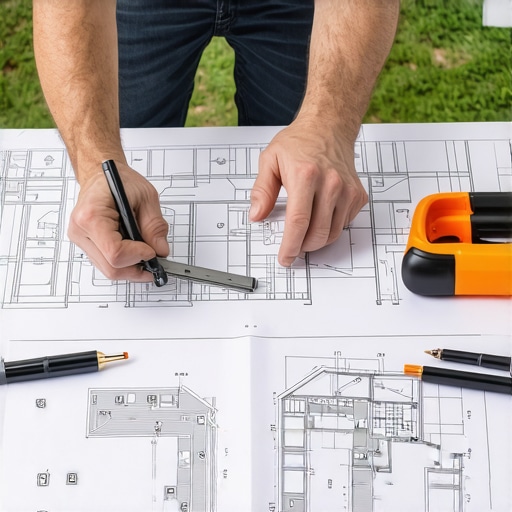
Before laying the bedding, clear the trench of any debris, roots, or sharp objects that could compromise the bedding material or the pipe’s stability. Excavate to the required depth, ensuring the bottom is level and free of loose soil. Use a laser level or string line to verify consistent depth throughout the trench. Remember, foundation matters—like building a house, your sewer pipe needs a solid base to prevent future issues.
Choose the Right Bedding Material
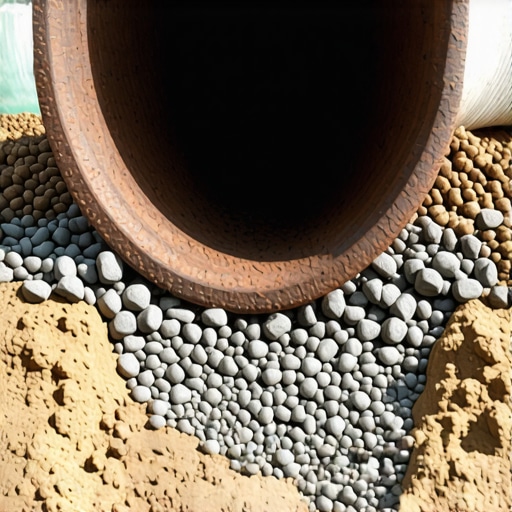
Use granular material recommended by local building codes, typically filtered gravel or crushed stone with a uniform size. For example, a 3/4-inch clean gravel grade offers excellent support and drainage, reducing the risk of shifting. Avoid organic soils, clay, or mulch, as they can settle unevenly and cause pipe misalignment. A specific market-grade gravel ensures stability — a lesson learned from my early misstep when I used general gravel that settled unevenly, leading to pipe sagging and future repairs. Refer to estimating guides for selecting the right material.
Lay a Stable Bed Layer
Spread a 4-6 inch layer of your chosen bedding material evenly across the trench bottom. Use a rake or shovel to smooth and level this layer, ensuring no high spots or voids. Compact it lightly with a hand tamper or mechanical compactor, avoiding over-compression which can cause uneven support. Visualize this step as setting the foundation for a sturdy building — every detail counts for long-term durability.
Position the Pipe Carefully
Place the sewer pipe onto the prepared bedding, ensuring it rests securely and is aligned correctly. Use spacers or blocks if necessary to keep the pipe at the desired grade. Check the slope continuously with a level to maintain proper flow and prevent backups or blockages. In my project, I used freshly laid bedding and carefully supported the pipe’s weight, avoiding any misalignments that could cause water flow issues down the line.
Backfill with Precision and Care
Fill around the pipe with granular bedding material in 12-inch layers, tamping lightly after each layer to eliminate voids and prevent shifting. Avoid using heavy equipment directly over the pipe until backfilling is complete. Cover the pipe with exactly the same bedding material, ensuring uniform support. This step is key: uneven backfill can create points of stress, leading to pipe cracks or misalignment over time, as I experienced when rushing the backfill, causing settlement issues later.
Final Inspection and Verification
Once backfilled, inspect the trench for smoothness and proper support. Walk along the line to verify there’s no sagging or unusual dips. Use a level to double-check the pipe’s slope, ensuring it meets local standards. Proper bedding installation is an investment in peace of mind, preventing costly repairs and ensuring longevity—just like I did after correctly bedding my pipe, which resulted in trouble-free operation for years.
When embarking on a new build or addition, many overlook critical nuances that can escalate costs or delay progress. Contrary to popular belief, the biggest mistakes often aren’t about materials or design choices but stem from misconceptions about estimating, permitting, and project management. For instance, a common myth is that permits are merely bureaucratic hurdles; in reality, they are safeguards that ensure your project complies with safety and zoning laws, as detailed in comprehensive permit guides.
One of the advanced mistakes I’ve seen repeatedly is underestimating the time and complexity involved in securing these permits. Rushing this step often leads to costly rework or work stoppages, which are preventable by understanding local regulations thoroughly. Another area where assumptions can mislead is in estimating project costs. Many rely on rough numbers or outdated quotes. However, precise estimation demands factoring in variables like permit fees, inspection costs, and potential delays, as explained in estimating cost insights.
A crucial nuance that often gets lost is the coordination between planning and execution phases. Skimping on pre-project planning, especially when estimating costs or securing permits, leads to unanticipated hurdles. For example, neglecting to verify soil conditions or existing utility lines beforehand can result in significant redesigns or excavation delays. As highlighted in project management strategies, proactive planning reduces unexpected surprises.
So, what’s the hidden challenge here? It’s the misconception that permits and estimates are one-time checks. In reality, these are ongoing aspects requiring continuous updating as the project evolves. Failure to adjust estimates or re-submit permits when scope changes occur can create compliance issues or financial strain. This vigilance is particularly vital when expanding or modifying the original plans, where extra permits might be required, as shown in permit navigation for additions.
To avoid these pitfalls, invest in understanding the full scope of permit processes and estimation techniques. Regular communication with local authorities and detailed documentation keeps your project on track. Remember, a small oversight now can balloon into significant setbacks later. Have you ever fallen into this trap? Let me know in the comments and share your experience.
Invest in Reliable Monitoring and Maintenance Tools
Maintaining the integrity of your construction project over time requires precise monitoring tools. I personally rely on laser distance meters like the Leica Disto series for quick, accurate measurements—these have saved me countless hours both during initial build and ongoing inspections. Their portability and real-time feedback make them indispensable for checking for settlement, alignment, or verifying setbacks after completion. Looking ahead, digital measurement devices integrated with building management software are becoming more common, enabling remote monitoring and early detection of potential issues.
How do I maintain project equipment over the long haul?
Regular maintenance starts with understanding each tool’s specific care requirements. For power tools, I schedule monthly inspections, clean filters, and replace worn bits to prevent equipment failure that can delay timelines. For larger machinery like trenchers or excavators, I adhere strictly to manufacturer maintenance schedules, which include fluid checks, filter replacements, and part lubrication. Documenting these maintenance activities in a dedicated log helps preempt costly breakdowns and ensures compliance with warranty conditions. You might also consider investing in diagnostic software that can alert you to mechanical issues before they escalate, much like the construction-heavy World of Better Tools outlined in this resource.
Leverage Technology for Long-Term Results
Software solutions like Procore or Buildertrend are game-changers for project management, offering centralized communication, real-time updates, and document control. I’ve found that integrating these platforms with cloud storage simplifies audits, eases access to permits and inspection reports, and streamlines ongoing maintenance scheduling. Setting up automated reminders for inspections and component replacements extends the lifespan of critical systems, helping projects stay compliant with evolving regulations.
What tools will shape the future of construction maintenance?
Emerging trends point toward IoT-connected sensors that continuously monitor structural health, and drones equipped with thermal imaging to detect heat leaks or moisture problems early. These innovations will make maintenance more proactive rather than reactive, drastically reducing long-term costs and service disruptions. For instance, I predict that in the next few years, integrating AI-driven analytics with your existing data will preemptively alert you to issues before they manifest visibly.
Don’t wait for small problems to turn into costly repairs. Start employing precision tools like laser measurement devices today and consider adopting software that tracks maintenance cycles. For a deeper dive into effective project management, explore this guide. Taking these steps now will help ensure your builds remain functional and safe for years to come.
In my journey through new build projects, a recurring theme has emerged: the importance of attention to detail in foundation work and permit management. One hard lesson I learned was that rushing the planning stages often leads to costly setbacks down the line. Ensuring each step—from accurate site assessment to meticulous permit application—has taught me that preparation truly pays off. Embracing comprehensive checklists and staying proactive about compliance helped me avoid delays, and I encourage you to do the same. Remember, the foundation you lay now—literally and figuratively—sets the bedrock for everything that follows, making your project resilient and compliant for years to come. Trust in thorough planning, stay curious about the nuances, and don’t hesitate to seek expert advice when vetting permits or estimating costs. Your dedication to these details is what transforms a good project into a great one, ensuring your new build stands the test of time and regulation.