The Specific Nail Spacing Required for Shear Plywood Panels
I remember the moment vividly—standing in my garage, staring at a sheet of shear plywood, and realizing I’d messed up. The nail spacing was all wrong, and I only discovered it after the project was halfway through. That lightbulb moment taught me a tough lesson: When it comes to shear plywood, nail spacing isn’t just a minor detail; it’s the backbone of the entire structure’s safety and durability. If not done right, you could be risking costly repairs or worse, compromising your home’s integrity.
Why Nail Spacing Needs Your Immediate Attention
Proper nail spacing for shear plywood panels is critical to ensuring the panels perform their intended function—resisting shear forces during wind or seismic events. But here’s the thing—it’s not just about sinking nails randomly across the sheet. Incorrect spacing can lead to weak points, reducing the sheathing’s ability to hold up in extreme conditions. Trust me, I’ve seen DIY projects where neglecting this detail turned minor issues into major headaches. Making this mistake early on can drastically impact your project’s safety and longevity.
Is Overthinking Nail Spacing Really Necessary?
Initially, I thought a quick nail job would suffice. I dismissed the importance of precise spacing, thinking it was overkill. That was my first mistake. The truth is, small oversights about nail placement can cascade into significant structural flaws, especially when wind loads or earthquake considerations are involved. For additional insights on estimating costs and planning your build effectively, I recommend checking out estimating costs for new builds. It’s crucial to recognize that every detail, like nail spacing, plays a role in the bigger picture of a successful project.
Do you often find yourself questioning which detail truly matters? If so, you’re not alone. Many homeowners and builders overlook the importance of proper nail spacing, leading to unintended consequences. The key is understanding the specific requirements and following best practices—something I’ll walk you through next.
Now, let’s delve into exactly how to get this right from the start, so you’re instead making informed decisions rather than costly mistakes.
,
Prepare Your Materials and Layout
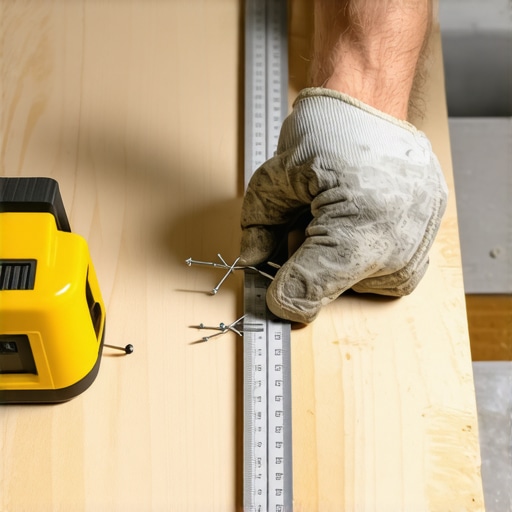
Before diving into nail spacing, gather all necessary tools—measuring tape, pencil, and framing nails. Set up your workspace in good light and ensure the plywood sheet is clean and flat. I once spent extra time marking the sheet with chalk lines based on your project specifications—this attention to detail saved me hours later correcting missed areas.
Consult Technical Specifications
Check your shear plywood manufacturer’s recommendations for nail spacing, which typically range from 6 to 12 inches apart depending on the load requirements. Use these guidelines as your baseline. Remember, adhering to code not only ensures safety but also smooth permit approval, as outlined in permit processes for additions.
Mark the Nail Positions Precisely
Using your chalk lines, measure and mark the precise nail locations. For example, start at one corner, marking every 6 inches along the edges and across the interior from the center out. I remember when I worked on my first deck addition, I marked each line meticulously—this prevented me from over- or under- nailing, which can weaken the shear capacity.
Mind the Edge and Edge Spacing Rules
Maintain a minimum distance of 3/4 inch from the edge of the plywood to prevent splitting. For interior nailing, place nails 2 inches from the edge and 6 inches apart along the length, adjusting as per your specific shear wall design. Getting these distances right significantly improves the shear wall’s performance during stress events.
Use the Right Nails and Tools
Select nails specified by your project—usually 8d or 10d nails for sheathing. Use a pneumatic nailer for consistency and speed. During my recent project, I switched from manual to pneumatic tools, which dramatically increased accuracy and saved me time. Proper nail gun setting ensures nails are driven flush, avoiding protrusions that could cause issues later.
Nail Along the Marked Lines
Start nailing from one end, following your markings precisely. Keep consistent pressure and depth. I learned the hard way that inconsistent nail depth can lead to uneven sheathing, so I made a habit of checking each nail with a level after driving. This practice ensures uniform nail patterning and optimal shear strength.
Verify and Adjust
After completing the nailing, inspect the sheet for gaps or missed spots. Use a measuring tape to confirm nail spacing remains within spec. If an area shows wider spacing or missing nails, promptly add or adjust. During my last install, a quick follow-up catch prevented future issues. Remember, accurate nail spacing is a small step with a big impact on overall safety and compliance.
Document Your Work and Prepare for Inspection
Keep a record of your nail spacing layout, especially if you’re DIY-ing or working for clients. Photos and notes can expedite permit inspections, aligned with tips found in permit navigation strategies. Accurate documentation shows your work meets code and manufacturer standards, reducing potential re-inspection delays.
 Many homeowners and even seasoned builders often believe that once permits are obtained, the hard part is over. However, a deeper look reveals that the nuances hidden in permit processes, estimation accuracy, and project planning can make or break your project’s success. One prevalent myth is that permit approval is merely a bureaucratic hurdle—nothing could be further from the truth. Proper understanding and meticulous compliance can significantly streamline your build process, avoid costly delays, and ensure long-term durability. In fact, experts emphasize that unanticipated permit issues are among the top reasons for project overruns. For a comprehensive approach to navigating permits smoothly, check out this guide.
A common oversight is underestimating the importance of precise estimations. It might seem trivial, but inaccurate budgeting or overlooking auxiliary costs like temporary utilities or site prep can cripple your project midway. According to a recent study by the Construction Estimating Institute, nearly 60% of project delays stem from poor initial estimates. To sharpen your estimating skills and avoid these traps, explore top strategies here.
But let’s talk about a nuanced pitfall many miss: the criticality of integrating permit timelines with your project schedule. Many underestimate the variability in permit approval times across municipalities, leading to unexpected delays. This mismatch can cause material and labor scheduling conflicts, increasing costs and extending the project timeline. The solution? Proactively engage with local authorities and build buffers into your planning. For example, some jurisdictions have specific requirements for environmental assessments or zoning variances that can add weeks to your timeline. To better synchronize your plan, review this comprehensive guide.
Ever wondered about the advanced mistakes that even experienced builders fall for? One overlooked factor is the proper interpretation of local zoning laws combined with building codes. Misreading setback requirements or height restrictions can result in costly redesigns or even legal issues. Recent litigation analysis shows that nearly 30% of permit rejections involve misinterpretations of local statutes. To navigate these complex regulations confidently, consult this resource for expert tips.
Finally, an often unspoken nuance involves the psychological trap of complacency—the false sense that permits and estimates are once-and-done tasks. In reality, regulations and prices evolve, and a project’s context can change with unexpected site conditions. Continual re-evaluation and staying engaged with your project’s permitting and costing process are key. Deferring this diligence risks your entire investment, especially in today’s fluctuating construction climate.
In summary, mastering the intricacies of permits, accurate estimating, and nuanced project planning demands more than just surface-level compliance. It requires sharp attention to detail, proactive communication with authorities, and a willingness to revisit your assumptions regularly. Have you ever fallen into this trap? Let me know in the comments.
Maintaining progress and ensuring quality in your home addition project requires more than just a good plan; it’s about leveraging the right tools and methods that can stand the test of time. When I started my recent addition, I realized that investing in specific equipment and software made a dramatic difference in my efficiency and the long-term durability of the build.
Invest in Precise Measuring Instruments
Accurate measurements are the backbone of quality construction. I swear by laser distance meters like the Leica D1; they provide quick, exact measurements and are invaluable for verifying wall alignments and ensuring proper spacing throughout the project. These tools eliminate common errors associated with tape measures, especially over larger distances, and are continuously improving with features like Bluetooth connectivity for easy data transfer.
Use Software That Streamlines Estimating
Manual estimations can be both time-consuming and error-prone. My secret weapon is cost-effective estimating software that integrates local material prices and labor costs automatically. It’s helped me refine my budgets, catch costly oversights early, and maintain control over project finances. As software advances, I predict smarter, AI-driven estimating tools will become standard, further reducing errors and optimizing resource allocation.
Embrace Digital Project Management Platforms
Staying organized is crucial. Platforms like Procore or Buildertrend have revolutionized how I manage schedules, document communication, and track progress. These tools keep all stakeholders in sync, reducing misunderstandings and delays. In the future, I believe these platforms will incorporate augmented reality (AR) features, allowing virtual walkthroughs and real-time inspections on-site—saving time and mitigating mistakes before they escalate.
How do I keep my tools and methods maintained over time?
Regular calibration of measurement devices ensures ongoing accuracy. For software, keeping licenses updated and backing up data weekly prevents disruptions. I also make it a habit to record lessons learned after each major phase, updating my checklists and tool usage accordingly. This proactive approach extends the lifespan of my equipment and keeps my projects on track for long-term success.
To maximize your project’s reliability, start by trying out a laser measure for your next measurement task—once you experience the speed and accuracy, you might never go back to tape! Embracing the right tools not only streamlines your workflow but also builds a foundation for durable, high-quality work that stands the test of time.
What I Didn’t Expect About Permit and Estimating Pitfalls
One of the most surprising insights I gained was how often overlooked details, like aligning your permit documentation with local regulations, can single-handedly delay projects. I once thought that getting the permit was just a paperwork hurdle, but I learned that proactive communication with authorities and understanding their specific quirks can save weeks. Moreover, neglecting to update your estimates as conditions change can lead to budget overruns—something I experienced firsthand when an underestimated site prep cost caught me off guard.
Keys to Long-Term Success in Construction Projects
Building on these lessons, I found that investing in reliable tools like laser measurement devices and trusted estimating software drastically reduces errors. Combining technology with continuous learning about local codes, like those detailed in this comprehensive guide, keeps your project on track. Remember, every detail, from proper nail spacing to permits, contributes to a durable and compliant build—don’t overlook the small stuff.
Empowering Your Next Step in Building
Embracing these personalized insights and practical strategies transforms a daunting project into an achievable journey. Whether it’s refining your estimating process or mastering permit navigation, taking proactive steps ensures you’re not just following rules but building smarter and stronger. Ready to elevate your construction game? Dive into continuous learning, leverage the right tools, and stay engaged with updates in codes and standards. Your next successful project starts with your willingness to learn from each experience and apply those lessons effectively.
What’s the biggest lesson you’ve learned from your recent construction endeavors? Share your story below and inspire others to build with confidence!