The Setback Rule for Accessory Dwelling Units You Can Not Ignore
I remember the exact moment I realized I was in over my head with my backyard project. I had spent weeks planning, estimating costs, and gathering permits, only to hit a sudden wall—an unexpected setback that threatened to shut everything down. That frustration was a wake-up call. It made me realize how easy it is to overlook critical regulations that can delay or derail your entire renovation or addition.
Why Missing the Setback Rule Could Cost You Big
As a fellow homeowner who’s been down this road, I can tell you that the setback rule isn’t just a bureaucratic hurdle—it’s a vital safety and zoning standard that protects your property and your wallet. Ignoring or misunderstanding this rule can lead to costly fines, project delays, or even having to tear down work done without proper approval.
In my case, I almost got caught because I assumed I knew the local rules. I didn’t realize that my planned location for the ADU was a few inches too close to the property line, based on what I learned from a reliable source—[Construction Edgez](https://constructionedgez.com/the-setback-buffer-rule-for-accessory-buildings-you-need-to-know). Did you know that in many jurisdictions, setbacks are strictly enforced and deviations can result in hefty penalties? This isn’t just about following regulations; it’s about safeguarding your investment.
Early on, I made the mistake of assuming permits were a simple formality. The truth is, missing critical setback buffer zones can cause the entire project to become non-compliant, leading to rework or legal trouble. This is a mistake I certainly don’t want you to make.
Are you facing confusion about setback requirements or worried about missing a rule that could stop your project in its tracks? You’re certainly not alone. Many homeowners ignore these details until it’s too late, but there’s good news—understanding and adhering to setback rules can save you a world of trouble.
Let’s dig into what you need to know so you can move forward confidently with your accessory dwelling unit, without fear of last-minute surprises.
Start with Clear Property Line Measurements
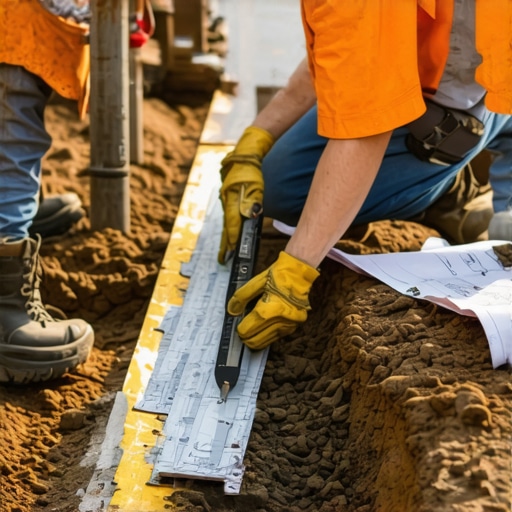
Before diving into construction, precisely measure your property lines using a survey or a professional stakeout. This step prevents costly miscalculations that can lead to setbacks violations. I once relied on outdated parcel maps, which caused my initial sketches to be off by a few inches. When I finally hired a surveyor, I gained accurate data that prevented future delays.
Consult Local Zoning Codes Early
Review your local zoning regulations to understand setback requirements specific to your property and project type. Many homeowners assume rules are uniform across neighborhoods, but regulations can vary significantly. I recommend visiting your city or county planning office or their website—many provide detailed maps and tables. Misreading these can cause retroactive adjustments or permit rejections.
Use Official Resources to Confirm Zones
Cross-reference your property’s zoning designation with official documents or online GIS tools. This verification ensures your planned structure falls within acceptable setbacks. I learned this the hard way when I built too close to the property line, only to be told I’d need a variance—which extends the timeline and adds costs.
Draft a Scaled Site Plan with Setbacks
Create a detailed, to-scale site plan showing your proposed structures, property lines, and setback distances. Tools like CAD software or even hand-drawn plans can work if done accurately. When I prepared my plan, I included all easements, setbacks, and existing structures, which proved invaluable during permit submittal.
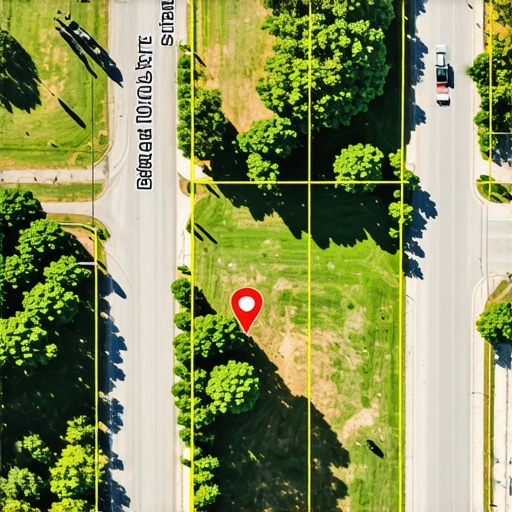
This illustrative diagram shows how to mark setback lines from property boundaries, helping visualize compliance before breaking ground.
Engage a Permitting Expert
If you’re unsure about interpreting regulations, hire a permitting specialist or a knowledgeable architect. They can identify potential hiccups early. I partnered with a local permit consultant who flagged a setback inconsistency in my plan—saving me from rejection and future alterations. This step might seem costly upfront but can save hundreds or thousands in rework later.
Document Everything
Maintain thorough records of measurements, correspondence, permits, and plans. Inspections often occur at different stages, and having clear documentation can resolve disputes swiftly. During my project, I kept detailed logs and photos, which helped clarify that I was in compliance when questioned by an inspector.
Schedule a Pre-Application Review
Many jurisdictions offer pre-application meetings where you can review your plans with planners. These sessions often reveal overlooked issues, including setback errors, before submitting formal documents. I attended such a review and was advised to shift my addition just a few inches, avoiding a future permit denial.
Stay Updated and Verify Regularly
Zoning rules can evolve, or there may be temporary amendments. Regularly check for updates, especially if your project spans several months. I subscribed to local planning newsletters to stay informed about rule changes affecting setback regulations. This practice helped me adjust my plans proactively.
Many homeowners assume that permit processes are straightforward or that estimating costs is simply plugging in square footage. However, these assumptions can lead to costly mistakes. One of the most pervasive myths is that permits are merely bureaucratic hurdles to delay your project. In reality, permits serve critical safety and zoning purposes, and rushing through or skipping them can cause major legal issues down the line. For example, failing to secure the correct permits for an addition can result in fines, forced demolition, or complications selling your property. Moreover, many underestimate the importance of detailed estimations. Overlooking hidden costs like utility upgrades, soil testing, or material surcharges can blow your budget. For advanced homeowners, understanding the nuances of cost estimation is essential—this isn’t just about square footage but about factoring in local codes, site-specific challenges, and unexpected delays.
Another common misconception is that once you get a permit, the path is clear. But permit approval is often just the beginning. Building inspections, adherence to evolving codes, and managing change orders require ongoing vigilance. Additionally, some believe that the cheapest contractor quote is always the best deal. But a low bid can hide hidden markups or subpar materials, leading to quality issues or budget overruns. Always scrutinize estimates closely, cross-reference with expert guidelines, and consider engaging a permitting specialist to navigate complex local requirements—similar to how I partnered with a local permit consultant, which saved me weeks of rework and fines.
What most folks overlook is the layered complexity of the permit and estimation process. It’s not a simple checkbox but a nuanced system involving detailed site assessments, understanding jurisdiction-specific rules, and anticipating future inspections or regulations. This awareness can prevent the silent pitfalls many fall into, especially with new builds or large additions. For example, ignoring soil testing for foundations can lead to future settling or cracks—a costly mistake. External studies, like those from the Building Codes Institute, emphasize meticulous planning and compliance as the backbone of successful construction projects.
For the seasoned homeowner or builder, the real challenge is mastering these subtleties without getting overwhelmed. You need to decode local nuances, anticipate hidden costs, and ensure ongoing compliance throughout the project. Regularly reviewing updates, like changes in setback rules or energy codes, is vital—stay ahead by subscribing to updates or consulting specialists.
Have you ever fallen into this trap? Let me know in the comments. The key takeaway: mastery over permit intricacies and estimating accuracy isn’t just academic; it can make or break your project, your budget, and your peace of mind.When managing permit approvals, additions, or new builds, having the right tools can make all the difference in ensuring smooth progress and long-term success. One essential software I utilize is estimation software. It helps me accurately project costs, factor in hidden expenses like utility upgrades, and avoid budget overruns—something critical for both small renovations and large-scale projects.
Beyond estimating, I depend heavily on CAD programs like AutoCAD for precise site plans. Visualizing setback lines and structure placements in a scaled drawing prevents costly mistakes down the line. I also use drone mapping tools such as DroneDeploy to capture up-to-date aerial surveys of my property. This technique supplies high-resolution images that verify property boundaries and topography, assisting in compliance with setbacks and foundation requirements.
For permit tracking, I leverage online project management platforms like Buildertrend. These tools centralize communications, document storage, and permit statuses, helping me stay ahead of scheduling hurdles and inspection dates. You should also consider subscribing to local planning newsletters; they provide updates on evolving zoning laws and permit policies, which are crucial for long-term planning.
How do I maintain tools and processes over time?
Consistently updating software and hardware ensures compatibility with current standards and reduces technical hiccups. Regularly reviewing and practicing procedures—such as site plan reviews or permit submission checklists—keeps the process fresh and efficient. Additionally, periodically cross-referencing your plans with official permit requirements ensures ongoing compliance, preventing surprises during inspections. As the industry evolves, emerging technologies like AI-driven site analysis could future-proof your workflow, making inspections and planning even more streamlined. I suggest trying out drone mapping tools if you haven’t yet—an investment that saves significant time and reduces errors. Remember, mastering these tools and processes today lays the groundwork for scalable, successful projects tomorrow.
What I Wish I Knew Before Diving In
The biggest lesson I learned was that permits and accurate estimations aren’t just paperwork—they’re the backbone of a smooth build. Underestimating the complexity of setback rules or overlooking hidden costs can turn your dream project into a budget nightmare or legal headache. My lightbulb moment came when a small surveying mistake escalated into weeks of delays and thousands in fines. Always double-check property lines and consult local zoning early to avoid surprises.
Tools That Changed My Approach to Construction Planning
Investing in reliable software like estimating tools helped me predict costs more accurately, factoring in hidden expenses like utility upgrades or soil testing. Using CAD programs such as AutoCAD allowed me to create precise site plans, visualizing setbacks before breaking ground. Additionally, drone mapping provided up-to-date aerial views of my property, verifying boundaries and topography—crucial for compliance and avoiding costly mistakes.
Stay Ahead, Build Smarter
The future belongs to those who stay informed. Regularly reviewing local zoning updates through newsletters or municipal sites can prevent costly permit rejections. I’ve found that the secret to avoiding permit delays is proactive engagement—schedule pre-application reviews and build relationships with local officials. Remember, mastery over permit processes and estimation not only saves money but also brings peace of mind, transforming your backyard project from a stressor into an enjoyable journey.