How to Fast-Track Your Basement Permit by Mapping Utility Lines First
I remember the sinking feeling I had the first time I submitted my basement renovation permit application, only to hit a wall. The inspector flagged unexpected utility line conflicts, and suddenly, my project faced costly delays that seemed to drag on forever. It was a frustrating ordeal—until I discovered a game-changing tip: mapping utility lines before starting the permit process can save you time and headaches.
Why Mapping Utility Lines Can Be Your Secret Weapon
If you’re planning a basement upgrade or finishing, understanding where utility lines run on your property isn’t just a good idea—it’s essential. Utility lines for water, gas, electricity, and sewer are often underground and can cross your property in unpredictable ways. Failing to identify and account for these lines early on can lead to permit rejections, extra inspections, or even costly adjustments once construction begins. According to the permits for new builds and renovations guide, proactive utility mapping helps prevent these issues, making your approval process faster and less stressful.
In my case, a simple utility map revealed a gas line that ran right through the corner of my basement. Not knowing its location had caused me unnecessary headaches, and I wish I had taken the time upfront to map everything out. Believe me, this small step can have a monumental impact on your project’s timeline and budget.
But why exactly does this matter now? With building codes tightening and municipalities cracking down on underground utility damage, authorities are more vigilant than ever. Failure to provide accurate utility information can result in permit denials or construction halts. Knowing where lines are before you start ensures you’re compliant and reduces the risk of surprises later.
So, have you ever faced a situation where utility lines unexpectedly complicated your project? If you’re nodding yes, don’t worry—you’re not alone. This was a common mistake I made early on, and it cost me dearly. Learning to map utility lines pays off, especially if you’re aiming to fast-track your permit approval.
Is Mapping Utility Lines Actually Worth the Hype?
Initially, I thought this step was an unnecessary hassle, but ignoring it almost derailed my entire project. Skipping the mapping process can lead to missed underground conflicts and permit refusals, which are far more costly than the time spent on early planning. Ensuring you’re aware of underground utilities is about protecting your property, your budget, and your schedule. It’s a simple, proactive measure that can make or break your project’s success.
To get started, consider engaging a professional surveyor or utility locator—these experts can provide precise maps and help you navigate complex underground systems. For more detailed guidance, check out this article on navigating permit requirements and ensure you’re covering all your bases.
Now that I’ve shared what I wish I knew when I started, let’s dive into the practical steps you can take right now to map utility lines effectively and make your permit application a breeze.
Start With a Clear Property Map
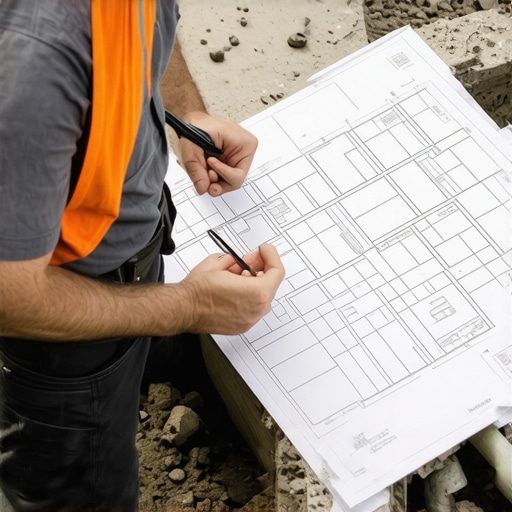
Before calling any professionals, review your property deeds and existing survey maps if available. These documents often indicate the general location of utility lines or easements. Think of this as your blueprint; it helps you identify potential conflicts and guides where to focus your efforts.
Use Local Utility Locator Services
Most municipalities and utility companies offer free or affordable locator services. Contact your local provider and request a utility scan of your property. Think of it as shining a flashlight on an underground maze—these experts use specialized equipment like electromagnetic detectors to highlight pipes and cables beneath your yard. Reach out to local utility services for precise information.
Hire Professional Utility Surveyors
If your property is complex—say, with multiple easements or older infrastructure—hire a licensed surveyor or qualified utility locator. They use ground-penetrating radar (GPR) or electromagnetic induction devices to produce detailed maps of underground utilities. This is akin to getting an X-ray of your property; it highlights the exact depth and position of lines, greatly reducing risk during construction.
Tip:
Request a written report or digital map from the surveyor. These documents serve as legal proof of utility locations and can be submitted with your permit application.
Visit Your Local Building Department
Familiarize yourself with your municipality’s requirements—some areas ask for detailed utility maps, while others only need a general plan. Check their online resources or contact the local building department. Having this info beforehand streamlines your submission and avoids costly rejections.
Document and Cross-Check Findings
Compare the utility maps from your sources. Confirm that the lines identified align with your property layout, and mark their approximate locations on your property sketches. Use spray paint or flags to clearly mark utility paths—think of this as drawing your property’s underground roadmap, which helps you coordinate with contractors.
Coordinate With Utility Companies
Once mapped, contact utility providers to verify locations and request any additional documentation or updates. Remember, utility lines can shift or be upgraded, so confirm the latest data before starting. This is your safety net; the more accurate your info, the fewer surprises during excavation or renovation.
Record and Share Your Utility Map
Keep copies of all maps and correspondence. When submitting your permit application, include these documents to demonstrate your proactive approach. This step shows authorities you’re serious about safety and compliance, helping your application move smoothly through approval stages.
In my own basement project, I combined publicly available maps, utility locator services, and a hired surveyor. The detailed report I received was invaluable—not only did it help me avoid conflicts with existing lines, but it also saved me from an unexpected utility shutdown during drilling. Investing time in mapping utility lines is like having a GPS for your project—actionable, essential, and ultimately saving you stress and money.
Many homeowners and builders operate under common beliefs that can inadvertently lead to costly errors, especially in estimating costs, securing permits, and planning new builds or additions. Let’s dig deeper into some of these nuanced pitfalls, so you can avoid them and ensure smoother project execution.
One widespread myth is that simple square footage calculations are sufficient for accurate estimates. In reality, this approach ignores crucial factors like material quality, code compliance requirements, and site-specific challenges. For example, failing to account for specialty materials or intricate structural elements can cause estimates to fall short, leading to budget overruns. According to expert estimates from construction estimation guides, incorporating detailed quantity takeoffs and contingency allowances is essential for reliable budgeting.
Another misconception revolves around permit requirements, where many assume that once they submit an application, approval is just a formality. The reality, however, is more complex. Permitting processes often have hidden nuances, especially with newer codes emphasizing energy efficiency, safety standards, and environmental considerations. Missing specific documentation, like detailed drainage plans or structural calculations, can cause delays or rejections. For example, failing to include a detailed drainage plan for hillside projects can stall permits, as outlined in specific drainage documentation requirements.
Advanced builders know that estimating and permitting are interconnected; inaccurate estimates can influence permit scope and requirements. Overlooking the need for specialized inspections or additional permits for unexpected elements—like utility upgrades or environmental mitigations—can lead to unforeseen expenses and timeline extensions. This detailed guide emphasizes proactive communication with local authorities to clarify potential additional requirements.
One trap to watch for is underestimating the importance of detailed planning ahead of time, particularly in involving experts. Engaging an experienced estimator or permit specialist early can reveal hidden complexities, saving thousands down the line. For example, a missing calculation on load-bearing walls or overlooking easements can halt progress. In my experience, consulting specialists early avoids the costly rework often prompted by surprises on-site.
A sophisticated question often asked by seasoned builders: “How do I reliably forecast costs considering volatile material prices and regulatory changes?” The answer lies in adopting flexible estimating techniques. This entails including contingency funds, regularly updating material quotes, and maintaining close communication with local officials to stay abreast of code updates. Modern software tools and industry databases play a vital role here, allowing adjustments in real-time, as highlighted in this comprehensive resource.
Have you ever fallen into this trap? Let me know in the comments. Recognizing these pitfalls and mastering their nuances is essential for turning your construction project into a smooth, predictable process.
Keep It Running: Tools I Recommend for Construction Success
Maintaining a steady workflow and ensuring quality over the lifespan of your project calls for the right set of tools. I rely heavily on specialized equipment and software that streamline the process, reduce errors, and save time. For instance, I swear by digital laser measures like the Leica Disto, which allows me to quickly and accurately measure spaces without cumbersome tape measures. This tool not only accelerates site measurements but also minimizes human error, setting a solid foundation for precise planning.
Partnering this hardware with construction management software like Buildertrend has transformed my project oversight. It consolidates scheduling, documentation, and communication into a single platform, enabling me to monitor progress in real-time and react swiftly to issues. This integration reduces miscommunication and helps maintain a clear record, essential when managing multiple stakeholders or scaling projects.
For detailed estimating, I prefer using Bluebeam Revu, which allows for markups and measurements directly on PDF plans. This method ensures the entire team has access to the most current version, and it simplifies change management. As construction projects grow in complexity, employing collaborative tools becomes non-negotiable for keeping everything on track long-term.
Safety continues to be a top priority. I highly recommend having a comprehensive first aid kit tailored to construction hazards, along with a maintenance checklist for machinery like saws, excavators, and cranes. Regular inspections and routine maintenance—guided by detailed logs—prevent breakdowns and accidents, especially as equipment ages and usage scales up.
How do I maintain tools and systems over time?
Consistent maintenance and updates are key. Replace batteries in electronic gear regularly, calibrate measurement devices annually, and update software licenses to ensure compatibility and security. Additionally, scheduling periodic training sessions for your team on new tools or software features ensures everyone remains proficient and safe. Investing in good quality storage solutions for tools, such as dedicated equipment racks and weatherproof bins, protects your assets from the elements and prolongs their lifespan.
Looking ahead, the trend points toward greater automation and smart systems that monitor equipment health remotely. Implementing IoT devices on machinery could alert you to upcoming failures before they happen, minimizing downtime and costly repairs. I recommend starting small—integrate sensors on your most critical equipment and analyze data regularly to understand usage patterns and maintenance needs.
Remember, long-term success hinges on consistent care. Regularly reviewing your maintenance schedule and upgrading tools when necessary keeps your workflow smooth and your project on schedule. For more detailed strategies, consider exploring this resource on estimating and maintenance and incorporate advanced practices that future-proof your construction operations. Try implementing a digital maintenance log this month—it’s a simple step with profound benefits.
The Unexpected Pitfalls That Changed My Approach
One of the most surprising lessons I learned was that diligent utility mapping isn’t just a technical step; it’s a safeguard against unforeseen delays. Missing these details early can turn what should be a smooth process into a series of costly surprises. Recognizing this early on transformed my entire approach to permit submissions and planning.
Another insight was that estimating costs isn’t a set-it-and-forget-it task. Overestimating the complexity of requirements often led to budget blowouts, but accurate, detailed forecasts grounded in real data kept projects on track. It taught me the importance of continuous learning and adjusting estimates as I gained more information.
I also discovered that engaging with local authorities proactively—not just during the permit phase but throughout—builds trust and clarifies expectations. It’s about turning a bureaucratic hurdle into a collaborative process, which ultimately accelerates approvals and smooths out hiccups.
Most importantly, I realized that sharing experiences and lessons learned in forums or with peers creates a community of support that’s invaluable. No one has all the answers, but collective wisdom often provides the breakthrough you need to move forward confidently.
Tools and Resources That Changed My Workflow
My go-to resource for permits and planning has always been the official local building department website. It provides the most current requirements and contact info, ensuring my documents are compliant. Reaching out directly helps clarify obscure rules, saving time and preventing rejection.
For mapping underground utilities, I rely on the utility locator services recommended in industry guides. They use advanced detection tools, giving me peace of mind and detailed plans for a fraction of the cost of potential delays.
Estimating software like Bluebeam Revu has been transformative—allowing me to embed measurements and notes directly into digital plans, which streamlines revisions and improves accuracy. These tools make collaboration seamless, ensuring everyone works from the same reliable data.
Lastly, I found that staying connected with experienced consultants or permit specialists through websites like these resources provides insights that help anticipate hurdles before they arise. They can help interpret complex code nuances and provide strategic advice tailored to your project’s specifics.
Embrace the Journey—Your Build Starts Now
Every construction journey is unique, filled with lessons that push us to become better planners and problem solvers. By sharing these insights, I hope you feel more empowered to take proactive steps—mapping utility lines, refining estimates, and engaging early with local authorities can drastically reduce stress and costs. Remember, progress comes from action, not perfection.
So, take that first step today, armed with knowledge and confidence. Whether you’re starting a basement renovation or embarking on a new build, these lessons and tools will serve as your foundation for success. The future of your project is in your hands—let’s build it wisely!
Your Turn to Make a Difference
Have you ever faced an unexpected utility conflict or permit hurdle that threw your project off course? Share your story below, and let’s learn from each other’s experiences to build smarter and smoother in the future.
,