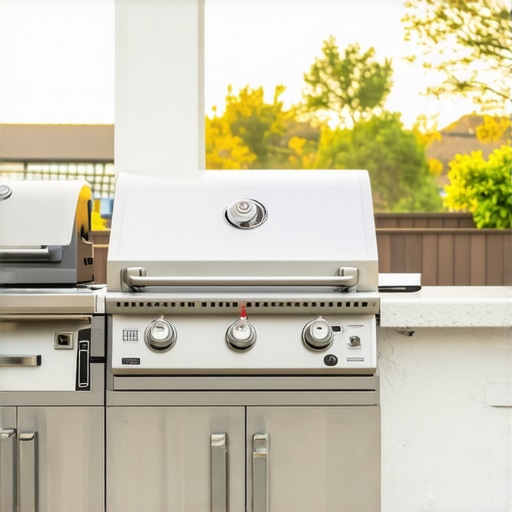
The GFI Outlet Placement Rule for Outdoor Kitchens
I remember the moment vividly—standing in my backyard, staring at my newly planned outdoor kitchen, feeling a mix of excitement and dread. It hit me like a ton of bricks: I hadn’t paid enough attention to the GFI outlet placement rules, and now I was second-guessing everything. That lightbulb moment made me realize just how confusing and frustrating these regulations can be, especially when you’re eager to bring your outdoor space to life.
Why Getting GFI Outlet Placement Right Matters for Your Outdoor Kitchen
Every outdoor kitchen enthusiast knows that the fun part is dreaming up your space—those sleek countertops, the grill, the cozy seating. But lurking beneath all that excitement are the vital safety codes that keep us protected and compliant. The GFI (Ground Fault Interrupter) outlets are crucial because they prevent electrical shocks, especially in environments exposed to moisture and outdoor elements. A misstep here isn’t just a minor oversight; it can lead to serious safety hazards, delays in construction, or hefty fines.
Early on, I made the mistake of assuming I could just add outlets wherever I wanted. Turns out, the placement of GFI outlets isn’t just about good design—it’s governed by specific rules, often overlooked by homeowners eager to move forward. I wish I had known how strict some of these guidelines are. That oversight cost me extra time and money, and I don’t want the same to happen to you.
Thankfully, understanding the GFI outlet placement rule can make your project run smoothly. It’s about knowing where outlets should go, how many are needed, and making sure they meet code requirements from the start. To save yourself the headache, I recommend reviewing your local electrical codes and consulting professionals early in the planning process. For comprehensive guidance, consider visiting [this resource on permitting for new builds and additions](https://constructionedgez.com/permits-for-new-builds-essential-tips-for-your-project), which explains the importance of proper outlet placement.
Have you encountered confusion or setbacks because of outlet placement rules? If so, you’re not alone—and the good news is, there’s a way to navigate this maze effectively. Later, I’ll walk you through the specific placement rules that can save your project from unnecessary trouble, backed by real-world insights and expert tips. Before we dive into the practical steps, let’s address some common skepticism about these rules—specifically, whether they’re really worth the hassle in outdoor projects.
Start with Local Code Review
Begin by analyzing your city’s electrical and building codes, which vary by location. Access your local permit office website or contact them directly at this link to obtain the specific GFI outlet requirements for outdoor installations. Treat this step as gathering your blueprint—knowing the rules upfront prevents costly mistakes later. I once overlooked local variations and faced delays; now, I always check regulations early.
Map Your Outdoor Kitchen Layout
Create a detailed plan of your outdoor space, marking where appliances, countertops, seating, and utilities will go. Use a simple sketch or digital tool. This visual map guides where outlets are necessary, ensuring all areas are powered safely and conveniently. During my project, I found that a clear layout prevented installing outlets in awkward spots, simplifying wiring and compliance.
Identify Power Needs and Outlet Placement
Assess your electrical requirements—consider appliances like grills, refrigerators, or lighting. For each, determine the proximity to GFI outlets. Imagine your setup as a series of islands; each island needs a reliable bridge (outlet). For example, I placed outlets near the countertop and cooking area but avoided placing them behind fixtures, which could complicate access.
Use the 6-Ft. Rule for Convenience and Safety
Position GFI outlets within 6 feet of all outdoor kitchens and grilling stations—this ensures easy access and adheres to safety standards. Think of it as creating a safety net that covers all activity zones without unnecessary clutter. During a remodel, I measured carefully, and it saved me from retrofitting later when I realized some outlets were out of reach.
Ensure Proper Height and Ground Level
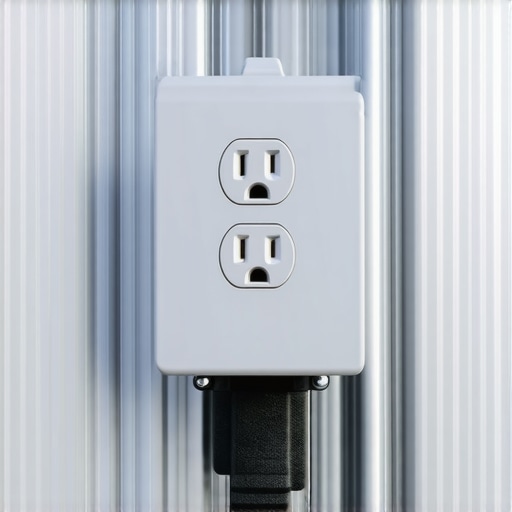
Mount outlets at the standard height—usually 12 to 18 inches above ground—to prevent water intrusion while keeping them accessible. Visualize the outlet as a socket on a wall: too high and inconvenient, too low and susceptible to splashes. My first attempt placed outlets too close to the ground; I later moved them to meet code and avoid moisture problems, which saved my project from future corrosion issues. 
Protect Outlets from Weather
-install weatherproof covers—GFCI outlets must be rated for outdoor use, with covers that shield against rain and splashes. Think of the outlet as a boat’s hatch—sealed tight to keep everyone dry. During my installation, I used covers designed for wet environments, preventing nuisance trips caused by moisture. Never compromise on weather protection; it’s a small investment for long-term safety.
Ground Fault Breaker Intention
Connect your GFI outlets to a properly rated ground fault circuit interrupter—use a dedicated circuit if possible. This setup acts like a firefighter, cutting off power instantly during faults. I learned the importance of dedicated circuits when a neighbor’s lawn equipment caused nuisance trips, but a separate line kept my outdoor kitchen safe and operational.
Test and Verify Before Finalizing
After installation, use a GFI tester to verify each outlet’s functionality—press the test button, then reset. This step is like a safety drill that confirms your setup’s integrity. In my experience, testing saved me from surprises when the power was needed most, especially during summer gatherings.
By following these precise steps, you’ll establish a safe, compliant, and functional outdoor kitchen. Remember, each step reduces the risk of infractions and enhances usability. For more detail on orchestrating seamless project execution, visit this resource.
Most homeowners assuming that permit processes and cost estimating are straightforward often fall prey to overlooked nuances that can derail their projects. Contrary to popular belief, rushing through early planning stages without understanding the intricacies of permits can lead to significant delays and unexpected costs. For instance, many believe that if a permit is approved once, future modifications won’t require additional approvals, but in reality, permits are often project-specific and may necessitate revisiting the approval process for changes, as highlighted in expert analyses from [this guide on navigating permit requirements](https://constructionedgez.com/navigating-permit-requirements-for-additions-in-2025). One common myth is that estimating costs is merely summing up material prices; however, a sophisticated approach involves factoring in waste, material margins, labor complexities, and potential code-related adjustments, as detailed in [estimating strategies for modern homes](https://constructionedgez.com/new-build-estimation-strategies-for-modern-homeowners).
A crucial nuance often missed by DIY enthusiasts is the underestimation of soft costs—permits, design fees, inspections, and unforeseen contingencies—that can inflate budgets by 20-30%. Ignoring these expenses can catch homeowners off guard after project initiation. Additionally, many misjudge the timeframes associated with permit approvals; some permits may take weeks or even months depending on local jurisdiction and complexity, contradicting assumptions of quick turnarounds, as discussed in [streamlining permit acquisition](https://constructionedgez.com/streamlining-permit-acquisition-for-faster-construction).
Advanced builders know that permits aren’t just bureaucratic hurdles but integral to project quality and compliance. They also understand that estimates must include allowances for permits and inspection fees, which vary widely between regions. Overlooking these can result in budget shortfalls. Furthermore, the best estimates incorporate buffer amounts for unexpected issues, such as discovering unanticipated structural problems or code violations that emerge during work. These are smart strategies, as shown in [expert estimating insights](https://constructionedgez.com/estimating-costs-for-new-builds-expert-insights).
An often-overlooked detail is how permit requirements evolve over time. Regulations can change mid-project, especially for projects spanning several months or years, which can render initial permits invalid or requiring updates. Staying informed through regular consultation with permitting authorities or professionals can save considerable trouble, as noted in [this step-by-step permit navigation guide](https://constructionedgez.com/navigating-permit-requirements-for-additions-in-2025).
Finally, industrial or complex projects involve nuances like specific foundation, electrical, or roofing codes that standard estimates and permit plans may overlook. These specialized requirements can greatly impact both timelines and budgets. In fact, a study by the National Association of Home Builders indicates that detailed pre-planning and early permit consultations can reduce project delays by up to 35%.
Have you ever fallen into this trap? Let me know in the comments. Remember, the key to a successful home addition or new build isn’t just ticking boxes—it’s understanding these hidden nuances that can make or break your project.
Investing in the Right Tools Ensures Long-Term Success
One of the most critical aspects of maintaining a construction project over time is leveraging precise equipment and software that streamline workflows. I personally rely on project management platforms like Procore because they centralize communication, document sharing, and scheduling, preventing miscommunications that often cause delays. Additionally, using digital estimating tools such as Buildertrend helps me track budgets accurately, account for waste factors, and adapt swiftly to unforeseen changes, which is essential for staying within costs as outlined in this comprehensive guide.
How do I maintain efficiency and adapt to project scaling?
As projects grow, maintaining control over timelines and costs becomes complicated. To address this, I employ BIM (Building Information Modeling) software like Revit, which allows me to visualize the entire build before breaking ground. This proactive approach helps identify potential clashes or design flaws early, saving significant rework time. Scaling also involves ensuring permits and inspections adapt alongside your project. I recommend establishing a continuous communication cadence with local authorities through tools like permit management resources to avoid bottlenecks.
Why regular maintenance and updates matter for long-term durability
Investing in quality materials and keeping a routine check on equipment is indispensable. For example, routinely inspecting electrical systems, especially GFI outlets, guarantees safety compliance over the years. I suggest implementing a maintenance schedule encompassing inspection of weatherproofing covers and testing GFI outlets using a dedicated tester—this simple step ensures ongoing safety and prevents costly repairs later. Furthermore, updating your project documentation with completed inspections and changes helps you stay aligned with code requirements, as emphasized in permitting guides.
Mastering permit management for seamless progression
Getting the necessary permits can feel like a never-ending process, but embracing digital tools significantly eases this burden. I advise proactively tracking permit statuses online, setting reminders for renewal deadlines, and maintaining open lines with local authorities. During my experience, staying ahead of permit expiration and revisions prevented unexpected delays. For complex projects, consider consulting with permit experts to preemptively address potential issues, saving you from costly adjustments—check out this resource for strategies that streamline permit acquisition.
Future trends in project maintenance and scaling
Looking ahead, I believe automation and IoT integrations will revolutionize project upkeep. Devices embedded in materials can monitor structural health long-term, alerting you to emerging issues before they escalate. Investing early in these technologies will pay off, ensuring projects not only stay within budget but also maintain their integrity and value over the years. In the meantime, adopting reliable tools and disciplined routines now will position you for successful, scalable projects well into the future. Why not try implementing a digital maintenance checklist today to see how it simplifies your ongoing project oversight? For detailed insights, visit this guide on long-term project value.”}} }
}
Lessons That Changed How I Approach Outdoor Projects
One of the most profound lessons I learned was the importance of meticulous permit research early in the planning process. Overlooking local variations in GFI outlet placement almost delayed my project by months. Now, I always double-check regulations through official sources or contact local authorities via this contact page. Additionally, understanding the delicate balance between safety and design—like ensuring outlets are within 6 feet of cooking stations—can significantly impact both usability and compliance. I also realized that investing in weatherproof covers and proper outlet height might seem minor, but these details prevent future headaches and safety hazards. Finally, I’ve come to appreciate the power of online permit management tools, which keep track of approvals and upcoming inspections, ensuring projects stay on schedule and within budget. These lessons, though learned the hard way, have become cornerstones of my approach to outdoor additions, permit processes, and estimating safety measures.
Tools and Resources That Got Me Through
For anyone tackling outdoor kitchen projects, I recommend starting with Expert Estimating Insights. It sharpened my ability to predict true costs, including permits and unexpected expenses. This comprehensive guide became my blueprint for integrating permit considerations into project planning, saving me time and stress. I also rely on permit acquisition strategies to navigate bureaucratic hurdles swiftly, especially in jurisdictions with complex requirements. To stay organized and proactive, I use project management platforms like Procore, which centralize documentation, schedules, and communications, keeping everything aligned with safety and compliance standards. These tools have transformed my approach from reactive to strategic, ensuring safe, compliant, and successful outdoor kitchens.
Why Taking Action Now Will Reap Long-Term Rewards
Building an outdoor kitchen isn’t just about creating a space—it’s about crafting a safe, compliant, and enjoyable extension of your home. Don’t wait for issues to arise; the time and effort invested now—like verifying outlet heights and ensuring weatherproofing—pay off hundreds of times over in peace of mind and functionality. Think of your project as an ongoing commitment to safety and quality, not just a one-time build. Embrace the lessons learned, leverage the right tools, and stay engaged throughout the process. With proactive planning today, you’ll enjoy a resilient outdoor space tomorrow—one that brings family and friends together in comfort and confidence. So, why not start by reviewing local permitting requirements or updating your project checklist today? Your future self will thank you for it.