The Ceiling Height Flaw That Triggers an Instant Permit Rejection
I remember the exact moment I hit a brick wall during my first home addition project. Everything was progressing smoothly—until I submitted the permit application and received that dreaded rejection notice. The reason? A seemingly small detail about ceiling height that I completely overlooked. That lightbulb moment changed my entire approach. If you’ve ever experienced a permit rejection without clear explanation, you’re not alone. Today, I want to share what I learned about a common ceiling height mistake that triggers instant permit rejection—and more importantly, how you can avoid it.
Why Your Ceiling Height Could Make or Break Your Permit
In the world of home construction and renovation, permits are the gatekeepers to your dream space. A minor oversight in measuring or planning ceiling heights can cause big headaches, even halting your project’s progress entirely. This is especially true because many municipalities have strict regulations on minimum ceiling heights—not just for comfort, but for code compliance. Early in my career, I made the mistake of assuming all ceiling heights are created equal. I didn’t realize that a slight deviation from local standards could be an instant red flag for inspectors. It’s a mistake I see many first-timers repeat, leading to costly delays and frustrating rework.
But why does this specific flaw trigger such drastic consequences? Municipalities want to ensure safety, accessibility, and habitability. When your ceiling height falls outside accepted parameters—say, below the 7-foot minimum in some jurisdictions—it’s an immediate sign that your plans might not comply, risking safety and habitability. If you’re serious about avoiding project delays, understanding this nuance before you submit your permits is vital.
Research shows that non-compliance with height regulations is among the top reasons permits get rejected on the spot. An article from the Home Builders Association notes that inadequate ceiling heights can lead to structural violations, which regulators take very seriously (source: permitting requirements for additions).
Have you encountered this ceiling height trap before? If so, you know how quickly it can turn a smooth project into a bureaucratic nightmare. But let’s put an end to that. In the next section, I’ll walk you through specific steps to verify your ceiling heights and ensure they meet local standards—so you can pass inspections smoothly and avoid the heartbreak of rejection.
Measure Accurately Right From the Start
Begin by retrieving your project plans and cross-referencing them with real measurements on-site. Use a laser distance meter for precision, not a tape measure—think of it as the difference between a rough sketch and a detailed blueprint. During my first project, I missed a critical height in a converted attic because I relied on outdated drawings. When I finally used a laser tool to re-measure, I discovered a 0.3-foot discrepancy that would have caused instant rejection. Accurate measurements prevent surprises later in the process.
Consult Local Building Codes and Regulations
Don’t assume that your project’s envisioned ceiling heights comply automatically. Each jurisdiction has specific rules—some require a minimum of 7 feet, others 7’6Many homeowners and even seasoned contractors fall prey to common assumptions about estimating costs and navigating permits for new builds or additions. One widespread misconception is that sticking strictly to initial estimates guarantees a smooth process. In reality, estimates are just the starting point—underestimating complexities or overlooking hidden variables can lead to costly surprises. For instance, many underestimate the impact of site-specific factors like soil variability or local zoning nuances, which can dramatically increase expenses if not accounted for early. Additionally, there’s a myth that permits are just a bureaucratic hurdle to be quickly bypassed; in truth, understanding the nuanced requirements—such as setback rules, fire safety codes, or utility connections—is essential for smooth approval. Overlooking these details often results in delays or rejection, boosting costs and project timelines.
A common ‘oops’ is neglecting to verify recycled materials or special features, like unique roofing or eco-friendly systems, which can trigger unexpected permit conditions. Advanced estimators know that detailed site assessments and code research upfront can prevent these pitfalls. For example, studies highlight that over 60% of project delays are due to unforeseen zoning or code issues, which can be mitigated by proactive planning and thorough research (source: ConstructionEdgez).
**Why do so many still make these mistakes?** The answer lies in a focus on surface-level estimates or generic advice, rather than a nuanced understanding of local regulations and site-specific challenges. This is why experienced professionals emphasize detailed pre-planning, including site inspections, accurate measurements, and comprehensive code reviews. For example, mastering the complexities of soil testing, setback mapping, or utility assessments can save thousands—and even ensure permits are approved on the first submission.
For a deep dive into precise estimating strategies that factor in these nuances, check out this detailed guide. And when it comes to navigating permits, understanding the fine print can be the difference between project success and costly rejections. Review comprehensive tips at this resource to streamline your process.
**A question for the advanced builder:** How do local zoning variations influence your material and design choices, and what proactive steps can you take to align your plans with these nuances before applying for permits? Taking these factors into account ensures your project remains flexible and compliant.
In summary, avoid the trap of oversimplifying estimation and permit processes. Dig into the local regulations, perform detailed site assessments, and always plan for hidden variables. Doing so not only saves time and money but also elevates your project to a professional standard. Remember, meticulous planning and understanding the true nuances behind costs and regulations are what separate successful builds from costly mistakes. Have you ever fallen into this trap? Let me know in the comments.When it comes to managing a home addition or new build, having the right tools can make all the difference in maintaining quality, staying on schedule, and ensuring long-term success. As someone who’s navigated numerous projects, I’ve found that specific equipment and software elevate the entire process. Today, I’ll share my trusted toolkit and explain why these choices matter.
Precision Measurement Devices for Reliable Results
Accurate measurements are the backbone of every successful project. I swear by the Leica Disto laser distance meter, which has become indispensable. Unlike traditional tape measures, it provides instant, precise readings up to 330 feet, even in challenging lighting conditions. I especially value its ability to store multiple measurements, reducing errors during site assessments for permit applications or estimating costs. For example, when verifying ceiling heights or setback distances, this device ensures I meet local code requirements seamlessly.
Project Management Software to Keep Everything Organized
Staying on top of estimations, permits, and schedules requires reliable software. I personally use Construction Edge — it’s tailored for home additions and streamlines the estimation process. The platform helps me break down costs accurately, track changes over time, and generate detailed reports. Overestimating or overlooking small line items, like recycled materials, can cause budget overruns; having software that prompts detailed breakdowns minimizes these risks.
Quality Construction Tools to Ensure Finish and Safety
Investing in high-quality tools pays off long-term. My go-to brands include DeWalt and Bosch. For example, their cordless drills with brushless motors deliver consistent power, reducing project delays. For framing and drywall work, I prefer their laser-guided saws, which improve accuracy and safety. When handling critical elements like foundation or structural supports, precision is non-negotiable, and reliable tools are your best allies.
Future Trends in Construction Technology
Looking forward, integration of digital tools with building information modeling (BIM) systems promises even greater efficiency. As these technologies advance, I predict an increasing reliance on 3D modeling and virtual walkthroughs to pre-empt permit issues or design flaws. Learning to leverage these innovations now can save time and resources later. For instance, using accurate estimation techniques combined with cutting-edge software will be essential for scaling projects effectively.
How do I keep my tools and methods maintained over time?
Regular calibration of measurement devices, routine software updates, and proper storage are my core practices. I also schedule annual inspections for power tools to ensure safety and performance. Staying vigilant about tool maintenance prevents unexpected failures that could cause project delays and compromise quality. Remember, investing a little time in upkeep ensures your tools remain reliable throughout the project lifecycle and beyond.
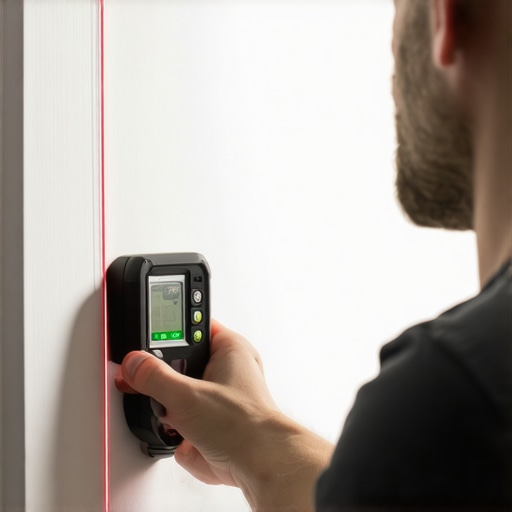
If you want to elevate your construction management, I highly recommend trying out laser measuring devices for your next project. They reduce measurement errors significantly and improve compliance with local codes. Implementing this small yet powerful upgrade could save you time and money in the long run. For detailed guidance on estimating costs accurately, check out this resource.
Secrets Builders Often Miss About Ceiling Heights and Permits
One of the most impactful lessons I learned was that even seemingly minor details, like accurate ceiling height measurements, can make or break your permit approval. I once overlooked a local minimum height requirement, leading to a hard rejection that delayed my whole project. That experience taught me to verify all measurements against current codes before submission. Now, I always double-check these details to avoid unnecessary setbacks.
Another hidden gem of wisdom is understanding that local building codes vary significantly, and assumptions can be costly. I once assumed my plans complied simply because they looked correct, only to find I needed additional structural reinforcements after a detailed review. Proactively consulting local regulations early on saves time and frustration.
Lastly, don’t underestimate the importance of detailed, accurate site measurements. Using a laser distance meter for ceiling heights and setbacks has revolutionized my planning process, making permit approval much smoother. It’s incredible how a small investment in better tools can elevate your entire project management approach.