How to Verify the Moisture Content of Framing Lumber Before Drywall
Last summer, I nearly faced a costly mistake that could have not only delayed my project but also increased expenses significantly. I had ordered a truckload of framing lumber, excited to kick off my new home addition. But after assembling the frame and waiting for the drywall, I noticed some odd gaps and unevenness. It wasn’t until a seasoned inspector pointed out the excess moisture in the wood that I realized my oversight—assuming the lumber was dry enough. That moment was a wake-up call. It made me question: How do I truly verify the moisture content of the framing lumber before proceeding with drywall installation?
Why Moisture Levels in Lumber Matter More Than You Think
Understanding and measuring the moisture content in framing lumber isn’t just a technical detail—it’s the foundation of a durable, stable build. If the wood is too moist, it can warp, shrink, or even develop mold after finishing. Conversely, lumber that’s overly dry might be brittle and more prone to cracking. As I learned from a construction white paper, improper moisture levels are one of the leading causes of structural issues in new builds (source: Construction Edgez).
In my experience, the initial mistake I made was trusting the visual cues—looking at the wood’s surface—and neglecting to do a proper moisture test. That oversight cost me time, money, and a lot of stress. Today, we’ll explore practical methods to verify moisture content accurately, so you can avoid similar pitfalls and keep your project on track.
Is Moisture Testing Actually Worth the Hassle?
I admit, early in my construction journey, I thought moisture testing was an unnecessary extra step—something only big contractors or specialists would bother with. My mistake. It turns out, skipping this crucial step can lead to foundation problems, warped walls, and even structural failure down the line. These issues aren’t just costly—they threaten the safety of the entire build.
When I first experimented with a moisture meter, I was surprised at how simple and quick it was to get reliable readings. Don’t fall into the trap I did—assuming that visual inspection will suffice. Instead, Invest in a quality moisture meter, understand its readings, and learn how to interpret results. This small investment of time and money can save you weeks of trouble—and thousands of dollars—later. Want a step-by-step guide? Check out this comprehensive resource on home addition estimates and apply the principles to your lumber assessment for better results: Estimating home additions.
Use a Reliable Moisture Meter for Quick, Accurate Readings
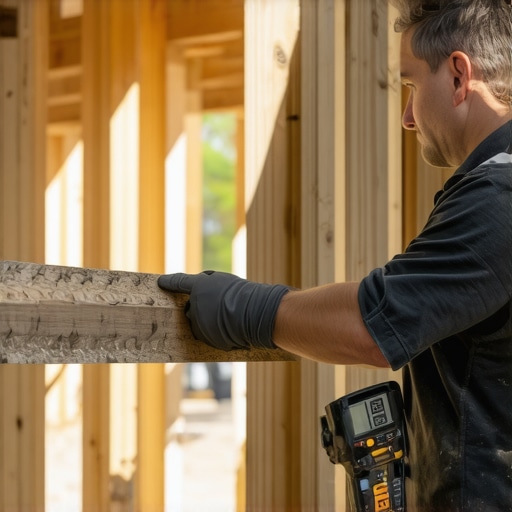
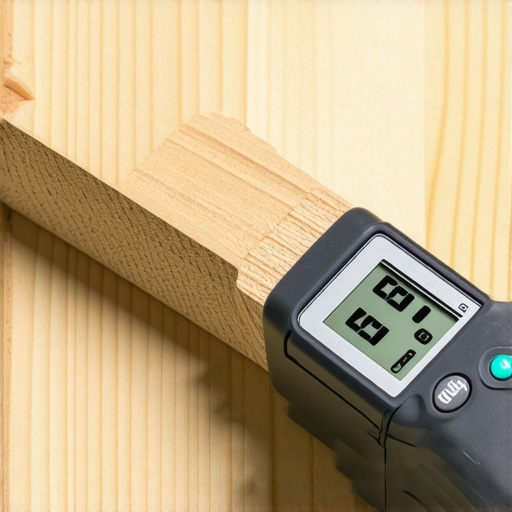
During my own project, I purchased a digital moisture meter and tested multiple lumber bundles on-site. I inserted the probes into the wood at several points, paying close attention to readings around 12-15%, which indicates properly dried lumber for framing. This quick step prevented future warping issues. When selecting a meter, choose one with pin and pinless modes for versatility and higher accuracy.
Calibrate Your Meter Before Use to Ensure Precision
Before testing, I calibrated my device according to the manufacturer’s instructions. This involved zeroing the meter on a piece of known moisture content or following factory calibration guidelines. Proper calibration prevents skewed readings, especially critical when working with significant quantities of material. Calibrate regularly, especially after moving the device between sites or after a period of non-use.
Identify the Optimal Testing Points on the Lumber
I focused on testing both the edges and the center of the boards, as moisture content can vary across the thickness. For larger beams, I measured at multiple heights and ends. Avoid testing surface coatings or paint, as they can give false low readings; always test the raw wood surface.
Interpret Moisture Content Based on Species and Use
After testing, I compared the readings with species-specific guidelines. For instance, Southern Yellow Pine should be below 19% before finishing, while Douglas Fir can be acceptable up to 15-20%. Knowing these standards helps determine if lumber is ready for installation or needs further drying.
Use Moisture Barrier Practices to Manage Moisture Migration
In my project, I applied vapor barriers and proper insulation to minimize moisture fluctuations after testing. This proactive approach preserves the integrity of the lumber, especially in variable climates, and prolongs the structural stability.
Document and Track Testing Results Over Time
I maintained a log of moisture readings for each batch of lumber, recording date, location, and specific measurements. This documentation helped track drying progress and added confidence in the material’s readiness. It also provided valuable records for inspections and future maintenance.
Applying these concrete steps led to a smoother construction process and avoided costly repairs down the line. For more details on managing home additions or navigating permit complexities, check out this guide on permit processes. Proper testing doesn’t just save money—it builds a safer, more durable structure.
 Many homeowners and even some contractors hold onto misconceptions about estimating costs, permits, and planning for home additions or new constructions. One widespread myth is that accurate estimates are just about adding up material and labor costs. In reality, the most successful projects rely on understanding the hidden nuances—like permit complexities and site-specific variables—that can significantly alter your budget and timeline. For example, assuming permits are a simple formality often leads to underestimating the time and cost involved, especially with evolving regulations. A mistake I see frequently is neglecting to account for the administrative and documentation hurdles that can extend approval times, which I discuss in-depth in guides on streamlining permit acquisition.
It’s tempting to believe that permits are uniformly straightforward—especially if you’ve seen a “no fuss” process on neighboring projects. But, in my experience, each project can have its unique challenges, such as zoning variances or environmental restrictions. These can cause delays if unanticipated, leading to costly stop-work orders and design revisions. The key is to proactively understand and prepare for these factors; many overlook this outer layer of complexity, assuming project scope entails only tangible tasks like framing or drywall. Delays caused by permit issues represent a significant portion of project overruns, as outlined in expert estimates on construction timelines.
A critical advanced consideration is the **perception that estimation is a static, one-time activity**. Instead, estimate refinement throughout the project is essential—tracking actual costs against initial figures, adjusting for unforeseen conditions, and revising permits accordingly. Neglecting this dynamic approach can lead to cash flow problems and project stalls. A good question for experienced builders is: How do you efficiently incorporate changes into your initial estimates to reflect real-world conditions?
Research backed by industry experts suggests that up to 30% of project delays are due to permit and regulatory miscalculations. This emphasizes the importance of understanding permit requirements thoroughly from the start. Luckily, resources like these guides on permits for home additions can help demystify the process.
Have you ever fallen into this trap? Let me know in the comments. The key takeaway is that detailed, knowledge-driven estimates—combined with strategic permit planning—are your best defense against costly surprises and project overruns. Recognizing and addressing these hidden nuances will ensure your build stays on track, within budget, and compliant with all regulations. Proper early planning isn’t just good practice—it’s essential for turning your vision into reality efficiently.
Tools That Make a Difference in Building Maintenance
Staying on top of your project’s health requires reliable equipment and software. From digital planning tools to physical measurement devices, the right tools can significantly enhance efficiency. Personally, I rely on the Bosch Digital Moisture Meter because of its durability and pinless technology, enabling me to quickly assess moisture levels without damaging surfaces—crucial for preventing warping or mold issues. Additionally, I use construction management software like Buildertrend to centralize communication, schedule updates, and track progress, which prevents miscommunications that can cause costly delays.
Investing in Accurate Measurement Devices
Precision matters. For example, I prefer the Protimeter Surguard for its sensitivity and ease of calibration, helping me catch moisture problems early. Regular calibration of tools ensures consistent accuracy—think of it as maintaining your vehicle; neglect it, and you’re risking bigger issues down the line. As my experience with moisture testing taught me, trustworthy data from calibrated devices saves time and money by guiding correct decisions about when materials are ready for use.
Incorporate Software for Long-Term Tracking
Beyond physical tools, project management platforms like this estimation guide help track costs, schedules, and permit statuses. These tools can alert you to potential bottlenecks before they escalate. In my projects, maintaining a digital log of inspection results prevents misremembering or misrecording crucial data—ultimately saving time during inspections or audits.
How do I maintain progress over time?
The key is consistency. Regularly updating your records, calibrating your measuring devices, and reviewing project timelines keeps everything aligned. As trends move toward smart building technology, integrating IoT sensors that monitor moisture, temperature, and structural integrity in real time will become standard practice. Adopting such innovations early positions you ahead of the curve, ensuring your projects remain sustainable and resilient in the long run. For specific strategies on scaling your efforts, this guide on adding value offers insights into expanding your scope without sacrificing quality.
If you haven’t already, I recommend trying the calibration routine I described—it’s a simple step that can prevent expensive reworks. Embrace these tools and practices, and you’ll find your projects running smoother, with fewer surprises along the way.
What My Wake-Up Call Taught Me About Permits and Planning
One of the most powerful insights I encountered was that overlooking permit intricacies can silently sabotage even the most well-planned projects. I learned this the hard way when a delay in permit approval shifted my entire timeline and increased costs. This experience underscored the importance of early permit research and proactive communication with local authorities to prevent avoidable setbacks. The lesson: Never underestimate the value of understanding permit requirements before breaking ground.
Secrets That Saved Me Thousands During Estimation
Accurate estimating isn’t just about summing up quotes; it’s about anticipating hidden costs and variances. My breakthrough came when I adopted a detailed, layered approach—breaking down the project into phases, including contingency for unforeseen issues like soil irregularities or material price fluctuations. This mindset shift helped me allocate resources wisely and avoid budget overruns. For comprehensive strategies, exploring guides on home addition estimation can be a game changer.
Why Building a Checklist Can Transform Your Construction Approach
Developing a thorough checklist of permits, materials, inspections, and milestones turned chaos into control for me. It ensured no detail was overlooked, from the initial planning phases to final inspections. Over time, I realized that checklists serve as a safeguard against costly mistakes and keep teams aligned. For anyone serious about mastering construction logistics, integrating this simple tool into your workflow is a must.
Where Excellence in Construction Begins
Remember, the biggest breakthroughs often come from small disciplined habits—meticulous planning, early permit engagement, precise estimation, and consistent documentation. As you progress in your projects, embrace these lessons; they’ll help you navigate complexities with confidence. You’re capable of building more than structures—you can craft peace of mind and long-lasting value. Take the next step today, and let your projects become the blueprint of success.