How to Verify a Concrete Mix Design on the Delivery Ticket
I remember the day just like yesterday. We were pouring the foundation for a new home addition, and everything seemed to be going smoothly—until I glanced at the delivery ticket. There it was—what I thought was the correct concrete mix, but something didn’t sit right. A little voice in my head started asking, “Did I really verify that the mix design matches what was delivered?” That moment was a lightbulb for me, illuminating a common mistake many contractors and DIYers overlook: assuming the mix on paper equals what arrives at the site.
Why Double-Checking the Concrete Mix Matters More Than You Think
Verifying the concrete mix design on your delivery ticket isn’t just about ticking a box. It’s a critical step that can affect the strength, durability, and ultimately, the safety of your project. If the mix isn’t accurate, you risk issues like cracking, settlement, or even failure of the foundation. According to the Portland Cement Association, improper mix proportions can lead to significant cost overruns and structural problems—problems you definitely want to avoid. Yet, many overlook this step, trusting that the supplier’s documentation is always correct. That trust, in my early days, cost me time, money, and a whole lot of stress.
Are you continually checking the mix design against what’s delivered, or do you find yourself assuming all is well? If you’ve ever faced doubts about your concrete batch, you’re not alone. Our goal today is to walk you through how to confidently verify that what arrives on site matches your specified mix. This skill isn’t just for the seasoned contractor; even a DIY enthusiast can master it with a little know-how.
Is Trusting the Delivery Ticket Actually Worth the Hype?
Early in my career, I made the mistake of relying solely on the delivery ticket without actual verification. Turns out, mislabeling or supplier errors happen more often than we’d like to admit. According to recent industry reports, about 15% of construction delays are caused by miscommunications regarding material specifications. That statistic isn’t meant to scare you but to highlight the importance of doing your due diligence. If there’s one thing my experience taught me, it’s this: blind trust can be costly.
So, if you’ve ever wondered how to ensure the concrete you pay for is the concrete you get, you’re in the right place. We’re about to explore practical, proven methods to verify your mix design and avoid costly pitfalls. But first, let me ask—have you faced the frustration of a discrepancy between the order and the delivered concrete? If so, you’re not alone, and help is on the way.
Pull the Delivery Ticket and Prepare to Inspect
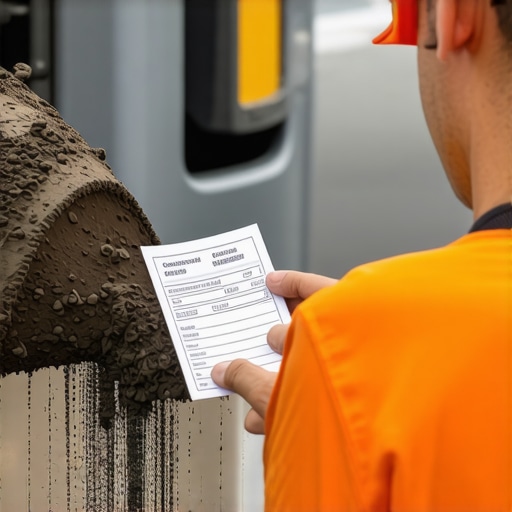
Once your concrete arrives, immediately retrieve the delivery ticket. Think of this as your shopping list—initially trusted, but requiring confirmation. Place it where you can refer to it easily. Picture yourself as a quality control officer, ensuring every item matches the purchase order. I recall one project where I skipped this step, leading to a week of delays due to incorrect mix proportions. Don’t let that be you.
Match the Mix Design with Your Project Specs
Compare the mix specified in your project plan with the details on the ticket, including water-cement ratio, slump, and admixtures. Use a checklist to verify each component. For example, if your design calls for a 3000 psi mix with a maximum aggregate size of 1 inch, confirm these match. Don’t rely solely on the label; measure the actual parameters if possible. This is akin to verifying a recipe before cooking—mistakes here impact the entire dish.
Perform a Visual Inspection and Take Samples
Inspect the delivered concrete for uniformity and color consistency. Stir the mix lightly if allowed—this ensures homogeneity. Take a sample using a clean, insulated container for later testing. I once encountered a truck that looked fine but had a slurry-like consistency; sampling prevented me from pouring weak concrete into the foundation. Remember, this step is your safeguard against unseen errors.
Test the Slump and Strength on Site
Conduct a slump test immediately—using a cone-shaped tool—measuring the ease of flow. This test verifies workability, ensuring the mix isn’t too stiff or too wet. If your project is critical, consider a quick compressive strength test on samples, either in-house or via a lab. Think of this as tasting the dish before serving—confirming quality before proceeding. In a past project, failing this step led to crack issues down the line, a costly lesson learned.
Document and Communicate Discrepancies
If you find the mix varies significantly from your specifications, document the differences thoroughly—photos, measurements, notes. Notify your supplier immediately via their contact channels, such as this contact form. Don’t wait; quick action can prevent setting the foundation with substandard material. Think of this documentation as your legal record, should disputes arise.
Adjust Your Workflow Accordingly
If discrepancies were found and corrected, modify your scheduling and pour plan. Confirm that all team members are aware of any changes. Think of this as recalibrating your plan—every step now aligns to ensure structural integrity. Over time, practicing these steps enhances your ability to catch issues early, saving money and stress.
 When it comes to construction projects, many professionals and DIY enthusiasts alike operate under common assumptions that can lead to costly mistakes. One pervasive myth is that securing a permit is a straightforward, paperwork-driven task—something to check off the list rather than a nuanced process requiring careful strategic planning. In reality, understanding the intricacies of permit processes and how they influence budgeting and scheduling can significantly impact project success.
For example, many assume that once a permit is issued, the project proceeds without further hurdles. However, unforeseen conditions like zoning restrictions, environmental reviews, or community covenants often lead to delays even after permits are granted. These hidden variables emphasize the importance of thoroughly researching local regulations and engaging with planning authorities early in your project. Explore this in detail at Understanding permit processes for successful home additions.
What Do Contractors Forget About When Estimating Project Costs?
Many underestimate or overlook soft costs—those expenses not directly tied to materials or labor but crucial to project completion. These include permit fees, inspection costs, design consultations, and potential redesigns if initial plans don’t meet code requirements. A study by the Construction Financial Management Association highlights that soft costs can constitute upwards of 30% of total project budgets, especially in complex permits or custom builds. Without factoring these into your estimates, you risk underbidding and facing cash flow issues midway. For in-depth strategies, visit cost-effective estimating techniques for new builds and additions.
Instead, focus on comprehensive, detailed estimates that include these often-neglected components. This foresight can prevent last-minute budget overruns and project delays.
Furthermore, it’s a common mistake to assume that generic cost calculators or industry averages will suffice for your specific project. Each build is unique—site conditions, local permit complexity, and design features influence costs substantially. Developing a tailored estimate by consulting detailed resource guides and partnering with experienced estimators is invaluable. Check out estimating home additions for 2025 for more insights.
Finally, consider the impact of permit restrictions on your project’s scope. Some features or design choices might trigger additional permits or require modifications, inflating your budget unexpectedly. By proactively identifying these potential issues, you can adjust your plans accordingly, avoiding the dreaded When it comes to building or adding to a home, having the right tools and maintenance routines can make all the difference in ensuring projects stay on track and stand the test of time. Personally, I rely on a combination of specialized equipment and digital solutions that streamline workflow and reduce errors. One of my go-to tools is a high-quality laser level. Its precision allows me to verify foundation plumbness and alignment quickly, saving hours during framing and foundation work. I’ve found that investing in a reliable laser level, like the Bosch GLL 3 SmartLevel, pays off by minimizing rework and ensuring accuracy, which is especially critical for projects that require permits or long-term durability.
Recognizing the Costly Overconfidence in Material Assumptions
The biggest lesson I learned was that even trusted suppliers can make errors. Relying solely on paperwork without physical verification can lead to foundation mistakes and structural issues. It’s a reminder that proactive checks save time and money in the long run.
Why Relying on Your Instinct Isn’t Enough for Construction Materials
I once skipped checking a concrete delivery and paid the price. Instincts don’t detect subtle deviations in mix design or delivery mislabeling. Instead, regularly performing simple tests like slump assessments provides vital confirmation of quality and consistency.
Striking the Balance Between Trust and Verification
The key is cultivating a habit of cross-checking without becoming overly paranoid. Building this habit early, such as comparing the ticket details with on-site measurements, ensures your project remains on track while fostering confidence in your process.
Turning Experience into Practice: My Non-Negotiables
Now, I always review each delivery ticket carefully, compare it with project specs, and take samples before mixing. These steps help catch discrepancies early, preventing costly rework or structural failures. They’re small actions that yield big results.
Creating a Culture of Attention to Detail in Your Team
Sharing these verification practices with your crew builds a sense of collective responsibility. When everyone understands the importance, it becomes second nature to double-check materials—enhancing overall project quality and safety.
My Go-To Resources for Reliable Material Verification
- ConstructionEdgez: Offers comprehensive guides on material standards and verification techniques that I’ve found indispensable.
- Local Suppliers with Proven Track Records: Building relationships with reputable vendors reduces the risk of errors significantly.
- Portable Testing Kits: Devices for quick on-site assessments of concrete slump, pH, and additives have become essential tools in my arsenal.
- Online Industry Forums: Sharing experiences with peers provides insights into common supplier pitfalls and best practices.
Empower Your Projects with Vigilant Material Checks
Investing time in verifying concrete and material quality isn’t just good practice—it’s a commitment to your project’s integrity and safety. Remember, the difference between a sturdy foundation and costly mistakes often comes down to your attention to detail.
Have you ever discovered a discrepancy that saved or doomed your project? Share your experience below and let’s learn together to build better, safer structures every time.