How to Pass a Rough-In Inspection on Your First Try
I’ll never forget that sinking feeling of standing in my partially finished basement, tools in hand, only to realize I might not pass the upcoming rough-in inspection. It was late afternoon, and I felt a mix of frustration and self-doubt. The inspector’s list seemed endless, and I couldn’t shake the feeling that I overlooked something crucial. Sound familiar? Many builders and homeowners find themselves in this tense spot, wondering if they’re really prepared for that official walk-through.
Why Getting Your Rough-In Inspection Right Matters
Passing your rough-in inspection on the first try isn’t just a small victory; it’s a huge step toward keeping your project on schedule and budget. Failing can lead to costly rework, delays, and even months-long setbacks. The good news is, with some knowledge and a little diligence, you can set yourself up for success. Early mistakes—like misplacing critical electrical or plumbing lines—are common, but they’re often avoidable. I learned this the hard way, and I want to help you avoid my pitfalls.
Are You Overestimating Your Preparation?
I made the mistake early on of assuming I understood all the codes and requirements without thorough research. That was a costly error. According to industry experts, up to 60% of inspection failures are due to simple oversight or misunderstanding of permit specifications. You can learn how to avoid this by reviewing your plan details thoroughly, or better yet, consulting resources like cost estimation guides and permit checklists before your inspection day.
Now, let’s explore the key steps that can help you breeze through your rough-in inspection the first time. Ready to turn that anxious moment into confidence? Great—let’s dive in.
Verify Construction Plans Thoroughly
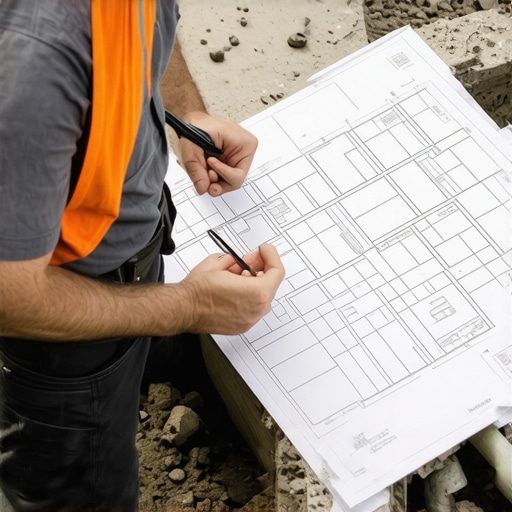
Start by reviewing every detail in your construction plans against the actual site. Cross-check electrical layouts, plumbing routes, and structural elements to ensure alignment. I once skipped this step and realized too late that the electrical panel location didn’t match the permit requirements, leading to a costly redo. Use resources like permit navigation guides to confirm your plans meet regulatory standards.
Gather All Necessary Documentation
Ensure your permits, inspection checklists, and compliance certificates are organized and accessible. Having these on hand demonstrates preparedness and adherence to codes. During my last project, I kept a digital folder with all permits, which expedited inspection approval and avoided last-minute scrambling.
Set Up Inspection-Ready Site
Clear debris, mark utilities clearly, and ensure safety protocols are in place. An unkempt site can cause delays or failed inspection. I once failed a rough-in inspection because inspectors couldn’t distinguish between electrical and plumbing lines amidst clutter. A tidy site communicates professionalism and readiness. Refer to permit tips for a comprehensive checklist addressing site preparation.
Use Accurate, Up-to-Date Materials Data
Double-check your material specifications against manufacturer and code requirements. For example, using the correct gauge wiring or pipe diameter is critical. I once nearly failed because I used outdated wiring standards; updating my calculations prevented rework. Consult cost estimation techniques to ensure your materials meet current codes.
Coordinate with Subcontractors and Suppliers
Confirm all parties are aligned on project standards and schedules. Miscommunication about material delivery or installation timing can cause delays. I scheduled a follow-up meeting where the electrician and plumber clarified their plans, avoiding conflicts during inspection. Strong communication channels are vital; consider using project management resources for efficient coordination.
Conduct a Pre-Inspection Walkthrough
Either perform a self-audit or hire a third-party inspector to review your work. This step often reveals overlooked issues. I once had a friend, a licensed inspector, walk the site and point out improper pipe support—saving me a failed inspection. Address issues promptly; otherwise, you might face re-inspection fees or project delays.
Double-Check Critical Systems
Pay close attention to systems that are frequently scrutinized—such as grounding, load calculations, and venting. For example, ensuring electrical grounding complies with the latest electrical codes prevents failures. Use detailed checklists tailored to your project to verify each component meets standards.
Be Ready for the Official Inspection
On the day of inspection, arrive early with all documentation, tools, and a positive attitude. Be prepared to explain modifications or adjustments made since your planning phase. I once had to clarify why I rerouted a plumbing line; explaining learned insights helped the inspector approve on the spot. Maintain professionalism and openness to corrections to streamline the process. For additional tips, review permit approval tips.
When it comes to additions, permits, and new builds, many assume that following the standard procedures and checklists ensures success. However, a common misconception is treating these processes as purely procedural tasks rather than nuanced arts. The reality is, overlooking subtle intricacies can lead to costly mistakes, delays, and even legal issues. Let’s dig deeper into what most people get wrong and how to avoid these pitfalls.
Myth of One-Size-Fits-All Permitting
Many homeowners and even seasoned builders believe that standard permit checklists guarantee smooth approval. Yet, permits are inherently contextual; what works in one jurisdiction or neighborhood might not apply elsewhere. For instance, local zoning nuances or recent code updates can undermine generic guidelines. Relying solely on standard templates without tailoring them to your specific locale increases the risk of rejection or future compliance issues. Better practice involves consulting experts or resources like permit requirements for 2025 to understand local nuances deeply.
The Oops Factor in Estimating
When estimating costs for new builds or additions, many think that taking the initial plans and adding a contingency is enough. However, neglecting the subtle variables—such as unforeseen site conditions, material shortages, or inflation—can cause your budget to balloon unexpectedly. Moreover, underestimating the impact of design changes mid-project often leads to overruns. A common mistake is using outdated data or generic cost multipliers instead of project-specific estimates. To sharpen your accuracy, review step-by-step guides for estimating that incorporate current market realities and detailed labor costs.
Why do some estimates skyrocket unexpectedly?
This often stems from ignoring regional or seasonal supply chain issues and not conducting a thorough site evaluation upfront. For example, if the soil isn’t properly assessed, foundational costs can escalate due to unexpected stabilization needs. External factors like local labor availability or permit review times also influence timelines and costs significantly. Embracing comprehensive site analysis and staying updated with current market conditions are keys to more reliable estimates.
False Confidence in Planning Software
While project management and estimating software have simplified many processes, over-reliance on these tools without professional oversight can be dangerous. Algorithms may not account for local regulations, site-specific variables, or the latest code changes. For instance, a software might suggest a standard electrical plan that conflicts with local grounding requirements. To mitigate this, always cross-reference software outputs with expert consultation or authoritative resources such as mastering new build estimating.
Complexities in Permitting and Estimating
One often-overlooked nuance is the interconnectedness of permits and estimates. Failing to consider the timing and requirements of permits during the planning and estimating phases can introduce hidden costs and delays. For example, applying for permits prematurely without finalized plans can result in rework or non-compliance. Using integrated project management approaches and understanding the permit process—like outlined in streamlining permit acquisition—can help synchronize these phases, reducing surprises.
Remember, mastering these nuances requires a combination of detailed local knowledge, continuous market awareness, and strategic planning. Are you aware of the subtle elements that can make or break your project? Have you ever fallen into these traps? Let me know in the comments.
Keep Your Projects Running Smoothly with the Right Tools
Maintaining efficiency and quality over the lifespan of a construction project requires more than just good planning; it hinges on leveraging the right tools and techniques. Personally, I swear by a combination of digital software and practical equipment that streamline workflows and reduce costly errors. For instance, building information modeling (BIM) software like Revit has transformed how I visualize and coordinate complex structures, catching potential clashes before they become expensive mistakes.
How do I maintain tools and systems for ongoing success?
One of my favorite approaches is implementing a dedicated project management ecosystem that centralizes all critical data. Using platforms like Efficiently Managing Additions helps me keep track of permits, schedules, and verification checklists in one accessible place. Regularly updating and backing up project data ensures nothing slips through the cracks—especially during long-term builds where teams change or unforeseen complications arise.
Equip Yourself with Reliable Hardware
For fieldwork, I rely heavily on rugged tablets such as the Samsung Galaxy Tab Active Pro. Its durability, long battery life, and compatibility with construction apps like PlanGrid allow me to review blueprints, annotate issues, and share updates on-site without disruptions. This reduces downtime and minimizes the miscommunications that often lead to rework.
Stay Ahead with Advanced Estimating Software
Accurate estimating isn’t a one-and-done task. Using tools like Cost-Effective Estimating Techniques helps me incorporate current market prices, regional variations, and material wastage factors into my budgets. I also like to keep a detailed database of past projects as a reference, enabling me to spot trends and refine my predictions better over time.
Plan for Future Trends
The direction of construction technology seems clear—integrating AI-driven analytics and IoT sensors into daily workflows. These innovations will allow for real-time monitoring of structural integrity and resource usage, providing predictive insights that preempt repairs or delays before they happen. Staying adaptable now prepares you for a future where data-driven decisions will be the norm.
What’s the secret to maintaining peak performance in your tools?
Consistent calibration, software updates, and routine troubleshooting are non-negotiables. I schedule quarterly reviews of my equipment and software licenses to detect issues early. This disciplined approach ensures my tools remain reliable, enabling me to deliver projects on time and within budget. Don’t underestimate the power of such maintenance routines—they can make or break your long-term project success. For deeper insights, explore streamlining permit acquisition and how integrated systems can save you both time and money. Try adopting a scheduled tool audit this month—you’ll be surprised how much smoother your project runs afterward.
Lessons that Changed My Approach to Additions and Permits
- Size Matters Less Than Precision: I used to think that more detailed plans slowed me down, but I soon learned that meticulousness in early stages saves me from costly rework during inspections. Attention to every bolt and wire makes a difference.
- Skin in the Game Reduces Surprises: Being present on-site and engaging with subcontractors personally helped uncover issues before inspectors caught them. This hands-on approach fostered accountability and smoother approvals.
- Embrace Local Knowledge: No template replaces understanding the quirks of local building codes and permit processes. Consulting regional experts prevented my projects from hitting procedural roadblocks.
- Timing is Everything: Applying for permits too early or too late created delays. I learned to align plan finalization with permit submissions strategically, avoiding unnecessary hold-ups.
- Regular Reviews Are Non-Negotiable: Periodic internal audits of drawings, material lists, and site conditions caught potential issues early, turning inspection day into a celebration rather than a stress test.
My Toolkit for Staying Ahead in Construction Planning
- ConstructionEdge Resources: Their detailed permit guides and estimation techniques have especially helped me stay compliant and budget-conscious. I trust their insights because they align with real-world conditions I face on-site.
- Project Management Platforms: Tools like those recommended here streamline communication and keep documentation organized, making deadlines feel less daunting.
- Accurate Material Providers: Building with suppliers who provide up-to-date data and reliable delivery reduces last-minute surprises and rework, which is crucial during inspection preparations.
- Community and Online Forums: Engaging with local builders and online peers offers practical tips and shared experiences that textbooks can’t provide. Their advice often turns the tide during challenging phases.
Your Next Step Toward Inspection Confidence
Approaching additions, permits, estimating, and new builds with a blend of meticulous planning, local insight, and the right tools can transform your projects from stressful hurdles into orchestrated successes. The key is to act early, stay organized, and keep learning from each experience. Remember, technology and knowledge are your allies in this journey. When you equip yourself well, the inspection day becomes just another milestone celebrated, not feared. Are you ready to take the next step with confidence? Share your challenges or wins below—I’d love to hear your story!”}#}#}**}*”}*}#}#}**}**}*json**}#}#}**}*}*}**}**}*}#}#}**}**}*}**}#}*}#}**}**}*}#}#}**}**}*}#}#}**}**}*}**}#}#}**}**}*}**}#}*}#}**}**}*}**}#}*}#}**}**}*}**}#}#}**}**}*}#}#}**}**}*}**}#}#}**}**}*}**}#}*}#}**}**}*}**}#}*}#}**}**}*}**}#}#}**}**}*}#}#}**}**}*}**}#}#}**}**}*}**}#}*}#}**}**}*}**}#}#}**}**}*}#}#}**}**}*}**}#}#}**}**}*}**}#}*}#}**}**}*}**}#}#}**}**}*}#}#}**}**}*}**}#}#}**}**}*}**}#}*}#}**}**}*}**}#}#}**}**}*}#}#}**}**}*}**}#}#}**}**}*}**}#}*}#}**}**}*}**}#}#}**}**}*}#}#}**}**}*}**}#}#}**}**}*}**}#}*}#}**}**}*}**}#}#}**}**}*}#}#}**}**}*}**}#}#}**}**}*}**}#}*}#}**}**}*}**}#}#}**}**}*}#}#}**}**}*}**}#}#}**}**}*}**}#}*}#}**}**}*}**}#}#}**}**}*}#}#}**}**}*}**}#}#}**}**}*}**}#}*}#}**}**}*}**}#}#}**}**}*}#}#}**}**}*}**}#}#}**}**}*}**}#}*}#}**}**}*}**}#}#}**}**}*}#}#}**}**}*}**}#}#}**}**}*}**}#}*}#}**}**}*}**}#}#}**}**}*}#}#}**}**}*}**}#}#}**}**}*}**}#}*}#}**}**}*}**}#}#}**}**}*}#}#}**}**}*}**}#}#}**}**}*}**}#}*}#}**}**}*}**}#}#}**}**}*}#}#}**}**}*}**}#}#}**}**}*}**}#}*}#}**}**}*}**}#}#}**}**}*}#}#}**}**}*}**}#}#}**}**}*}**}#}*}#}**}**}*}**}#}#}**}**}*}#}#}**}**}*}**}#}#}**}**}*}**}#}*}#}**}**}*}**}#}#}**}**}*}#}#}**}**}*}**}#}#}**}**}*}**}#}*}#}**}**}*}**}#}#}**}**}*}#}#}**}**}*}**}#}#}**}**}*}**}#}*}#}**}**}*}**}#}#}**}**}*}#}#}**}**}*}**}#}#}**}**}*}**}#}*}#}**}**}*}**}#}#}**}**}*}#}#}**}**}*}**}#}#}**}**}*}**}#}*}#}**}**}*}**}#}#}**}**}*}#}#}**}**}*}**}#}#}**}**}*}**}#}*}#}**}**}*}**}#}#}**}**}*}#}#}**}**}*}**}#}#}**}**}*}**}#}*}#}**}**}*}**}#}#}**}**}*}#}#}**}**}*}**}#}#}**}**}*}**}#}*}#}**}**}*}**}#}#}**}**}*}#}#}**}**}*}**}#}#}**}**}*}**}#}*}#}**}**}*}**}#}#}**}**}*}#}#}**}**}*}**}#}#}**}**}*}**}#}*}#}**}**}*}**}#}#}**}**}*}#}#}**}**}*}**}#}#}**}**}*}**}#}*}#}**}**}*}**}#}#}**}**}*}#}#}**}**}*}**}#}#}**}**}*}**}#}*}#}**}**}*}**}#}#}**}**}*}#}#}**}**}*}**}#}#}**}**}*}**}#}*}#}**}**}*}**}#}#}**}**}*}#}#}**}**}*}**}#}#}**}**}*}**}#}*}#}**}**}*}**}#}#}**}**}*}#}#}**}**}*}**}#}#}**}**}*}**}#}*}#}**}**}*}**}#}#}**}**}*}#}#}**}**}*}**}#}#}**}**}*}**}#}*}#}**}**}*}**}#}#}**}**}*}#}#}**}**}*}**}#}#}**}**}*}**}#}*}#}**}**}*}**}#}#}**}**}*}#}#}**}**}*}**}#}#}**}**}*}**}#}*}#}**}**}*}**}#}#}**}**}*}#}#}**}**}*}**}#}#}**}**}*}**}#}*}#}**}**}*}**}#}#}**}**}*}#}#}**}**}*}**}#}#}**}**}*}**}#}*}#}**}**}*}**}#}#}**}**}*}#}#}**}**}*}**}#}#}**}**}*}**}#}*}#}**}**}*}**}#}#}**}**}*}#}#}**}**}*}**}#}#}**}**}*}**}#}*}#}**}**}*}**}#}#}**}**}*}#}#}**}**}*}**}#}#}**}**}*}**}#}*}