How to Calculate Net Square Footage for Faster Permits
I vividly remember the frustration of staring at my blueprint, wondering why my permit application was taking so long. Every delay felt like a personal challenge, and I realized I was missing a crucial piece of the puzzle—calculating net square footage correctly. Early in my projects, I made the mistake of estimating total area without considering how much space was truly usable, which led to endless back-and-forth with inspectors and costly delays. That lightbulb moment changed everything.
Why Accurate Net Square Footage Matters for Faster Permits
Understanding how to accurately calculate net square footage isn’t just a technicality; it’s the key to streamlining your permit process. When I first started, I thought I could eyeball the dimensions or rely on rough estimates. Turns out, permit officials are meticulous, and they want precise data showing the exact usable space. If your calculations are off or incomplete, your permit gets delayed—sometimes by weeks.
By mastering this skill, I’ve been able to prepare permit submissions that are clear, accurate, and less likely to be challenged. That means my projects move faster, I avoid fines, and I get to enjoy my new space sooner. If you’ve ever felt the sting of permit delays, you’re not alone. Many builders and homeowners struggle with this, but the good news is, it’s entirely fixable—and I’m here to show you how.
Streamlining your permit acquisition is a game-changer, and understanding net square footage plays a big role in that process. Let’s dig into why this particular number can be your secret weapon in avoiding bureaucratic bottlenecks.
Is Getting Your Calculations Right Really That Important?
Absolutely. Early on, I made the mistake of using total floor area as a stand-in for usable space. It’s a common error, but it can cause your application to be rejected or sent back for revisions. The difference between gross and net square footage matters a lot—inspectors want the net, or usable, area to be clearly defined and backed by accurate measurements.
Getting this right not only speeds up approval but also enhances your credibility. When everything lines up perfectly, your permit process becomes smoother, saving time and money.
Understanding these nuances isn’t just about avoiding delays—it’s about taking control of your project timeline. If you’re tired of waiting on permits, the next step is to learn precisely how to calculate your net square footage correctly. Trust me, once you get this right, everything else falls into place more easily. Ready to see how? Let’s explore the step-by-step process to calculate net square footage effectively and make your permits quicker and less stressful.
Break Down Your Space Accurately
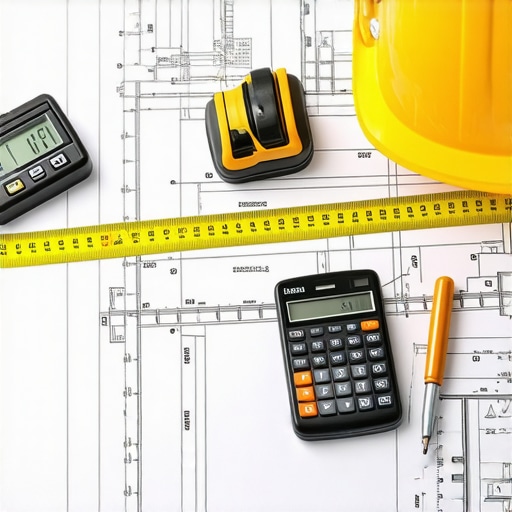
Start by measuring every room, hallway, closet, and structural element that will be included in your building project. Use a reliable tape measure or digital laser for precision. Think of this step like peeling an onion—layer by layer—so you don’t miss any part of the usable space. In my first few projects, I skipped this meticulous measurement, which led to overestimating my areas and getting stuck in permit purgatory. After I adopted this detailed approach, my applications became clearer and faster to approve.
Identify Which Areas Count and Which Don’t
Not all spaces count toward net square footage. Typically, areas such as unfinished attics, garages, porches, and storage rooms are excluded unless specifically specified by your local authority. For example, when I built an addition, I initially included my unconditioned garage. Later, I learned from permit requirements that non-conditioned spaces often don’t count. Recognizing this saved me time and improved my communication with inspectors.
Subtract Hidden Barriers and Obstructions
Include structural elements like columns, beams, and other obstructions that reduce usable space. Measure their clear width and length to calculate the actual area they consume. I once overlooked a large support beam in a basement, which skewed my total area. Once I properly accounted for it, my net square footage was more accurate, and the permit process went smoothly. Think of these elements as obstacles in a race—your calculation must account for every hurdle to succeed.
Use Precise Formulas and Tools
Calculate the area of each room by multiplying length by width, ensuring all measurements are in the same units. Sum all relevant rooms to get total gross area, then subtract non-countable spaces. I prefer using a digital calculator or spreadsheet template I built after reviewing estimating techniques. This method minimizes errors and makes it easy to update as you adjust plans. Think of this as assembling a puzzle—you need every piece fitting perfectly to see the full picture.
Document and Validate Your Calculations
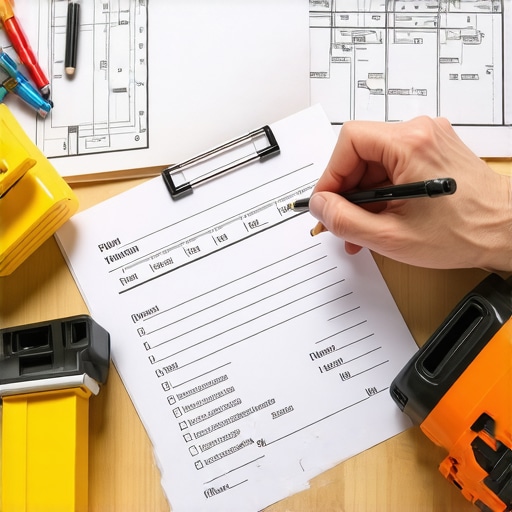
Write down each measurement and calculation step. Attach annotated sketches or diagrams showing how measurements were taken, especially for complex spaces. During one project, I included photos and notes in my submission, which impressed inspectors and shortened approval times. Using a detailed report signals you’re serious and meticulous, reducing doubts about your data’s accuracy. For extra credibility, consider consulting a building professional or using visualization software.
Avoid Common Pitfalls
Never estimate space based on rough eyeballing; always measure. Don’t include storage closets, unfinished basements unless they’re heated and finished, or outdoor patios, unless specifically permitted. My biggest mistake was neglecting to exclude a small, unconditioned porch—once I corrected that, my permit was approved without delay. Think of your measurements as a legal document—you want them to stand up to scrutiny and ensure the smooth flow of your project.
Consistently applying this detailed, disciplined approach to calculating net square footage will transform your permit process from a bottleneck into a formality. For further strategies on streamlining your permit acquisition, mastering these core calculations is essential.
Most people believe that obtaining permits for additions or new builds is just about submitting plans and waiting for approval. However, the real nuance lies in the *perception* versus the *reality* of how permit authorities interpret your estimates, especially when it comes to cost and measurements. Many assume that a rough estimate, or a simplified calculation, will suffice—that’s a misconception that can cause significant delays or even rejection. In my experience, the trap isn’t in the complexity of calculations but in overlooking the subtle expectations of specificity and accuracy. For example, permit specialists like those referenced in estimating techniques emphasize that even minor errors in measurement or assumptions about space can be misinterpreted and cause your application to be scrutinized more intensely.
One common myth is that all spaces are counted equally, but in reality, understanding which areas to include—such as conditioned versus unconditioned spaces—and how to adjust for structural elements can mean the difference between a smooth approval process or a series of back-and-forth revisions. The superficial approach of estimating based on past projects or using generic data can backfire; permit reviewers expect your figures to be backed by precise calculations, detailed diagrams, and clear documentation. Ignoring these nuances can inflate costs, extend project timelines, and erode credibility with inspectors.
A crucial advanced mistake to watch out for involves miscalculating net versus gross square footage. For example, including unconditioned porches or unfinished basements in your total area might seem harmless, but if local codes specify exclusions, this oversight signals that your submission isn’t thorough, raising red flags. A detailed understanding aligns with insights from permit process experts who highlight the importance of exact measurements and compliance documentation.
Why is this so critical? Because permit authorities are increasingly sophisticated, and with available tools, they can detect discrepancies that might seem minor to the untrained eye. A common Ensuring your tools are reliable and your maintenance routines are effective is vital for long-term success in construction projects. I personally rely on a combination of high-precision digital measuring devices and project management software to keep everything on track. For instance, I use a Leica DISTO laser measure because it provides accurate, quick measurements, reducing errors that could delay permits or increase costs. Combining this with software like SketchUp allows me to visualize changes in real-time, making adjustments before actual execution—saving both time and money. Looking ahead, integration of augmented reality (AR) overlays is becoming a game-changer, enabling virtual walkthroughs that help identify potential issues early. This trend promises to make projects more efficient and reduce unforeseen hiccups during inspections.
How do I maintain my tools and systems over time?
Regular calibration of measuring instruments is a must—misreading measurements can cascade into costly mistakes. Scheduling routine software updates and backups ensures that your project data remains secure and up-to-date, especially when managing multiple projects simultaneously. Developing a checklist for equipment maintenance, such as cleaning sensors, inspecting batteries, and verifying firmware, keeps tools performing at peak efficiency. Additionally, establishing a protocol for reviewing project milestones and updating plans accordingly prevents stagnation and keeps work aligned with permit requirements. Consistent maintenance and upkeep not only prevent last-minute surprises but also build credibility with inspectors and clients alike.
Interestingly, the use of specialized software tailored for permit estimation, like construction management platforms, can streamline your long-term workflow. These tools often include features for tracking permits, deadlines, and compliance issues—all in one place. Personally, I recommend investing in a system like Procore, which provides a centralized dashboard to monitor every aspect of your project, from initial planning through inspection. As technology progresses, expect these platforms to incorporate AI-driven analytics, offering predictive insights that help you anticipate potential permit bottlenecks and address them proactively. This foresight can significantly accelerate your approval process, especially when combined with meticulous measurement techniques.
To get ahead, I suggest trying out a comprehensive project management tool integrated with your measurement devices. Experimenting with such systems can revolutionize your workflow, dramatically reducing delays and enhancing accuracy. Remember, in this business, staying organized and maintaining your tools isn’t just about convenience—it’s about ensuring your workload remains manageable and your projects stay compliant with evolving permit standards. This proactive approach will serve you well as the industry moves toward smarter, more connected construction practices.
Lessons I Didn’t Expect to Learn the Hard Way
One of the most eye-opening lessons in my journey was realizing how even small discrepancies in net square footage calculations could cause significant permit delays. I used to think rough estimates would suffice—until I faced rejection letters and frantic revisions. That taught me that precision and detailed documentation aren’t just bureaucratic hoops but vital tools for efficiency.
Another revelation was understanding the subtle differences between conditioned and unconditioned spaces. Initially, I included areas like garages and porches without verifying if they counted. Once I learned to distinguish which areas to exclude, my applications flowed smoothly, saving weeks of back-and-forth. This nuanced knowledge is often overlooked but can dramatically improve your project timelines.
Finally, I discovered that leveraging advanced measurement tools and software isn’t just cool tech—it’s a game changer. Digital laser measures combined with visualization software like SketchUp help catch errors early. Investing in these tools turned my permit process from a stress point into a streamlined, predictable routine.
My Top Picks for Construction Planning and Permitting
- Leica DISTO Laser Measure: Accurate, quick, and reliable—this tool reduces measurement errors that could delay permits. I’ve been using it for years, and it’s never let me down.
- SketchUp: Perfect for visualizing space changes and making clear, detailed diagrams that impress inspectors. The ability to present precise plans makes a real difference.
- Procore Construction Management Software: A centralized platform for tracking permits, deadlines, and compliance documents. It keeps my projects organized and ensures nothing slips through the cracks.
- ConstructionEdge’s Permit Tips Guide: A resource that offers expert advice on permit processes, helping me avoid common pitfalls. It’s like having a mentor available anytime I need guidance.
Take Charge of Your Construction Journey
Remember, mastering net square footage calculations isn’t just about avoiding delays—it’s about empowering yourself as a builder or homeowner. Each precise measurement and thorough documentation step you take today sets the foundation for smoother, faster permit approvals tomorrow. Don’t let small oversights hold back your progress. Dive deep, stay meticulous, and watch your projects move from dream to reality with confidence. Your next step? How will you implement these measurement strategies in your upcoming project? Share your thoughts below and let’s learn together.