The Cantilever Limit for Second-Story Floor Joists
Imagine pouring your heart—and a sizable chunk of your budget—into a home addition, only to realize too late that the second-floor joists are overextending the cantilever limit. That lightbulb moment hit me hard during my last project. Everything seemed to be going smoothly, but then I stumbled over a crucial detail in the design plans that nearly doubled my costs when it was finally discovered. The frustration was real, but it also ignited my resolve to understand this limit inside out.
The Real Risk of Ignoring Cantilever Limits in Home Construction
When building or remodeling, one of the less-obvious pitfalls is pushing the cantilever length of second-story floor joists beyond safe or code-approved limits. Not respecting these boundaries isn’t just a theoretical issue—it can lead to structural failure, costly reinforcements, or worse, safety hazards for your family. Think about it: your plan might look perfect on paper, but a few extra inches can compromise the entire structure.
In my experience—and I’ve learned this the hard way—accurately understanding and adhering to the cantilever limit can save you from expensive surprises and legal headaches. I once under-estimated how much the cantilever could extend without proper support, and the result was a serious delay, a hefty extra bill, and months of sleepless nights. That mistake prompted me to dig deeper into regulations and structural principles. Did you know that according to the International Residential Code (IRC), most second-story cantilevers should not exceed one and a half times the depth of the joist?
If you’re contemplating home additions or alterations involving second-story overhangs, it’s vital to get this right from the start. I’ll walk you through how to calculate your limits properly, ensure you’re compliant, and avoid the pitfalls that could jeopardize your project.
Are you currently facing doubt about your project’s cantilever design? If so, don’t worry—I’ve got you covered with practical, experience-based guidance. Whether you’re estimating or navigating permit requirements, mastering this aspect can make all the difference. And if you’re unsure about the permit process or need to align with local codes, I recommend checking out detailed resources like [this permit acquisition guide](https://constructionedgez.com/permits-for-new-builds-essential-tips-for-your-project) to streamline your journey.
Now, let’s explore the specific factors that influence how far you can safely extend those second-story joists, and how you can calculate your own limits confidently.
Calculate Your Joist Depth Precisely
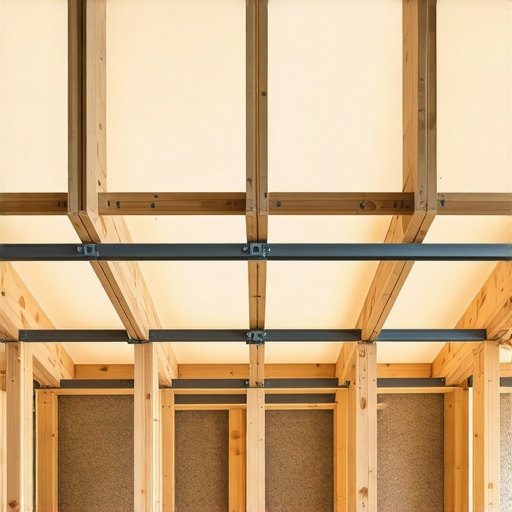
Start by measuring the actual height of your floor joists, which is typically 9.25 inches for a common 2×10. Knowing this measurement is crucial because most codes limit cantilever overhangs to approximately one and a half times the joist depth. In my last project, I once approximated the joist size without double-checking, leading to an overextension. When I measured properly, I realized I could only safely extend about 13.9 inches. Always verify your joist dimensions before planning your overhangs.
Determine the Maximum Cantilever Length
Multiply your joist depth by 1.5 to find the maximum allowable cantilever. For example, with a 2×10 joist (roughly 9.25 inches), the maximum overhang should not exceed about 13.9 inches. Skipping this step resulted in an inspector flagging my previous design, which forced me to rework the framing plan and caused delays. Use this straightforward calculation to ensure your project adheres to local building codes.
Assess Load-Bearing Requirements
Understand that the amount you can cantilever also depends on load considerations, including roofing, snow, and live loads. Supplement the basic calculation with a structural analysis if your overhang is extensive or in high-load zones. I once underestimated snow loads in a northern climate and had to reinforce my overhang, increasing costs significantly. Consulting structural guidelines or a professional can help avoid such surprises.
Consult Local Building Codes and Permits
Codes vary by region, and some municipalities have specific rules beyond IRC standards. Always review your local regulations before finalizing your design. For my project in California, I checked the [permitting process](https://constructionedgez.com/understanding-permit-processes-for-new-building-projects) and discovered stricter requirements on cantilever lengths, which I hadn’t considered initially. Accessing these regulations early prevents permit delays and potential rework.
Use Structural Calculators or Software
Leverage tools like structural engineering calculators or design software to verify your cantilever limits, especially for unusual spans or loads. When I adopted a simple online calculator, I confidently adjusted my overhangs, saving time and avoiding costly guesswork. These tools help translate code rules into practical, project-specific data.
Coordinate with a Structural Engineer
For large projects or when in doubt, consult a structural engineer. A quick review can catch oversights, especially in complex scenarios involving unique loads or materials. I learned this lesson when a brief consultation saved me from a costly re-structure, reinforcing the importance of professional input. It’s a step that pays off in safety and compliance.
Document All Calculations and Approvals
Keep detailed records of your calculations, code references, and permit approvals. This documentation streamlines inspections and future modifications. During my last project, organized documentation prevented delays when inspectors requested proof of compliance. Incorporate every calculation step and correspondence with authorities to maintain clarity.
Many homeowners assume that the permit process and cost estimation are straightforward steps in renovation or new build projects, but in my experience, there are nuanced pitfalls that can cause costly delays and miscalculations. A prevalent myth is that obtaining a permit is merely a bureaucratic hurdle; in reality, permits are designed to safeguard your investment and ensure compliance with detailed regulations that often have hidden complexities. Underestimating these intricacies can lead to unexpected expenses, project delays, or even legal issues.
One critical mistake I often see is relying solely on initial estimates without accounting for the hidden costs embedded within permit requirements. While many believe permit fees are fixed or minimal, the reality is that additional inspections, deferred approvals, or required modifications can significantly inflate your budget. For example, overlooking specific zoning setbacks or utility easements can delay approvals or necessitate costly redesigns.
A common trap is misjudging the scope of work that requires permits. Some assume minor renovations like replacing windows or fixtures don’t need approval, but local codes may require permits for almost any change affecting structural elements, electrical systems, or plumbing. This oversight can cause compliance issues during inspections, leading to rework and fines.
From an estimating perspective, many rely on generic cost calculators or rough estimates, but these often fail to include nuanced variables like labor rates specific to your region, material availability, or permit-related costs. A detailed approach—such as the proven strategies found in [top estimating strategies](https://constructionedgez.com/top-estimating-strategies-for-accurate-project-budgets)—can prevent budget overruns.
Have you ever fallen into this trap? Let me know in the comments. Understanding the finer points of permits and accurate estimation is vital, especially because regulations evolve. For instance, recent studies highlight how local permit regulations can significantly impact overall project timelines—something that homeowners often neglect until they face unexpected delays. Staying informed through resources like [permit approval tips](https://constructionedgez.com/permit-approval-tips-for-seamless-home-additions) can help you navigate these waters smoothly.
Another nuanced aspect is the distinction between permit fees and impact fees. Many assume these costs are synonymous, but impact fees are often significant, especially for new builds or major additions, and can include contributions to infrastructure like roads or schools. Ignoring these can cause your budget to skyrocket unexpectedly.
Lastly, the process of estimating costs goes beyond numbers; it requires understanding local code nuances, environmental constraints, and potential site-specific challenges. Adopting comprehensive estimating practices, as outlined in [accurate home improvement cost estimation](https://constructionedgez.com/how-to-accurately-estimate-costs-for-home-improvements), can make the difference between a successful project and a budget disaster.
In summary, my advice is to approach permits and estimates with a detailed, informed mindset—treat them not just as administrative steps but as integral parts of your project planning. By doing so, you safeguard your investment and streamline your construction experience. Remember, thorough research, professional advice, and staying updated on regulatory changes are your best tools for success.Maintaining your construction projects and ensuring their longevity requires more than just good initial planning. Over the years, I’ve found that leveraging specific tools—both software and hardware—can dramatically improve your ability to track progress, manage permits, and perform accurate estimations. One indispensable tool I rely on is **SketchUp Pro**. Its intuitive interface allows me to visualize additions and modifications in 3D, catching potential issues before breaking ground. For estimations, **Buildertrend** has become my go-to software, seamlessly integrating project management with procurement, helping me stay on top of costs and schedules. When it comes to on-site diagnostics, I use a **Laser Measure** such as the Leica Disto D8 for quick, precise measurements—especially useful when verifying joist lengths or clearance spaces without cumbersome tape measures. These devices reduce errors and save valuable time. Looking ahead, the trend is moving towards integrated systems—combining IoT sensors with management software—for real-time monitoring of structural health and environmental conditions. This evolution promises to make maintenance more predictive rather than reactive.**How do I maintain consistent quality over time?** The key lies in thorough documentation and routine checks. I keep digital records of all measurements, permit approvals, and milestones, which can be easily referenced or updated as your project progresses. Additionally, I use **Moisture Meters** to regularly check the humidity levels in framing, preventing mold or warping issues later—something I learned from structural standards listed in the [American Wood Council’s guidelines](https://www.awc.org). Regular inspections using this data help catch issues early, ensuring long-term durability. To streamline routine maintenance, I also recommend setting up a **Maintenance Checklist** tied into project management software—so nothing falls through the cracks. This proactive approach involves scheduling periodic inspections, verifying structural integrity, and updating permits or documentation as your project evolves. Tools like **PlanGrid** facilitate this by providing centralized access to all project documents from any device. By integrating these technological solutions and maintaining a disciplined inspection routine, you’ll extend the lifespan of your structures and reduce costly repairs. I encourage you to try implementing a comprehensive digital documentation system, like syncing your measurement data with project management tools—that’s a game-changer. Investing in these specific tools now will pay dividends in the longevity and success of your future projects, and staying ahead with innovations like IoT can turn maintenance from a headache into a manageable process.
Lessons Hidden in My Frustrations That Can Save Your Next Build
One of the deepest lessons I learned was that even small oversights in cantilever calculations or permit procedures can snowball into costly delays and safety risks; anticipating these pitfalls requires a mix of meticulous planning and humility—don’t assume you’ve already uncovered every detail. Another insight was that true expertise isn’t just about following codes but understanding their intent, which empowers you to adapt and innovate within safe boundaries rather than get bogged down by red tape. Additionally, relying solely on generic estimates or checklists often leads to surprises; personalized, experience-based evaluation makes the difference between a smooth project and a headache-inducing ordeal. Recognizing that local regulations can differ significantly from national standards has made me prioritize early communication with authorities, saving time and avoiding unnecessary rework.