Why Your Addition Footings Must Sit on Undisturbed Soil
Have you ever watched a small addition or renovation turn into a nightmare because of one overlooked detail? I remember the first time I underestimated the importance of soil conditions, and it nearly cost me a fortune. What seemed like a straightforward project suddenly spiraled into a battle against cracks, uneven settling, and permit delays. That “lightbulb moment” taught me a vital lesson: your footing’s foundation foundation isn’t just about concrete—it’s about what lies beneath.
The Heart of the Matter: The Soil Under Your New Footings
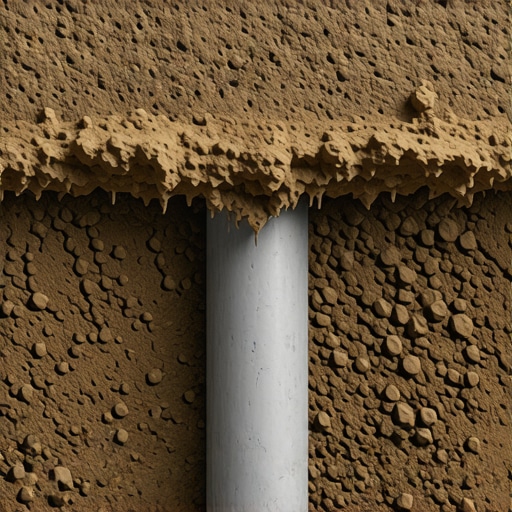
When planning a home addition, one of the most neglected yet critical steps is verifying that the soil under your footings is undisturbed and properly compacted. Why? Because even the most well-engineered concrete can’t fight against variable soil conditions. If the soil shifts, settles, or is disturbed—think poor compaction or previous construction activity—you risk uneven settling, cracks, and structural issues down the line.
From my personal experience, I initially thought I could save time by skipping the soil testing step. Instead, I ended up with a foundation that moved slightly over time, causing stubborn cracks that were costly to repair. It was a mistake I won’t repeat, and I want to spare you from the same headache.
Experts agree that proper soil preparation and testing are essential. According to the permits and building code regulations, construction on undisturbed soil ensures the stability of your structure and helps keep permits approved smoothly.
What You Might Be Missing About Soil and Footings
The biggest problem? Assuming that the soil your neighbor’s project sat on is the same as yours. Soil composition varies widely—even within a small neighborhood—and these differences can have dramatic effects. Compacted gravel, clay, or even previous construction debris beneath your site can sabotage your project if not identified early.
Have you faced issues with uneven settling or cracks in your home’s foundation? If so, chances are soil disturbance played a role. Recognizing this early and making soil testing a priority can save you money and headaches later.
In the next sections, we’ll explore exactly how to verify your soil’s condition and ensure your footing sits perfectly on undisturbed ground, giving your project the solid start it deserves. Ready to dive into the practical steps? Check out how accurate cost estimating can help plan for proper soil testing and get your project on the right track.
Begin with a Thorough Site Inspection
Start by visiting your construction site during different weather conditions to observe soil behavior. Look for signs of poor drainage, standing water, or erosion, which indicate compromised soil stability. Personally, I once skipped this step, assuming the land was stable because neighboring properties had no issues—but I was proven wrong after a heavy rain caused unexpected settling.
Hire a Geotechnical Engineer for Testing
Engage a qualified geotechnical engineer to perform soil borings and testing. This involves drilling core samples at various points to assess soil composition, compaction, moisture content, and bearing capacity. For my project, this step revealed a high clay content that could swell or shrink, influencing footing design significantly. Including this data in your planning ensures your foundation is tailored correctly, reducing future cracking or shifting.
Interpreting Test Results
Understand that soil testing reports provide load-bearing capacities, moisture levels, and potential settlement estimates. Use this information to determine if special footing designs—such as deeper footings or aggregate stabilization—are necessary. In my case, the engineer recommended a gravel bed beneath footings, which I incorporated to improve drainage and stability.
Prepare and Compact the Soil Properly
Based on the test results, ensure the soil is excavated and graded as specified. Use proper compaction equipment to achieve the desired density, minimizing future settling risks. I personally rented a vibratory plate compactor to compress the fill material, which made a noticeable difference in preventing uneven subsidence. Remember, neglecting compaction can lead to cracks and costly repairs down the line.
Document and Certify Soil Conditions
Keep detailed records of all testing reports, compaction logs, and site inspections. These documents may be required for permit approval and future reference. Ensuring compliance with local regulations, as outlined in permit and building codes, helps avoid delays. Once your soil is tested and prepared, you’re ready to proceed with footing installation confident of a stable foundation.
Verify During Excavation
Have your engineer or inspector monitor the soil just before pouring concrete. A quick check ensures that the in-situ soil matches the test conditions—errors here could compromise the entire project. During my recent remodel, a surprise wetter soil layer was uncovered, prompting a revision in footing depth, which saved potential future issues.
Applying these concrete steps transforms guesswork into precision, securing the foundation’s integrity and preventing headaches down the line. For more insights on optimizing your construction process, consult permit acquisition strategies or explore adding value through expert home additions.
Many homeowners and even seasoned contractors rely on simplified rules of thumb when estimating costs, permits, and timelines for new builds or additions, but this can be a costly mistake. Contrary to popular belief, the most critical errors often stem from overlooking nuanced variables that significantly impact project success. For example, a common myth is that ‘square footage alone determines cost,’ but in reality, factors like site accessibility, soil conditions, and local permitting nuances play a decisive role. These overlooked details can lead to unexpected expenses, delays, or even permit denials.
One trap many fall into is assuming permits are a mere paperwork hurdle, rather than an integral part of the planning process. The real danger? Underestimating the time and effort required to navigate complex permit requirements, which vary widely by jurisdiction. According to a study published by the construction permitting expert, nearly 30% of project delays are attributable to permit approval failures or miscalculations in compliance requirements.
Advanced builders know that permits are intertwined with design details—small adjustments in compliance standards can lead to significant redesigns. For instance, new energy codes may require additional insulation or ventilation, impacting both costs and timelines. This is often missed in initial estimates, leading to ‘oops’ moments halfway through construction.
Why Do Estimators Often Get Construction Costs Wrong, and How Can You Avoid It?
The issue often lies in the reliance on outdated or generalized data. Many estimators use national averages or past project figures without accounting for regional differences or recent code updates. The result? Under-budgeting or overestimating can both occur, but under-budgeting is by far the more dangerous, leading to project stalls or compromised quality.
To refine your estimates, leverage cost-effective estimating techniques that incorporate local data, permitting nuances, and site-specific variables. Also, embracing technology like estimating software can help include variables that manual calculations tend to overlook.
Finally, don’t forget the importance of early permit planning. Aligning your design with local code requirements from the outset can streamline approvals and reduce costly redesigns. For insights on permits for faster construction and avoiding common pitfalls, check out these resources.
Enjoying a smoother project journey means digging into the details that many overlook. Have you ever fallen into this trap? Let me know in the comments and share your experiences! Remember, mastering the nuances of estimation and permitting can save you thousands and prevent stressful surprises during your construction adventure.
Invest in Reliable Equipment to Sustain Progress
One of the most effective ways to ensure your construction efforts stay on track over time is by selecting tools that are both durable and precise. Personally, I rely heavily on high-quality rotary laser levels like the Bosch GSL 2 Professional because they provide consistent accuracy for grading and layout tasks, reducing rework and ensuring that foundations remain true. Investing in dependable equipment pays off through fewer delays and tighter quality control, which is crucial when long-term results are at stake.
Adopt Software Solutions for Consistent Monitoring
Modern construction management demands more than manual checks; I recommend incorporating project management software like Procore or Buildertrend. These platforms enable real-time tracking of tasks, materials, and schedules, fostering communication among teams and preventing issues from escalating. For routine maintenance, digital checklists and cloud-based document repositories ensure that important records, like soil test reports or inspection logs, are accessible whenever needed, maintaining a transparent record for permits and future references. As technology advances, integrating these tools will become essential for scalable, long-term success.
Prioritize Regular Inspection and Preventative Maintenance
Establishing a maintenance routine that includes periodic inspections of equipment, site drainage, and foundational elements can save significant costs down the line. For instance, inspecting soil compaction and drainage systems periodically—especially after heavy rains—can prevent structural issues. I advocate for creating a checklist based on expert advice on site maintenance to ensure no detail is overlooked. Remember, proactive upkeep enhances durability, reduces repair expenses, and ultimately sustains property value over the years.
What Are the Best Tools to Maintain Your Construction Site?
In my experience, combining high-end measuring devices with robust digital management systems offers unparalleled control and efficiency. For example, using a Measuring Wheel for accurate terrain measurement alongside software that tracks progress ensures your project remains aligned with initial estimates and permits. Embracing these tools not only simplifies ongoing maintenance but prepares you for scaling future projects confidently.
Prepare for Growth with Scalable Systems
Looking ahead, city codes and building standards are increasingly complex, making scalability crucial. Investing in modular tools and flexible management platforms—like integrated BIM (Building Information Modeling) solutions—helps adapt to expanding projects. According to industry experts, adopting such systems can dramatically reduce errors and rework, facilitating smooth growth. Start small: implement a reliable inspection protocol and a simple project management app, then expand as your projects grow larger and more complex.
Why not try integrating a project management platform with your regular inspection schedule? As the trend moves toward more automated oversight, this strategy ensures your projects stay consistent, compliant, and ready for long-term success. For more insights, visit adding value with expert home additions and see how these methods can be tailored to your needs.
Lessons I Still Can’t Believe I Learned the Hard Way
One of the most valuable lessons I’ve gathered is that overlooking soil conditions isn’t just a small mistake—it’s a potential disaster waiting to happen. I once skipped detailed soil testing, thinking my site was straightforward. The result? Settling cracks and costly repairs that could have been avoided with a deeper understanding of what lies beneath. That experience made me realize that every successful build starts with a foundation of knowledge—literally and figuratively.
Another insight I wish I had embraced earlier is the importance of real-time verification. During excavation, I learned that soil moisture and compaction can change unexpectedly, reinforcing the need for on-site inspections just before pouring concrete. This proactive step can save days or weeks of fix-it work, especially if soil conditions deviate from initial tests.
Lastly, I discovered that permits are more than just paperwork—they’re a window into local regulations and site-specific nuances. Understanding the permitting process in-depth enabled me to avoid delays and redesigns that stemmed from missed compliance requirements. Trust me, investing time in this early can streamline your entire project pipeline.
Tools and Resources That Changed How I Build
The first game-changer was relying on high-quality geotechnical reports, which provided a clear picture of soil behavior at my site. I trust expert soil testing services because they help customize foundation designs, preventing future problems.
Next, embracing project management software like Buildertrend helped me coordinate tasks, documents, and inspections seamlessly. It creates a digital trail of soil reports, permits, and inspection logs, which is invaluable when questions arise later down the line.
Finally, I recommend specific books such as Building Foundations That Last, which dives into soil-structure interaction in a way that transformed my approach to site preparation. These resources are trusted because they combine practical advice with real-world case studies, reducing trial-and-error.
Take Action Now—Your Next Build Depends on This
Every detail, from soil conditions to permit compliance, plays a vital role in the success of your project. The future of your construction journey hinges on how well you understand and control these elements. Remember, small investments in soil testing, site inspections, and permits can save you from big headaches and hefty costs later. So, why not get started today by reviewing your current plans and asking, “Have I thoroughly analyzed my site’s soil and permit requirements?” Thinking ahead is the key to turning your construction vision into reality—without unnecessary surprises. What’s been your biggest challenge in managing soil or permits? Share below and let’s learn together!