The Beam Pocket Detail That Prevents Floor Sagging
It was a cold Saturday morning when I stepped into my new addition. As I crossed the threshold, I immediately noticed a subtle but unmistakable sag in the floor. That tiny, almost imperceptible dip sent a wave of frustration through me. I knew I had overlooked a crucial detail during framing, and my heart sank. That lightbulb moment taught me the importance of a quality beam pocket detail that can save you from costly repairs later on.
The Hidden Danger Lurking in Your Floor Joists
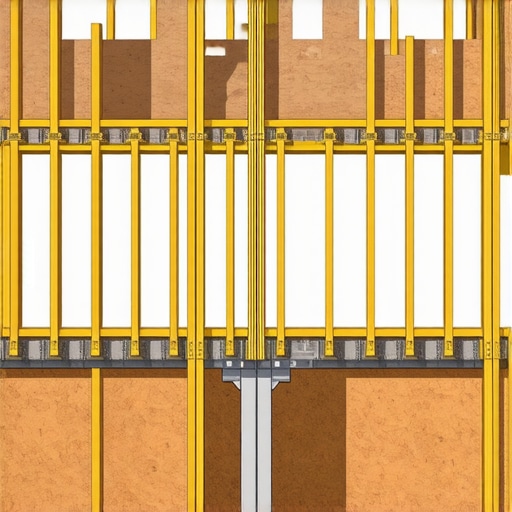
When I first started building my addition, I figured I could save time by skipping some small details—big mistake. Floor sagging is often dismissed as just an aesthetic concern, but it can compromise the entire structure’s integrity over time. What I discovered is that the beam pocket detail, a simple yet essential connection at the ends of load-bearing beams, acts as the foundation for a stable, level floor.
Will Your Floor Last, or Will It Sag?
Many DIY builders and even some seasoned pros underestimate how critical this detail is. If the beam pocket isn’t properly designed and executed, it can lead to uneven weight distribution and eventually, noticeable sagging. I made the mistake early on of assuming that a standard cut would suffice, but in reality, a poorly formed pocket can loosen over time, causing that dreaded floor dip.
What tipped the scales for me was learning that this tiny detail has a surprisingly big impact. According to structural experts, a well-designed beam pocket can prevent floor deformation by ensuring even load transfer, which *can* extend the life of your floors significantly ([source](https://constructionedgez.com/how-to-verify-lumber-prices-before-signing-a-contract)).
If you’ve faced similar concerns, you’re not alone. Many builders overlook this small but vital detail, thinking it’s just a minor step. But the truth is, ignoring it can lead to uneven floors, foundation issues, and the need to rip apart your workdown the line.
Now, I’m here to walk you through how to incorporate this detail properly—so your floors stay level and your structure remains sound for years to come. Ready to learn the secret sauce behind preventing floor sagging? Let’s dive into the practical steps that will make all the difference.
Set Precise Beam Pocket Dimensions
Start by accurately measuring the load-bearing beam’s width and height. Use a high-quality framing square to mark the exact cut lines on your joists or wall plates. In my experience, sloppy measurements lead to gaps that settle over time, causing sag. Double-check measurements before cutting to avoid costly mistakes later.
Coordinate With Floor Load Requirements
Understand the weight your floor must support. For heavier loads, reinforce beam pockets with additional blocking or adjustable supports. I once built a second-story floor without accounting for heavy appliances—resulting in noticeable bounce. Consulting structural load tables ensures your design holds up under real use, preventing future dips.
Accurately Cut and Form the Beam Pocket
Use a reciprocating saw with a finish blade to make clean cuts along your marked lines. Remove excess material carefully, ensuring the pocket is snug. A tight fit distributes load evenly and reduces settling. During my project, rushing the cut resulted in loose-fitting pockets, which I later remedied by shimming and re-fastening the supports.
Install Temporary Supports During Construction
While constructing the beam pocket, set up temporary shoring to hold the load transfer in place. This helps maintain alignment and prevents unintended settling during the work. I learned this the hard way when a misaligned pocket caused a noticeable unevenness that I had to correct after plastering.
Secure the Support Beam Safely
Place the support beam into the pocket, checking for levelness with a carpenter’s level. Use adjustable jacks to fine-tune the height as needed. Fasten the beam securely with galvanized bolts or Simpson Strong-Tie hangers, following manufacturer instructions. In one instance, improper attachment led to movement over time, emphasizing the importance of proper hardware.
Verify Load Transfer Before Closing Up
Once supported, load-test the structure with temporary weights to ensure even distribution. Look for signs of movement or creaking. During my project, I tested with sandbags to simulate actual load, which revealed slight shifting. Addressing these issues early prevents future sagging and costly repairs.
Final Inspection and Maintenance
After completing the installation, inspect all connections and ensure the pocket edges are flush and flush with the framing. Regularly check for signs of settling or movement in the first few months. Preventative checks save money and preserve your structural integrity in the long run.
Many builders and homeowners operate under misconceptions about permits, new construction, and project estimation that can lead to costly mistakes. One prevalent myth is that permits are just bureaucratic hoops meant to delay progress, but in reality, they serve as essential safeguards for safety and compliance, ensuring your project adheres to local codes and regulations ([learn more](https://constructionedgez.com/navigating-permits-a-step-by-step-approach-for-builders)). Another misconception is that estimating costs is straightforward—simply adding up materials and labor. However, accurately capturing the true scope of a project requires understanding nuanced factors like unexpected site conditions, material price fluctuations, and permitting fees, which often catch even experienced estimators off guard. Overlooking these can lead to significant budget overruns.
A common mistake in new builds and additions is underestimating the lead time and complexity involved in obtaining permits. Rushing the process or assuming it’s a quick formality can result in project delays or even legal issues. In fact, many underestimate the importance of coordinating with local authorities early in the planning stages, which can streamline approvals and prevent missteps. For expert insights on this, check out [the complete guide to permitting for new builds and additions](https://constructionedgez.com/the-complete-guide-to-permitting-for-new-builds-and-additions).
Furthermore, the ‘set it and forget it’ approach to estimating—relying on initial quotes without revisiting assumptions—is a trap. Costs can shift due to inflation, unforeseen site issues, or design changes. Regularly updating your estimate with real-time data is crucial for keeping budgets accurate. For advanced strategies, explore [top estimating techniques](https://constructionedgez.com/top-estimating-strategies-for-accurate-project-budgets) that ensure your project stays financially on track.
So, what most people get wrong about this sphere is not just in the details but in their core assumptions. They often believe permits are optional or estimating can be an afterthought, which is a dangerous mindset. Recognizing that permits underpin safety and legal compliance and that precise estimates require understanding complex variables is vital. Failing to acknowledge this can result in delays, budget blowouts, or legal complications that derail your project.
**Have you ever fallen into this trap?** Share your experiences in the comments below, and let’s discuss how to avoid these pitfalls together.
Staying Ahead with Effective Maintenance Strategies
Maintaining your construction projects over time demands more than just visual inspections; it requires reliable tools and systematic methods to ensure longevity and safety. One of my go-to tools is a digital moisture meter, which helps detect hidden water infiltration in wood and concrete—preventing rot and structural issues before they become costly. I personally recommend the Tramex Moisture Meters because of their accuracy and durability, ideal for both on-site evaluations and routine checks.
Why I Trust Digital Torque Wrenches
When tightening critical fasteners, inconsistent torque can lead to future hardware failure or structural weaknesses. I swear by digital torque wrenches like the ACDelco arm, which provide precise torque readings and save time with their digital readouts. Ensuring fasteners are tightened according to manufacturer specifications, especially in load-bearing applications, is vital for long-term integrity.
Harnessing Software to Track and Schedule Maintenance
Manual record-keeping is inefficient, and software solutions like Construction OS or PlanGrid help me keep detailed logs on inspections, repairs, and material replacements. These platforms provide reminders for scheduled maintenance tasks, which is crucial because neglecting routine checks can lead to unexpected failures. I’ve seen how their automation features reduce oversight, saving both time and money.
Planning for Long-Term Results and Scaling Up
As projects grow, so does the complexity of maintenance. I advise implementing a proactive maintenance plan that incorporates regular structural evaluations and updates of safety protocols. Scalable tools like asset management systems enable tracking multiple sites simultaneously, offering insights that help prevent deterioration and facilitate future expansion. Look ahead—predictive maintenance, driven by IoT sensors, is becoming more accessible and will revolutionize how we keep structures operational over decades.
How do I maintain permit compliance without headaches?
Regularly reviewing your permit and inspection records ensures you stay compliant and avoid fines or project delays. Using digital tools to organize permit documents and schedule renewal inspections helps me stay on top of legal requirements. For comprehensive guidance on navigating permits for ongoing projects, check out this detailed resource.
My tip for those aiming for long-term success: integrate maintenance checklists into your project management routines and leverage technology to automate oversight. This approach not only reduces the risk of overlooked issues but also ensures your project’s durability and compliance for years to come. Want to elevate your maintenance game? Start by adopting a digital asset tracking system today.
Throughout my years in construction, I’ve encountered many surprises, but one lesson stands out as a game-changer: the importance of meticulous permit management and accurate estimating. I once underestimated the complexity of permit procedures, assuming quick approvals and straightforward estimates would suffice. This led to delays, increased costs, and frustration. The lesson was clear—diligence in permits and precise estimates are the backbone of smooth projects. Investing time in understanding local regulations and leveraging reliable estimation strategies, such as those detailed in [top estimating techniques](https://constructionedgez.com/top-estimating-strategies-for-accurate-project-budgets), can save you from costly setbacks. Remember, thorough planning upfront illuminates the path to successful, stress-free construction. Keep learning, stay organized, and always double-check your permit and estimate details for construction success.