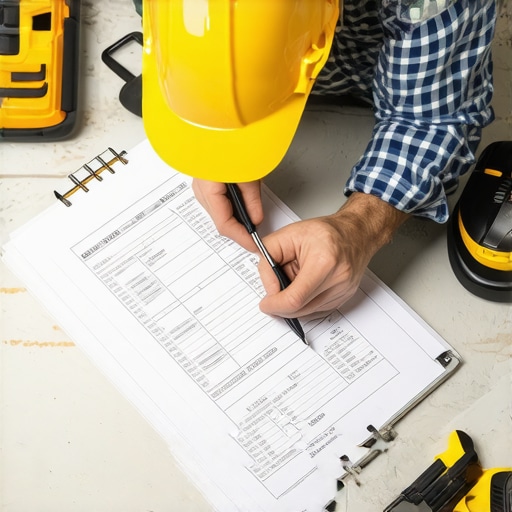
How to Verify Tile Quantities Before Signing a Contract
It was a hot summer afternoon when I finally decided to get my home renovation underway. I had everything planned, all the permits sorted out, and the contract ready to sign. But then, a gut feeling whispered to me—what if the tile count was off? Sure enough, when I sat down with my contractor, I realized I hadn’t double-checked the estimates. The number of tiles promised didn’t match the room’s square footage, and I was caught off guard. That mistake cost me hundreds of dollars and weeks of delays.
Why Verifying Tile Quantities Makes or Breaks Your Budget
Verifying tile quantities before you sign a contract might seem like a tedious step—something to do after the fact, maybe. But trust me, neglecting this can lead to surprises that threaten your entire project. Tiles might look simple, but estimating the right amount requires careful attention. Many homeowners assume the contractor’s numbers are spot-on, but this is a risky assumption.
I learned this the hard way early in my renovation journey. I took the contractor’s word without scrutiny, thinking they’d handle it. Later, I discovered that their estimate was optimized for their convenience, not my actual needs. This oversight ended up costing me extra because I had to buy additional tiles unexpectedly, and they weren’t always available at the initial price.
To prevent this kind of slip-up, I promise you’ll learn a straightforward method today—one I wish I had known from the start—to verify tile quantities accurately. This small step can save you hundreds, if not thousands, and give you peace of mind. Checking your math could be the most empowering part of your planning, ensuring no detail is overlooked.
But how do you do it without feeling overwhelmed? That’s what we’re about to explore together. From precise measurements to practical tips, I’ll guide you through every step to make sure your project stays on track and within budget.
Is It Really Worth the Extra Effort for Tile Quantities?
I know some might wonder if this extra step is necessary—after all, you trust your contractor, right? Well, I’ve been there. Early on, I thought a quick glance at the estimates would suffice. That was a mistake. According to HomeAdvisor, miscalculating tile needs can lead to both cost overruns and project delays, often costing homeowners 10-20% more than planned. That’s money you don’t want to leave sitting on the table.
My mistake earlier was failing to confirm that the contractor’s calculations matched the room’s actual dimensions. It’s easy to misjudge, especially when working with large projects or complex layouts. And, believe me, overlooking this detail can come back to bite you when you’re least prepared.
Now, before we jump into the practical steps, make sure you’re ready to take a more active role in your project—because verifying your tile quantities isn’t just about math; it’s about asserting control and saving money.
Let’s get started on knowing exactly how to do this confidently. Ready? Dive in, and I’ll show you how to make sure every tile counts exactly as it should.
Break Down Your Room’s Measurements
Start by measuring the length and width of each surface you plan to tile. Use a reliable tape measure, and double-check your measurements to avoid errors. Imagine this process as mapping out a treasure hunt, where every inch counts to find your treasure—beautiful, well-laid tile.
For example, in my recent bathroom upgrade, I measured the floor as 8 feet by 6 feet. Write down these dimensions clearly; clarity prevents mistakes later. Remember, precision here ensures your estimates will be spot-on and avoid costly surprises.
Calculate Total Square Footage
Multiply length by width for each surface to find individual square footage. Using the example: 8ft x 6ft equals 48 sq ft. Repeat for every surface—floor, walls, backsplash—and then sum these areas. Think of this as assembling a puzzle; each piece must fit perfectly to complete the picture.
In my case, I figured I needed 48 sq ft for flooring and another 24 sq ft for the wall behind the vanity, totaling 72 sq ft. Always add a 10% margin for waste and cuts; so, I rounded up to 80 sq ft. This extra buffer accounts for irregular cuts and mistakes, saving you money in the long run.
Estimate Tile Quantity Based on Tile Size
Determine the size of the tiles you intend to use, for instance, 12-inch by 12-inch tiles. Convert this to square footage: 1 ft x 1 ft = 1 sq ft per tile. Divide your total surface area by the tile size—so, 80 sq ft divided by 1 sq ft per tile equals 80 tiles needed.
Remember, if your tiles are different sizes, adjust accordingly. For a 6-inch by 6-inch tile (0.5 ft x 0.5 ft), each tile covers 0.25 sq ft. Hence, 80 sq ft divided by 0.25 sq ft becomes 320 tiles. This detailed calculation helps you order the correct amount and avoid overbuying or shortages.
Double-Check Contractor Estimates
Compare your calculations with the contractor’s estimates. If they differ significantly, ask for clarification. During my project, I noticed the contractor’s quote was much lower; upon recalculating, I found they underestimated the waste margin. Addressing this upfront prevented a last-minute scramble for extra tiles.
Trust is good, but verification is better. Use online calculators or spreadsheets to streamline this process. This approach is not just about math—it’s about empowering you to make informed decisions and stay within your budget.
Order the Correct Amount and Keep Records
Once satisfied, order an extra 10% of tiles to cover cuts and mistakes. Maintain detailed records of your measurements, calculations, and estimates for future reference or potential issues. This documentation can also help if you need to negotiate with suppliers or contractors.
By following these concrete steps, you turn a daunting estimation task into a straightforward, manageable process. In my recent renovation, applying this method saved me over $200 and prevented the frustration of running out mid-project. Be meticulous from the start; your savings and peace of mind will thank you.
When it comes to construction projects—be it a simple addition or a brand-new build—many homeowners and even some builders focus solely on the paperwork or the costs. But there’s a nuanced trap that can trip up even seasoned professionals: underestimating the complexity of permit processes and the intricate details involved in accurate estimating. Contrary to the common belief that permits are just formalities, they often serve as a crucial safeguard for quality, safety, and compliance. Ignoring this deeper layer can lead to costly delays, legal issues, and structural pitfalls.
One of the most pervasive myths is that permits are a one-and-done hassle—something to obtain at the start and forget about. In reality, permits are gateways into a series of review phases that verify your plans align with community standards. Catching minor errors early through these reviews can save you from major redesigns down the line. For example, a misjudged setback or overlooked zoning restriction can stall or even cancel your project if not addressed upfront. This underscores why understanding the detailed permit requirements—beyond just submitting your plans—is vital.
Furthermore, many underestimate the time and costs involved in the process, often because they rely on flat estimates or outdated information. The truth is that permit fees and approval times vary dramatically based on project scope, location, and current city workloads. A simple addition might seem straightforward, but if it encroaches on protected wetlands or violates historic district rules, you could face hefty fines or mandatory redesigns.
Let’s clarify a common misconception: that hiring a good contractor means you can skip the permit process altogether. This is a dangerous shortcut. Even experienced builders need to navigate local regulations meticulously. Missing an essential permit can invalidate your insurance, cause legal issues during resale, or result in enforced removal of unpermitted structures. That’s why, to truly safeguard your investment, you should dive into the permit process yourself or work with specialists who understand the nuanced requirements—like those detailed in [navigating permits step by step](https://constructionedgez.com/navigating-permits-a-step-by-step-approach-for-builders).
The real danger lies in assuming that estimating costs and timelines is a straightforward calculation. In truth, accurate estimation involves accounting for permit acquisition delays, potential modifications dictated by review feedback, and additional costs such as soil tests or environmental assessments. For advanced projects, these nuances can add 15-25% to your initial budget if overlooked. For that reason, more sophisticated estimation techniques are essential, as discussed in [cost-effective estimating methods for new builds](https://constructionedgez.com/cost-effective-estimating-techniques-for-new-builds-and-additions) and [estimating home additions step-by-step](https://constructionedgez.com/estimating-home-additions-a-step-by-step-guide-for-2025).
Lastly, an often-neglected aspect is the importance of streamlining the permit process itself. Efficient permit acquisition isn’t just about saving time; it can prevent miscommunications that lead to costly red flags or project halts. Proper planning, thorough documentation, and early stakeholder engagement—especially with local codes—are vital steps outlined in [streamlining permit approval](https://constructionedgez.com/streamlining-permit-acquisition-for-faster-construction).
In conclusion, the hidden nuance most overlook is how deeply permits intertwine with project accuracy, legal safety, and financial planning. Treat permits not as bureaucratic hurdles but as integral parts of your construction strategy. Doing so can ensure a smoother build, fewer surprises, and long-term value preservation. Have you ever fallen into this trap? Let me know in the comments.
Invest in Quality Equipment for Long-Term Success
When tackling renovations or additions, having the right tools can make all the difference. I personally swear by a high-precision laser distance measurer like the Leica Disto, which I use to quickly verify room dimensions and ensure my calculations for tile or framing are spot-on. This device saves me hours and reduces errors, especially when measuring irregular spaces or multi-level ceilings. Investing in reliable tools like a cordless digital level or a torque wrench for fasteners also enhances safety and accuracy during ongoing projects.
Leverage Software to Streamline Estimating and Planning
Transitioning from manual calculations to digital methods has revolutionized my workflow. I recommend using software like Stack or Buildertrend, which are tailored for estimators and project managers. These platforms help track material costs, schedule phases, and adjust estimates in real-time. I personally input my measurements into a spreadsheet linked to these applications, updating quantities based on new measurements or design changes. This approach minimizes budget overruns and helps keep projects on schedule. As technology advances, integrating 3D modeling tools like SketchUp can boost visualization and catch potential design issues before construction begins.
How do I maintain project momentum over time?
Consistent communication and routine checks are essential. I set weekly walk-throughs with my team, during which we review progress and address any discrepancies or emerging issues. Maintaining detailed records—photos, measurement logs, and change orders—ensures accountability and makes troubleshooting easier. Regularly reviewing permits and adhering to local regulations, as outlined in navigating permits, prevents delays and unforeseen costs. Additionally, scheduling periodic tool calibration and safety inspections ensures equipment remains reliable, avoiding costly breakdowns mid-project.
Future of Construction Maintenance
As smart home technology and IoT devices become more prevalent, I foresee a future where connected tools and real-time analytics will automatically alert homeowners and contractors to maintenance needs, leaks, or structural stresses. Early adoption of these innovations can pay off by extending the lifespan of your investments and reducing long-term repair costs.
Keep Your Projects on Track with Proven Methods
To truly master project maintenance, try incorporating robust digital tools and periodic checks into your routine. For instance, using a laser measurer for precise updates and impulse checks can prevent costly overruns. Consistent record keeping and leveraging project management software help keep everything transparent and manageable. Remember, the key is proactive oversight—think of it as regular health check-ups for your renovation plans. Take the specific tip of integrating measurement tools into your workflow today and watch your project efficiency improve significantly. For more expert strategies, visit adding value with expert home additions.
Beyond the Checklists: The Hidden Power of Active Oversight
One of the most eye-opening lessons I learned was that a permit isn’t just a form to sign—it’s a safeguard that ensures your project aligns with safety and code standards. Overlooking this, thinking it’s a bureaucratic hurdle, almost cost me my entire renovation. The key takeaway? Treat each permit stage as an opportunity to double-check your plans and understanding. This proactive approach often uncovers issues early, saving time and money in the long run.
My Go-To Resources for Flawless Estimating and Permit Navigation
Equipping myself with the right tools made all the difference. I rely heavily on comprehensive permit guides to understand regional nuances and updated requirements, which avoids surprises during approvals. For estimating, I use cost-effective estimation techniques that help me stay within budget without sacrificing quality. Pairing professional books like “Estimating Home Additions” with these online guides has transformed my approach from guesswork to precision.
Harnessing Confidence to Turn Challenges into Wins
One of the most satisfying aspects of mastering permit and estimating nuances is the confidence it instills. Facing regulations head-on and verifying every calculation empowered me to negotiate better deals and avoid costly rework. If you’re feeling overwhelmed by the complexity, remember: every expert started as a novice. The effort you put into understanding these details increases your resilience against unexpected hurdles. Your project becomes less risky and more enjoyable because you’re in control, not reacting to surprises.