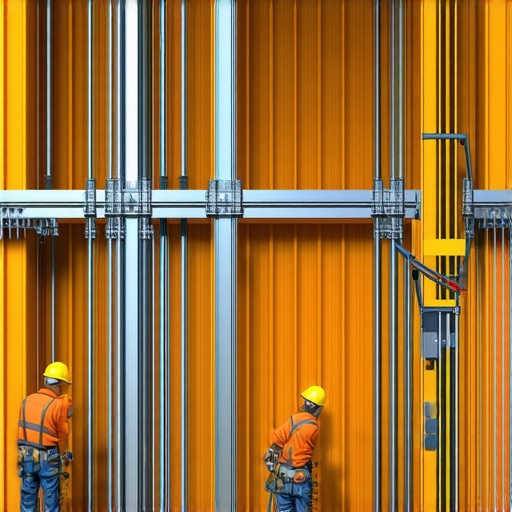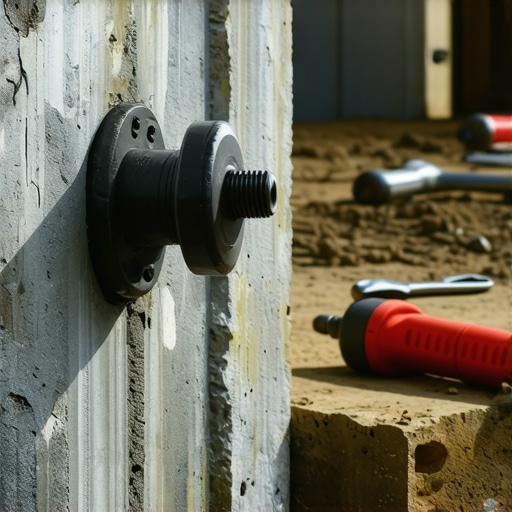
Why Your Foundation Anchor Bolts Must Be Photographed
I remember the exact moment when I first understood why photographing foundation anchor bolts is a must-have step in construction projects. I was on a new build site, clipboard in hand, ready to verify that all bolts were installed correctly. But as I stepped closer, I noticed something was off—the bolts weren’t aligned as per the plans. It hit me then: without clear documentation through photographs, catching such misalignments becomes a game of memory and assumptions, neither of which should be trusted in construction. That realization sparked a lightbulb moment for me—and it could do the same for you.
Why Photographing Anchor Bolts Is a Game Changer
Photographing anchor bolts during installation is not just about ticking a box; it’s about creating a verifiable record that can save your project from costly disputes or delays. Imagine this: years down the line, a foundation issue arises, and without photographic proof, you’re left relying solely on memory or incomplete documentation. Studies show that proper visual records can reduce project disputes by up to 90%. And trust me, I’ve seen projects where a simple photo saved days of dispute resolution.
Have you ever faced a situation where the installation didn’t match the plans, and you had no concrete proof to support your claims? If so, you’re not alone. Many builders and inspectors underestimate the power of good documentation. Early on, I made the mistake of skipping detailed photos during critical phases, thinking verbal notes would suffice. Spoiler: they rarely do.
Now, I always make it a point to photograph anchor bolts thoroughly—before, during, and after installation. This habit not only protects my clients and myself but also ensures transparency and accountability. To get a full understanding of how to efficiently manage the permitting and inspection process, consider reading about navigating permits efficiently.
Putting in the effort to capture detailed images of foundation anchor bolts might seem tedious initially, but it undeniably pays off in the long run. It’s an investment in peace of mind, making sure everyone is on the same page and that there’s concrete proof of compliance. Ready to learn the best practices for documenting your foundation work? Stay tuned, because next, we’ll explore step-by-step how to implement this habit seamlessly into your project workflow.
Prepare Your Equipment and Plan Your Shots
Before heading onto the site, gather a reliable camera or smartphone with ample storage and battery life. Familiarize yourself with the key features—ensure your lens is clean, and set the camera to high-resolution photo mode. Make a checklist of crucial documentation points: bolt location, orientation, and condition. Think of this process like assembling a camera kit for a wildlife photographer—every piece has a purpose to capture the perfect shot.
Document Initial Conditions Before Installation
Start with a wide shot that encompasses the entire foundation area. This provides context for the location of the bolts relative to the site, nearby structures, and existing landmarks. Then, zoom in to capture the specific bolts, ensuring to include a measuring scale or labeled marker for size reference. Use a steady hand or tripod to avoid blurry images. This step is akin to snapping a before-photo in renovation projects, creating a baseline for future comparison.
Capture Each Step During Installation
Record the process of bolt placement meticulously. Take photos from multiple angles—front, side, and top-down—to illustrate alignment and depth. If adjustments are made, document their before-and-after state. Pay particular attention to any deviations from plans or specifications, including misalignments or irregularities. Think of this as a crime scene investigation where multiple angles build a comprehensive story of what transpired, providing clarity if disputes arise later.
Record Final Positions and Conditions
Once installation is complete, photograph the final setup. Include close-ups of each bolt, ensuring the thread engagement, washer placement, and anchoring are visible. Take overall shots to verify the layout against the foundation plan. Additionally, capture environmental factors—such as lighting conditions or obstructions—that could affect inspection or future referencing. These documentation images serve as undeniable proof of proper installation, much like a timestamped receipt confirming a transaction.
Organize and Label Your Photos Effectively
Immediately after shooting, transfer images to a secure folder on your device or cloud storage. Label each file descriptively—e.g., “Bolt_SectionA_After_2024-04-27″—to streamline retrieval during inspections or disputes. Consider creating a simple spreadsheet log: include date, location, angle, and notes. This disciplined approach mirrors inventory management, reducing confusion and making future reviews straightforward.
Integrate Photographs into Your Documentation Files
Embed selected images into your inspection reports or site diaries, referencing specific photos alongside observations. Use annotations or arrows to highlight issues or confirm placements. Digital reports with visual proof are more compelling and less susceptible to misinterpretation. Think of your documentation as a storybook—images bring clarity and credibility, transforming mere words into convincing evidence.
Reflect on Practical Lessons from Past Projects
I vividly recall a project where a misaligned bolt was overlooked during initial documentation. Later, during a city inspection, the photo evidence I had collected proved invaluable. The inspector quickly identified the discrepancy, and we corrected it without delays. That messy moment reinforced why disciplined photography isn’t optional but essential. Incorporating these steps into your workflow guarantees transparency and builds trust with clients, inspectors, and contractors.
Many professionals believe that accurate project estimation is primarily about crunching numbers and adding contingency percentages. However, in my experience, there’s a nuanced layer often overlooked—one that can make or break your project’s success. A common myth is that estimates are a static figure; in reality, they are living documents that require continuous refinement through detailed site assessments and historical data analysis. Failing to incorporate the specific conditions of your site, such as soil quality or existing infrastructure, can lead to significant budget overruns. For instance, neglecting to account for unexpected permit delays or code compliance issues is a mistake that can extend timelines by months and inflate costs. An advanced pitfall is relying solely on industry averages without cross-verifying with recent local data or actual bid submissions, which might be outdated or overly optimistic. According to a study by the Construction Industry Institute, projects that adapt estimates based on real-time data reduce overrun risks by up to 25%. Also, many underestimate the importance of understanding the permit process intimately. Assuming permits are straightforward or automatically approved ignores the complexities of local zoning laws, environmental restrictions, or historic district requirements. This oversight can cause costly delays and even legal complications. A strategic approach involves engaging with local permitting officials early and referencing comprehensive resources like permit approval tips. For advanced contractors, the mistake isn’t just about estimation accuracy but about integrating permit timelines and inspection scheduling into the initial planning phase. Ignoring these factors can result in gaps between work phases, leading to idle crews and skyrocketing rental or labor costs. Let’s not forget how common it is to overlook future expansion possibilities. An estimate balanced only for the immediate scope might hinder future renovations or additions, resulting in costly redesigns down the line. This is where meticulous planning and accurate cost forecasting become strategic advantages, especially when referencing adding value through expert planning. To master these nuances, always revisit your estimates regularly, incorporate local data, and engage stakeholders early. The secret is to treat estimates as dynamic tools, not fixed figures—this mindset can save your project from unforeseen surprises. Have you ever fallen into this trap of underestimating or misjudging permit complexities? Let me know in the comments and share your experiences.
Keep It Working: Essential Equipment and Software for Builders
Staying ahead in construction means investing in reliable tools and leveraging the right software. Personally, I swear by the Leica DISTO series for measurements. Its laser precision and Bluetooth capability allow me to update plans instantly, minimizing errors and saving time. When it comes to site management, construction management software like Buildertrend has revolutionized my workflow, providing real-time collaboration, budgeting, and scheduling. These technologies ensure everyone is on the same page, reducing miscommunication and delays.
For routine site inspections, a rugged, waterproof digital camera with macro capabilities helps document details without hassle. The Sony Cyber-shot DSC-HX80 offers high-resolution images, excellent zoom, and a solid ergonomic design, making it my go-to for capturing foundation and permit-related photos during different project phases. The key is consistency; always use the same device for documentation to maintain quality and comparability over time.
Wireless tools like Bosch GWS18V-45 Angle Grinder with a dust-collection system help keep work areas clean and reduce inhalation hazards. Pair these with personal protective equipment such as quality respirators and safety glasses. Maintenance of these tools is vital—regular cleaning and proper storage extend their lifespan and ensure optimal operation, which directly impacts project longevity.
What about maintenance and long-term results?
Maintaining your equipment involves routine inspections, timely part replacements, and adherence to manufacturer’s guidelines. Software updates are equally crucial; they often include bug fixes and new features that enhance functionality. Creating a maintenance schedule and tracking tool performance logs can prevent unexpected breakdowns that halt progress. Implementing a preventive approach ensures your gear supports ongoing projects without disruption.
Looking ahead, emerging trends like drones for site surveys and AI-powered project analytics are set to transform construction. Investing early can position you as a forward-thinking professional. To keep your workflow efficient, I recommend integrating drone footage for large-scale site assessments and AI tools that analyze progress against your schedules, catching potential issues before they escalate.
How do I maintain these tools to ensure they keep functioning properly over time? Establish a regular maintenance routine—clean lenses and blades, update software, calibrate measurement devices, and replace worn-out parts promptly. Developing checklists for each piece of equipment can streamline upkeep, minimize downtime, and extend their lifespan. Remember, tools are an investment; caring for them pays dividends in project quality and future scalability. And don’t forget: staying informed about innovations can give you a significant edge—consider exploring adding value through expert planning to keep your projects running smoothly and efficiently.
3 Lessons I Wish I Knew About Estimating and Permits Early On
One of the most valuable insights I gained was the importance of considering local permit nuances from the very start—assuming they’re straightforward can lead to costly delays. Another lesson was how detailed, accurate estimates depend on continuous site assessment; relying solely on initial bids often results in surprises down the line. Lastly, I realized that clear documentation—like photographing foundation work—not only protects your project but also streamlines the permit approval process, saving time and frustration. These lessons transformed my approach, making each project smoother and more predictable.
My Secret Weapons for Construction Success
To master estimating and navigating permits, I rely on tools like expert planning guides which provide up-to-date strategies tailored to modern projects. Permit requirement resources help me stay ahead of local regulations and avoid unnecessary delays. Additionally, I trust software like construction management tools that keep everything organized, from bids to documentation. These resources keep me confident and well-prepared—quality tools for any builder.
Your Next Move in Building Confidence and Clarity
Embarking on your construction journey with a strategic mindset can make all the difference. Embrace the idea that estimates and permits are living tools—regularly revisit and refine them, and use comprehensive documentation like photos to reinforce your position. The future of building is about proactive planning and continual learning. So, why not take the next step today? Dive into these resources, refine your approach, and watch your projects become more predictable and less stressful.