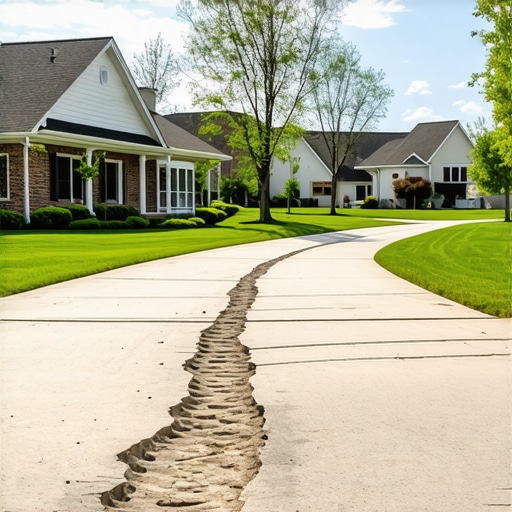
The Grading Mistake That Destroys Your New Driveway
There I was, elbows deep in gravel and concrete, trusting my contractor’s word more than I should have. Only later did I realize a simple mistake in grading plans could have spelled disaster for my fresh driveway. That lightbulb moment hit hard—what I thought was a minor oversight nearly cost me thousands and years of frustration.
Why Getting Grade Right Is More Critical Than You Think
If you’re like me, you might dismiss grading as a minor detail. But it’s the hidden star of driveway longevity and proper drainage. Poor grading can lead to water pooling, basement flooding, or even structural damage. According to the Water Runoff Rule, incorrect elevation changes account for a large chunk of permit rejections—and costly rework.
Will My Driveway Drainage Be OK? The Common Skepticism
I remember thinking, “A little slope won’t make a difference.” I was wrong. An initial mistake I made early on was relying solely on quick estimates without consulting detailed grading plans. It’s tempting to trust a contractor’s quick sketch, but the devil’s in the details. That slip-up almost led to an uneven surface and water issues that could have plagued me years down the line.
So, what’s the fix? How can you avoid falling into the same trap? Stay with me—I’ll guide you through the essentials of proper grading for your new driveway and help you sidestep costly mistakes. We’ll explore proven strategies and insider tips to safeguard your investment and keep your property safe and functional for decades to come.
Assess Your Site and Create Accurate Grading Plans
Start by conducting a detailed site survey. Use a laser level or contractor-grade tools to establish the existing slope and elevations. Once you have these measurements, draft a grading plan that specifies the proposed slope away from your house, ensuring proper drainage. Remember, a slight 2% slope (about 1/4 inch per foot) is typical to direct water effectively. I learned this lesson firsthand when I re-measured my driveway slope after a failed initial test, correcting it to avoid future water pooling.
Estimate the Scope and Costs Accurately
Develop a detailed estimate of materials and labor needed. Break down the project into excavation, fill soil, compacting, and finishing. Use online tools like cost estimation guides to get realistic numbers. During my last project, I gathered three quotes for excavation. Cross-checking them against online estimates prevented me from overpaying and prepared me for negotiations.
Engage Qualified Professionals for Permitting
Before starting work, identify whether your project needs a permit. Most jurisdicions require permits for grading and driveway expansion, especially if the changes affect drainage or involve substantial excavation. Contact your local building department or review their permitting guidelines. I found that scheduling a preliminary consultation clarified the scope and helped me avoid costly delays. Remember, proper permits prevent legal issues and ensure your project complies with local codes.
Prepare and Submit Your Permit Application
Compile all necessary documents, including grading plans, site surveys, and contractor estimates. Accurate documentation is key; errors can cause rejection or delays. Use checklists from municipal websites or permitting resources. I once submitted incomplete plans, which led to a two-week hold, but after resubmitting with corrected documents, approval was swift. Being meticulous at this stage saves time and money.
Coordinate Your Construction Timeline with Permitting
Plan your project timeline to align with permit approval. Some jurisdictions process permits quickly, while others take weeks, especially during peak seasons. Factor this into your schedule to avoid delays. During my project, I kept in touch with the permit office and scheduled work to start immediately after approval. This approach minimized idle time and kept costs predictable.
Monitor the Construction and Ensure Compliance
During execution, verify that grading work matches your plans. Regular site visits and communication with your contractor help catch discrepancies early. If you notice slope deviations, address them immediately to prevent drainage issues. After completion, an inspection from local authorities might be required to close permits. My experience with proactive oversight saved me from rework and ensured that my driveway met all standards.
 }{Many homeowners and even seasoned builders rely on surface-level assumptions when estimating new builds and additions, especially concerning permit requirements. A common misconception is that permits are merely a bureaucratic hurdle rather than a critical component ensuring safety and compliance. In reality, overlooking the nuanced aspects of permit processes and accurate estimations can lead to costly delays and legal setbacks. Unlike the belief that permits are optional paperwork, expert insights reveal that permits are integral to verifying structural integrity, zoning compliance, and environmental standards. For example, missing critical site-specific factors like utilities or easements can invalidate a permit application, resulting in rework and fines. Advanced estimators know that each project has unique nuances—such as soil stability, existing easements, or neighborhood covenants—that dramatically influence costs and approval strategies. Failing to account for these details often causes underestimates by 20–30%, which can sabotage budgets before ground is broken. An often neglected factor is understanding the permit approval timeline, which varies by jurisdiction and project complexity; some regions process permits within days, while others take several weeks. Misjudging this can disrupt project schedules, leading to idle time and increased labor costs. Moreover, some builders mistakenly assume that submitting a standard permit application suffices, but detailed supporting documents—like site plans with precise elevations or engineering stamps—are required. Submitting incomplete or inaccurate documentation is a leading cause of delays, or worse, permit denial. To avoid this trap, consult local regulations early and consider enlisting professionals who understand the intricacies of permit requirements. For instance, familiarity with permitting guidelines can streamline approval and prevent costly mistakes. Remember, detailed estimations must also factor in permit fees, handling costs, and potential contingency budgets for unforeseen issues. The most experienced contractors also anticipate the hidden costs associated with delays caused by outdated or misinterpreted regulations. In my own practice, I’ve seen projects stall because underestimated permit complexities caught even the most prepared off guard. It’s a reminder that successful project planning depends on meticulous research, realistic assumptions, and proactive communication with local authorities. So, next time you plan a build or addition, ask yourself: have I really dug into the permit nuances, or am I risking costly surprises? Stay vigilant, and don’t overlook the importance of thorough, nuanced estimation. Have you ever fallen into this trap? Let me know in the comments.
Keeping It Working: Essential Tools for Ongoing Maintenance
Once your driveway, build, or addition is complete, the work doesn’t end. Regular maintenance is vital to ensuring longevity and preventing costly repairs down the line. I personally rely on a combination of digital tools and traditional methods to stay ahead of potential issues. One indispensable software I use is BuildTrack Pro, which offers comprehensive project tracking, scheduling, and maintenance alerts. It helps me schedule routine inspections and log any repairs needed, ensuring nothing slips through the cracks. Additionally, monitoring the performance of your drainage system or foundation isn’t just about visual checks—it’s about using the right tools. A digital moisture meter, for instance, helps detect early signs of water intrusion or soil saturation—crucial in water-sensitive areas.
How do I maintain my property’s structural health over time?
Periodic inspections are key. I set quarterly reminders in my calendar to assess grading integrity, inspect for erosion, and verify that water flows away from structures as planned. For larger projects, employing drone inspections can be a game-changer, offering detailed aerial views to spot issues that might be hidden from ground level. Incorporating laser levels during routine checks ensures that slopes remain correct, especially after heavy rains or snow melts. Using these tools isn’t just for initial construction; they form the backbone of a proactive maintenance plan that extends your project’s life and preserves its value.
Anticipate Future Growth and Scaling Needs
Thinking ahead about scaling your property is as important as the initial build. Modern software like cost estimation tools can help you plan expansions by modeling future modifications, considering permit requirements, and estimating costs with high accuracy. This foresight allows you to allocate prep work now—like reinforcing foundations or upgrading drainage systems—to support future additions without massive overhauls. Moreover, keeping detailed records of your existing infrastructure makes it easier when planning permits or new builds, ensuring compliance and efficiency from the start.
What advanced maintenance techniques are shaping the future?
Emerging trends include smart sensor networks embedded within structures, providing real-time data on stress, moisture, and temperature. These sensors can alert you to issues long before visible signs appear, minimizing damage and repair costs. As these technologies become more affordable, integrating them into your ongoing maintenance routine could revolutionize how you protect your investments. Taking proactive steps now—like regularly updating your digital monitoring systems and training yourself on emerging tools—puts you ahead of the curve and ensures your projects remain durable and vibrant for decades.
If you haven’t yet experimented with digital moisture meters or scheduling routine drone inspections, I highly recommend trying these advanced techniques. They have transformed my approach to property upkeep, saving me time and money while securing peace of mind. Embracing these tools today means fewer surprises tomorrow—empower yourself with the latest in maintenance technology and stay ahead in your construction journey.

After navigating the twists and turns of my driveway project, one thing became crystal clear: meticulous planning and understanding the nuances of permits and grading make all the difference. The lessons I learned the hard way — from miscalculations to permit delays — have transformed my approach, turning daunting tasks into manageable steps. If you’re tackling a similar project, embracing these insider insights will save you time, money, and frustration.
Top Mistakes That Cost Me Time and Money (And How You Can Avoid Them)
The biggest revelation was how underestimated site-specific details are — soil conditions, easements, and local regulations can derail even the most well-intentioned plans. I once assumed a standard slope would suffice without verifying the exact elevation data; this oversight led to water pooling and a redo that set me back weeks. Now, I double-check all measurements and consult experts early on, gaining peace of mind and compliance.
Another hard lesson was misjudging permit timelines. Depending on your jurisdiction, processing can range from days to several weeks. I recommend engaging with local authorities early—review their requirements thoroughly and submit complete, accurate documentation. This proactive approach prevents costly delays and keeps your project on track.
My Trusted Tools and Resources for Success
Over the years, I’ve calibrated my toolkit to include digital survey apps and professional estimation platforms. For detailed site surveys, tools like cost estimation guides have been invaluable, helping me develop realistic budgets and avoid underestimating expenses. When navigating permit requirements, leveraging resources such as permitting guidelines ensures compliance and streamlines approval processes. These resources combined have become my blueprint for efficient project management.
Embrace a Growth Mindset for Your Property
Beyond planning and permits, ongoing maintenance is the secret to longevity. I utilize digital systems like BuildTrack Pro for scheduling inspections and logging repairs, which keeps my property in top shape. Investing in smart sensors and drone inspections has further elevated my proactive approach, helping me spot issues before they escalate. This continuous attention transforms a one-time project into a long-term asset.
Thinking ahead, consider how future expansions might impact your current work. Using estimation tools designed for scalability can guide you in reinforcing foundations or updating drainage systems, making future modifications smoother and less costly. By planning with growth in mind, you’re setting the stage for sustained value and ease.
Lessons from Hard Knocks That Paved My Path Forward
- Emphasize accuracy: Small measurement errors can cascade into costly rework. Precision at each stage saves dollars and headaches.
- Don’t cut corners on permits: Building relationships with local authorities and submitting complete documentation prevent delays.
- Prioritize site evaluation: A thorough site survey uncovers hidden issues and sets a realistic foundation for grading plans.
- Invest in technology: From moisture meters to drone inspections, modern tools enable proactive maintenance and peace of mind.
- Plan for the future: Scalability considerations during initial design reduce disruptions and expenses down the line.
These lessons, born of personal experience, are your shortcuts to smoother, more predictable projects.
Resources That Have Changed My Approach to Building Smart
- Expert home addition guides: Practical insights into planning and execution.
- Accurate estimation tools: Essential for budgeting and scope management.
- Permit navigating resources: Clarifies local requirements and speeds approval.
- Project management strategies: Keep your project aligned and on schedule.
Seize the Moment to Elevate Your Project Game
Building or adding to your property isn’t just about laying concrete or installing a new structure—it’s about creating a resilient, well-planned asset for the future. Embrace the lessons learned, leverage trusted tools, and maintain a proactive mindset. Your driveway, addition, or renovation will not only stand the test of time but will also serve as a proud testament to your careful planning and dedication.
What’s one lesson you wish you had known before starting your own project? Share below—I’d love to hear your story and help you avoid the pitfalls I encountered!